Head Gear Page 1 Page 2 Page 3
TO VIEW FULL SIZE IMAGES: USERNAME and PASSWORD are both "mm"
Ops-Core manufactures cutting-edge products and components use by the military and sporting goods industries; focusing on eye, face and head protection. Designs are done by Ops-Core's sister company, Artisent. Ops-Core, being a small business, can take on special or state-of-the art projects that the larger manufacturers might not, and has the flexibility to provide custom solutions for specialty markets and customers. The FAST Helmets were designed to meet the requirements of today's soldiers who now have to use and integrate a plethora of headgear on the battlefield. The importance of protecting a soldier's brain, eyes and ears on the battlefield has always been acknowledged, and today's soldier has more protection available than ever before. Goggles, bullet and frag resistant helmets, impact protection, hearing protection are all part of the soldier's inventory, which are designed to protect him and enable to carry out his mission. In addition to protective equipment worn on the head, the soldier might have to use night vision, gas masks, communication headsets, illuminators, or identification devices, all of which are made by different manufacturers and need to all work together on a soldier's head. Traditional helmets were designed as protective gear, not as integrated load-bearing systems. With the advent of night vision goggles, the attempt was made to stabilize these heavy devices on the head by adding a nape strap, which prevented the helmet from tipping forward due to the weight. The NVD mounts were designed to attach to existing helmets. Even when permanent mounts were designed that were screwed onto the front of the helmet, the strap system was still inadequate. Ops-Core's Head-Loc Retention system was a step forward in the right direction, providing a helmet strap retrofit kit that was designed with the proper geometry to stabilize a helmet with NVD attached. For the attachment of other devices, the Ops-Core ACH-ARC (Accessory Rail Connector) adds a lightweight modular platform to the sides of a helmet. The FAST is designed to be compatible with:
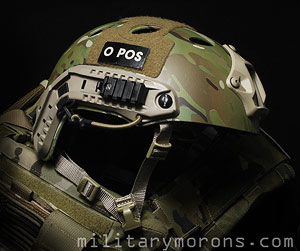
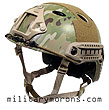
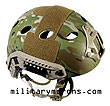
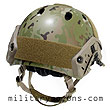
The FAST Helmet system is the first one designed from the ground up that takes all these different factors into consideration, and is designed to work with each of them, separately or in tandem. Description - The Ops-Core FAST Helmet is available in two versions: the FAST Ballistic Helmet, and the FAST Bump Helmet shown here. The FAST Ballistic helmet passes ACH ballistic requirements with 20% less weight than the issued ACH. The only difference between the Bump and Ballistic FAST helmets is the shell material and thickness. Both share the same shape, capabilities and features. The Bump Helmet was designed to provide the user with an extremely lightweight modular platform for NVDs and other devices, and also protect the head from blunt trauma and impacts. It is generally chosen over the Ballistic shell when light weight has precedence over the additional weight of ballistic protection. This could be for recce operations, fast roping, climbing or training. The Bump Shell - The FAST Helmets have a side-cut configuration that looks to be in-between the MSA MICH TC2001 and TC2002 'Gunfighter' helmets; the sides of the helmet do not cover the ears so there is no interference with communications headsets or hearing protection. The Bump shell is made from lightweight carbon fiber. Injection molded plastic skateboard helmets are intended to provide protection against abrasion and knocks, while absorbing impacts with their internal liners. They are not designed to provide the structural integrity needed to comfortably support and stabilize night vision devices mounted on the front. The carbon fiber shell of the Bump helmet provides this structure, improves the impact dissipation, and helps the inner liner absorb more energy to reduce brain injuries from blunt trauma. The strength of the shell also provides crush resistance despite its very low weight. The Bump Shell has eight oval holes in it for ventilation (the Ballistic Shell is solid), and is available in Crye MultiCam (shown here), DG2 Urban Tan, 504 Foliage Green, Black, and Desert MARPAT. It's available in three sizes: S/M, M/L and L/XL. It is pre-drilled with the standard MARSOC/WARCOM 3-hole pattern for night vision mounts. Loop velcro fields are provided on the top and rear of the shell for attaching devices (strobes etc), IFF ID markers etc. The Bump Helmet provides impact protection certified
to CE EN 1385 (international standard for headgear for white water
sports) and ASTM F1492 (skateboard helmet standards for multiple impacts)
and the U.S. Army ACH specification for chin strap retention and non-ballistic
impact protection. FAST-ARCs - The ARC (Accessory Rail Connector) comes standard on the FAST helmet. It's similar to the ACH-ARC, except that it has two additional mounting points for head borne accessories. The rails are made of glass-reinforced nylon, and are secured to the helmet by the front and rear chin strap mounting points. The rails are more low profile than the ACH-ARC and have no sharp corners or edges to minimize clearance or snag hazards. The rails have dovetail slots into which accessory rails are slid into. There are vertical locking slots and outer detents molded into the rail as well. The FAST-ARC provides 4 positions for rail-mounted accessories; two upper dovetails on the sides and two lower dovetails. The upper ARC dovetails are for devices like low-profile lights, video camera, visor, mandible and up-armour side covers. The lower ARC dovetails are for mounting devices like flip-out COMs headset, battery pack, goggle strap keeper, mandible and up-armour side covers. The corner between the two rails has a buckle receiver for gas and O2 mask strap kit attachments, eliminating the bulk and clutter of traditional bayonet style mounts. The supplied buckle also provides an additional point of attachment. The ARC dovetails accept the Ops-Core locking and rotating adapters that utilize emergency break-away features for airborne operations. A picatinny adapter and wing-loc adapter is included with the FAST helmet. Other adapters available include circular single (22mm) and dual (21mm) camera and light adapters, and a SureFire X200/X300 adapter that will allow pivoting up and down. BISS-NVD Lanyard - The BISS-NVD lanyard bungees that extend from the bottom front of the ARC rail on each side are intended to work with a variety of NV products including monocular and binocular devices. The lanyard is a short length of elastic bungee cord with a small split ring and snap hook on the end. When attached to the NVD or mount, they put tension on the device, taking out all of the vibration and rattle that is resident in NV mounts, and also provide a safety lanyard for mounts with break-away features. The lanyards can be removed if not needed by cutting off the lock ring after loosening the ARC rail bolt, or left in place. When not needed, the ends attach conveniently to the ARC corner buckle. In some photos, you'll see the lanyards clipped together at the front of the helmet for less of a snag hazard. They should not be stored that way for extended periods as they're stretched out and reduces their tension over long periods of time. Also, if stored under the VAS shroud, they're not very secure and should really be slipped over the lip at the bottom of the shroud so they don't slip off the edge of the helmet and snap back into your face. VAS Shroud - The Ops-Core VAS Shroud night vision mount shown here is sold separately from the FAST helmet. It is constructed of aluminum and weighs a scant 1.2 oz (34 grams). It comes in DG2 Urban Tan, 504 Foliage Green and Black powder coated finishes. It's in the shape of a pentagon, with a slot in the middle for the standard U.S. Army Mount Arm #A3256368, or Norotos INVG or AKA2 mount arms. The VAS Shroud attaches to the FAST helmet with stainless steel screws and ballistic T-nuts. It has no sharp edges or protrusions to snag, and is snag free for HALO, HAHO or static line use. It's shaped to conform to the curvature of the helmet shell, which ensures a stable platform. It is the lightest, lowest profile, least obtrusive and least expensive semi-permanent NVD mounting solution currently available.
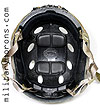
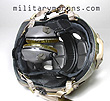
Pad System - The inside of the shell has a series of velcro die-cut shapes, for the installation of the removable/interchangeable pads. The velcro used is the ultra thin kind, similar to that on velcro one-wrap - you can barely see any hooks or loops. The hook portion will not snag other fabrics or hair. The surfaces stick together very firmly, though. There are two top pads, two side pads, and one rear pad. Both 1/2" and 3/4" thick top and rear pads are supplied with the helmet for proper fitting. If a headset with headband is going to be used, the top pads are positioned with a gap between them for the headband, and the side pads are omitted. The front/forehead EPP impact liner/pad is non-removable. The pads are not the same foam pads supplied with the ACH or MICH. Instead of closed cell foam or Skydex, the pads are made up of firm EPP (Expanded Polypropylene) for impact absorption and soft LDV (Low Density Vinyl) for comfort, neither of which are affected by moisture, altitude or temperature. The pads are curved, not flat, and are molded to the shape of the head. At first glance, the EPP material looks similar to polystyrene. However, EPP is not the same as EPS (Expanded polystyrene/styrofoam). EPP is a very durable yet resilient closed-cell foam and there is no comparison in structural strength. While you can push your finger into a block of styrene and indent it, EPP can absorb energy over and over without denting or breaking. EPS is commonly found in single-use helmets, like motorcycle helmets. The EPS will crush with very little rebound and the helmet will need to be replaced after a hard hit, whereas EPP will recover after a blow and is good for multiple impacts. The firm EPP makes up most of the volume of the pad. The part that contacts your head is the LDV portion, which is a very soft and pliable closed-cell foam, yet is strong and durable with relatively high tensile strength. Occ-Dial Fitband - Instead of relying only on pads to keep the helmet snug and stable on the head, an adjustable fitband is used. The fitband is a plastic band that encircles the circumference of the head that can be adjusted via the Occ-Dial (Occipital lobe dial adjustment system). 'Occipital lobe' refers to where the dial is located - right over the occipital lobe of your brain at the back of your head. It's not unlike the dial ratchet system on some helmets; a rubberized dial on the rear mechanism is turned to either loosen or tighten the fitband around your head. The fitband can be adjusted in height by sliding on the mounting screws before tightening them completely. It can also be 'pre-loaded' before final screw tightening, to better match the shape of your head. The Occ-Dial fitband is covered with soft, synthetic suede-like material pads at the front, nape, side and rear. All of them are removable for washing or replacement. An interesting feature of the fitband is that it detaches in the front to allow the headband of a headset or earphone to fit behind it (between the fitband and the helmet shell), rather than pressing the headband against the user's head. The earphones can be left secured in the helmet.
Integrated Head-Loc Retention System - The FAST helmet has the Head-Loc Retention system integrated with the Occ-Dial adjuster, which provides 4 times the stability than the standard issue ACH helmet suspension/retention system. The key to the stability of the Head-Loc system is that the side straps are straight, all the way from the back to the front of the chin, while the chin straps are also straight when they run from the side of the helmet and down under the chin. By eliminating the angle or pivot points between the chin cup and straps, the helmet is much more stable on the head than the standard harness. The simplified strap geometry and Head-Loc buckles make adjusting the helmet easier than any other harness I've tried. Note that my FAST helmet is fitted with a right-side buckle, as I'm a lefty and normally shoot from the left cheek. Read my previous write up on the Ops-Core Head-Loc Retention system here. The FAST Bump helmet is illustrated below with a pair of PVS-7's mounted with the BISS-NVD lanyard snapped onto the side strap mounts. The lanyard needs to be unsnapped before flipping the goggles up as they're under a lot of tension.
Initial setup/adjustment - The FAST helmet comes with excellent illustrated instructions on a card on how to set up the helmet before using it. This involves ensuring that the helmet is the right size, then making use of the different thickness pads, fitband height adjustment and 'pre-loading' the fitband to match your head shape better. The side ads can be used to increase protection on the sides, or can be left out. Donning the FAST helmet utilizes the same Head-Loc procedure with the addition of the Occ-Dial adjustment. The helmet is put on with the band loose and the dial turned to tighten it until it is comfortably snug. The chin strap buckle is then attached. Both rear Head-Loc sliders are pulled forward simultaneously towards the chin until snug, then the two front Head-Loc sliders are pulled down until snug. Wearing the FAST with headsets - This is a real neat feature built into the FAST. First, the top comfort pads are positioned in the shell so that there is enough room for the headset band to fit between them. The front of the fitband has two T-studs which ride in channels in the front impact liner. By pulling the center of the fitband away from the front impact liner, the studs are drawn towards the center and the front of the fitband can be detached from the impact liner. The headset band is then slid behind the earphone band and the front if the fitband is re-attached and locked in place to the front impact liner. The headset band remains behind the fitband, and the headset is essentially attached to the helmet. They are donned as a unit, instead of putting on the headset before the helmet. For stand-alone use, the headset is easily and quickly detached from the helmet. The photo below illustrates how the headset headband is captured by the fitment band. General Observations and notes - The FAST Bump Helmet is illustrated below with a Novatac EDC-120T LED light mounted on the right side using the picatinny rail adapter and Vltor SM-OCG mount, and worn over a Sordin headset. The FAST Helmet is extremely lightweight - it only weighs 1.5 lbs with the VAS Shroud installed. The fit is superior to any other than I've tried; ballistic or otherwise.
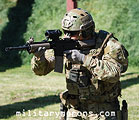
Stability of the FAST Helmet is unsurpassed. When adjusted correctly, it is as solid as it gets on the head without screwing it directly into your skull. The FAST helmet interfaces perfectly with the Sordin headset - no squeezing or pressing down on the ears or interference with the ear cups. You get what you pay for - Now, the FAST Helmets definitely aren't cheap, and some will ask "I can get a Pro-Tec skateboard helmet for $50 - why should I pay 10 times that for a Bump shell?" This same question has been asked of many other things - a $450 Strider folding knife vs. a $150 Spyderco, a $500 Aimpoint vs. a cheaper red dot, a $1000 Nightforce scope vs. a $100 Bushnell etc, or $400 hiking boots vs. $100 ones etc. The list would go on forever but you get the point. Like any other piece of high performance equipment, these features do not come without a cost. The FAST Helmet was designed from the ground up for military applications - every other helmet out there has been adapted from civilian use like skateboarding or white water sports with nothing more than a change of colour. It's difficult to convey in a review or photos, but the difference in fit and stability will be apparent once you handle or use a FAST helmet in person. As I mentioned above, while a skateboard helmet will provide impact protection, the carbon fiber shell of the FAST Bump Helmet provides the support and stability for mounted accessories that an injection molded plastic skateboard helmet can't. In order to get a Pro-Tec helmet even close to functioning like a Bump Shell, you'd need to change out the chin strap (even a 4-pt) system to a Head-Loc, install rails on the sides, replace the stock liner with an adjustable pad system so you can use it with headsets, and you'd still fall short of the functionality and compatibility with other items that the FAST Helmet is design with. Range Report After weeks of cool weather, it just so happened that the day we had our scheduled range day on warmed up to the mid 80's. Not blazing, but warm enough to see how the Bump helmet would feel. I wore it in conjunction with the Crye CAGE Chassis, and while it's not as heavy as the FAST ballistic helmet, I was still able to get an impression of how it wears on the head. The other 'bump' (PT/Protec) helmets made of plastic which I've worn are my frame of reference form comparison, not the ballistic helmets I own. My purpose wasn't to evaluate the FAST helmet from a long-term user perspective, or how well it protects the head from impacts, but to see how easy it was to don, doff, adjust, general comfort/observations and to see if it restricted head movement or vision in various positions. The day was spent doing various rifle and handgun drills, which included shooting from different positions and running. Donning/Doffing - At the range, I used the FAST helmet with my Sordin hearing protectors at all times; I did not use it without them. First, I loosened all the adjustments slightly. Then I installed the headset by detaching the front of the fitment band, sliding the headset behind it, then re-attaching the band at the front. Keeping the headband of the headset in the space between the two top comfort pads, I used both hands to hold the spring-loaded ear cups apart with both hands while slipping the helmet and headset onto my head as a unit. The Sordins fit perfectly under the FAST without any extra pressure on the ear cups. I then snugged up the fitband by rotating the Occ-Dial knob. It wasn't necessary to make it tight, but just to take up the slack. When I did my initial setup on the helmet adjustments, I did notice that if the fitband height in the helmet is adjusted so that the dial is partially covered by the helmet shell, it can be more difficult to rotate. So, I left enough dial uncovered outside the bottom of the helmet to reach with my fingers. I then snugged up the rear and front Head-Loc slider adjustments. Since I wasn't wearing any NVGs, I just took the slack out of the straps instead of making them tight. After doffing the helmet, I found that it wasn't really necessary for me to loosen up the fitband and straps every time time I wanted to put it on again. I'd just stick it on my head, and buckle the chin strap buckle. Comfort - The Bump Helmet by itself is so light that weight is really a non-issue. The weather was warm enough to make me perspire with only a hat on, especially after we started moving around, so when I exchanged it for the Bump Helmet, I tried to pay attention to where I thought it might feel warmer. Overall, it didn't feel like the Bump was much warmer than the hat. Where I thought I felt it to be slightly warmer was where each pad in the helmet was touching my head. It makes sense, as the foam is an insulator, and it essentially doesn't breathe. But the surface area of each pad is small, and all around them is empty space for air to circulate. Warm air is allowed to escape from the eight vents on top of the shell. The most noticeable warmer spot (for me) was the forehead, where the front fitband sits. The soft, suede-like material is absorbent, but it can only hold so much moisture. When you wear a hat and sweat, a lot of the sweat of soaked up by the front fabric of the hat, where it's able to evaporate since it's exposed. The rate of evaporation of sweat from the helmet forehead band is much slower since it is not exposed to the 'outside air', and it's possible to saturate it. I only noticed this a couple of times, after some intense exertion like sprinting (my armour and ammo weighed about 30 lbs). I'd get sweat dripping down my temples and face. Bear in mind that with a hat, I also had sweat dripping down my face, but slightly less. It's just something to deal with when wearing any helmet in hot weather. That being said, I did find the Bump to be more comfortable/cooler than the plastic skateboard helmets that I have, because of the individual pad system vs. the fuller coverage liner inside most skateboard helmets. Stability/Mobility - As expected, the Bump was completely stable on my head, without any accessories or NVG attached. Running around, changing positions, shooting with my head on the ground etc didn't do anything to move the helmet. When adjusted correctly, the Bump does not interfere with peripheral vision or eyewear. I adjusted it so that there was the slightest bit of clearance between my Revision Sawfly eye protection and the front lip of the Bump helmet. I also had full range of motion of the head; both up and down, without interference with my gear. The only time I noticed something was when I went into the prone position and the Crye Chassis rode up a bit and the top of the plate contacted the back of the Bump helmet, preventing me from lifting my head completely. I just scooted forward in the Chassis a bit, letting it ride back down onto my shoulders and I was able to get full clearance to lift my head. I've worn the FAST Bump helmet with my old PVS-7's for short periods; more as a check of stability vs.overall comfort. The Bump helmet is a platform; it's not going to make the NVGs any lighter or more balanced. The PVS-7's stick out in front and put strain on the muscles at the back of the neck, no matter what platform you use, unless you use a counterweight (which makes the whole thing heavier of course). Here's where the Bump shell differs from the plastic skateboard helmets. Take one of those Protec helmets and squeeze/crush the shell. Front to back, side to side - it doesn't matter. On all of them I've handled, the injection-molded shells are relatively thin and can easily be flexed out of shape. That's fine, as they're designed for impact protection, but this shell flexibility makes for a less stable platform for NVGs and mounted accessories. Shell distortion under load (when running or moving with the night vision goggles), adds to the movement of the NVGs relative to the helmet, and also the head. You already have the movement of the helmet relative to the head (a stable strap/suspension system is essential) and the last thing you want is the NVGs bouncing even more in front of your face when you're running or moving. The Bump carbon fiber shell, on the other hand, is very rigid, and takes a lot of force to flex. You essentially get the rigidity of a kevlar/ballistic shell in the Bump, with the weight of a skateboard helmet. The Occ-Dial Fitband makes a huge difference as well; as it provides another level of stability in addition to the pads and straps. It's pretty obvious that I'm very impressed with the Ops-Core Bump helmet. At the time of this writing, in addition to supporting NVDs, no other non-ballistic helmet has been specifically designed to offer a modular platform that allows the military end user to quickly don and doff other head-borne equipment, or offers the support accessories to go with it. If you need something like the Bump Helmet, the Bump Helmet is the best you can get. Period. Nothing else in stock form comes close.
|
Wilcox Industries L4 G24 NVG Mount
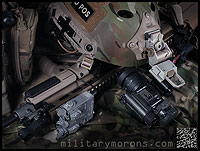
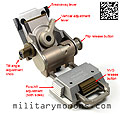
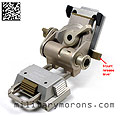
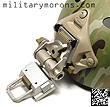
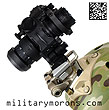
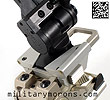
Looking at some of the products that Wilcox makes, it's like a Santa's Toy Factory or 'skunk works' for military Special Operations, Federal and local government agencies. Wilcox has had over a quarter century of manufacturing experience, and specializes in the design and manufacture of innovative products that provide our warfighters with a tactical advantage. They have a pretty diverse product line, including the aforementioned night vision mounting systems, small arms systems and support, the PATRIOT hybrid life support system, weapon optic mounts, parachutist nav boards, laser designators and helmet recording systems. Their main facility in New Hampshire not only has manufacturing capability, but in-house testing capability for their products. Two additional facilities in Virginia Beach and San Diego assist in product development, support and training. Both facilities are located close to East and West coast SEAL Team Naval Amphibious bases, not by coincidence. NVG Helmet Mounting Systems - Wilcox manufactures helmet mounting systems for various night vision devices including the AN/PVS-7, 14, 15, 18 and 22. Some are strap/ratchet mounts that require no mounting holes, and others have standard one or three hole mounting schemes. Of these, the three-hole mount is generally considered the most stable and secure. Most of their systems have proprietary interfaces between the shroud (part that is secured to the helmet) and the mount (detachable part that the night vision optic attaches to). Since I already had Ops-Core VAS shrouds, which is a three-hole shroud that is compatible with the standard U.S. Army Mount Arm #A3256368 ('rhino mount), I waited for Wilcox to offer a standard-issue compatible mount instead of going one of their proprietary systems. Their new mount is the L4 G24 Breakaway mount (P/N 28300G24). When offered as a system with an Ops-Core VAS Shroud, it's called the L3 G25 Helmet Mount System (P/N 28300G25). It comes anodized in black or tan (add a '-B' or '-T' to the end of the part number to indicate colour choice). The tan anodizing is very light - more of a 'tan tint'. L4 G24 Breakway Lever Mount - The L4 G24/G25 Breakaway Lever Mount with Low Profile Breakaway Base allows the attachment of an AN/PVS-7A, 7C, 15 or 18 NVG to a helmet-mounted Ops-Core three-hole VAS Shroud of the standard Army 1-hole shroud, by means of a one-piece mount and interface plate. AN/PVS-7B and 14 can be mounted by the use of custom interface adapters. The G24 is made of aerospace-grade materials; mostly machined aluminum with steel hardware and polymer. Description - The G24 is made up of a number of intricately-machined parts and assemblies, the main ones being an interface plate that attaches to the shroud, a sliding portion that I'll refer to as the 'body', and the pivoting portion in front I'll refer to as the 'flip' portion, as it flips up or down. When the flip portion is stowed (or folded up), the G24 presents a much smaller package than the USGI rhino mount. One of the reasons for that is the location of the pivot point. The G24 pivot point is located lower down, which doesn't require the flip portion to be as long. The interface plate assembly has a lip called the 'top mounting guide' on top which engages the inside of the shroud, and a small rubber bumper which eliminates rattling and ensures a snug fit to the shroud. The mount release lever (with the brown polymer ends) is near the bottom of the interface plate, and is pressed either from the left side or right side to retract or extend the spring loaded tongue, which engages the bottom of the shroud. The black breakaway lever at the top also slides to the left or right depending on whether the breakaway feature is enabled or disabled. The mount body can slide up and down relative to the interface plate by unlocking the vertical adjustment lever on the front of the body. To its left is a brown polymer knob which is the tilt angle adjustment knob. The flip release button is located on the right, and is depressed to stow or deploy the flip portion. The flip portion locks in the stowed and deployed positions and cannot be moved until the button is pressed. The flip portion is made up of a U-shaped rail and the adapter interface to which the goggle is mounted. The adapter interface slides fore and aft along the rail, and locks at intermediate positions defined by teeth on the inside of the rail. There is a button on each side of the adapter interface and both must be pressed to unlock it in order to slide it. On the bottom of the adapter interface is a dovetail, in which the goggle adapter shoe slides into and locks. A pivoting spring loaded lock retains the adapter shoe until the brown polymer NVG release button on the front of the adapter interface is pressed.
Mounting/Breakaway Feature - The G24 mount is attached to the shroud by pushing the mount release lever to the right (when looking at the back plate of the mount). This retracts the spring loaded tongue at the bottom of the interface plate, allowing the mount to be installed. The top mounting guide is inserted into the top of the shroud, then the mount is roated downward until it seats. The release lever is then slid to the left, which extends the tongue. The mount is pressed against firmly at the base, allowing it to seat and teh tongue to achieve its position. To detach the mount, the mount release lever is pressed to the right. What the breakaway lever does when pressed in from your right, is decrease the amount that the spring loaded tongue protrudes. The tongue has a 45° bevel at the end, which takes up half the fully exposed length when normally extended. When the breakaway lever is pressed, only the beveled portion protrudes, which allows the mount to detach from the shroud when subjected to an upwards force. If the force is great enough, the bevel will cause the tongue to be pushed up, and once the spring pressure exerted on the tongue is overcome, it will retract enough for the mount to pop out of the shroud. The purpose of this breakaway feature is for user safety when performing operations that could cause entanglement, such as fast roping or parachuting. Banging the NOD while walking through a doorway or exiting a vehicle will cause the NOD to detach, rather than snap the users head back. Note that the breakway feature should be used with a lanyard to retain the NOD.
Stowing - The flip portion of the G24 has 130° of rotation from deployed to stowed. The lower location of the pivot point vs. the USGI mount places the stowed NOD/goggle presents a slightly lower height profile to lessen the chance of snagging it on an overhang or doorway. Unlocking the mount from either position is accomplished by depressing the flip release button, which will lock automatically in the next position.
Adjustments - The vertical adjustment
lever is located on the front of the mount, and is rotated CCW (when
looking at the front of the mount) to unlock it. It's a cam/friction
type lever and can be stiff to lock/unlock, but very secure. The mount
slides up and down on a dovetail track in the interface plate, and
is infinitely adjustable (no steps) with 0.9" of vertical travel.
The USGI mount has on vertical adjustment capability.
AN/PVS-14 Arm with NVG Interface - Since the various night vision goggles and devices have different mounting interfaces, Wilcox ensures compatibility with their mounts with custom interface shoes, designed for each type of device. These interface shoes are not compatible with USGI mounts, but are cross-compatible with Norotos shoes/mounts. For the AN/PVS-14, Wilcox has their own version of the USGI 'J-arm', with the proper dovertailed interface for the G24. The 'AN/PVS-14 Arm with NVG Interface Shoe (P/N 26300G01). The PVS-14 Arm is made of aluminum and polymer with steel hardware. There is a large knurled thumb screw which secures the Arm to the PVS-14 goggle. The two spring-loaded contacts on either side of the thumb screw are for the 'automatic shutoff' function if the goggle has one.
Connections/Adjustments - The NVG interface
shoe attached to the arm slides smoothly into the dovetail on the
bottom of the adapter interface on the G24 mount. It clicks into place
and is held securely until the NVG release button on the front of
the adapter interface is pressed.
Amber Filter Cover Assembly - Eye splash refers to the spill of green glow from the goggle's eyepiece lens, illuminating the user's face, which can potentially compromise the user's position. This is usually alleviated by using the rubber eye cup that attaches to the eyepiece but it's not always that comfortable (especially with eyeglasses) and pops-off rather easily. The Wilcox Filter Cover Assembly quickly attaches to an array of night vision goggles and scopes, eliminating the need for an eye cup and greatly reducing the amount of light escaping from the eye piece. The assembly consists of a reddish-orange tinted, wavelength-controlled polycarbonate (Lexan) lens mounted to a plastic ring, which snaps onto the eyepiece of the goggle. Looking at the photos below, you might say 'Hey, I thought 'amber' is yellow.' So did I, so I looked it up. 'Amber' refers to a series of shades of orange-yellow, which can range from yellow to reddish-orange. The lens also serves to protect the ocular lens of the night vision device. A padded rubber eye cup encloses the lens/ring and protects the eye socket from impact injury and helps prevent light from escaping the eyepiece. The assembly is more secure than the standard rubber eye cup, and compatible with users of prescription lenses and protective eyewear. Looking through the filter, the normally green image is changed to a yellowish tint. I find it more 'natural' and closer to a black and white image than green, and prefer this colour. There is no image or resolution degredation. The two photos below on the right were taken with the IR illuminator on. The Filter Cover Assembly comes in three sizes to fit various NVGs - the one shown here is P/N 34000603 for the AN/PVS-14/ITT F5050.
General Observations and notes - The two items that go between your night vision goggles and your head are the helmet and mount. The helmet provides the platform and the mount is the adjustability/interface. Ops-Core has contributed greatly to the design of better platforms with their FAST Helmets and replacement liner/strap systems for existing helmets. Without a stable and comfortable platform for NVGs, they'll bounce around no matter how good the mount is. I used to discount the value of a good NVG mount, mostly due to the price. While most folks are used to shelling out the cash for an optic mount to match the quality of a scope, the same doesn't always apply to NVGs. Many, including myself, are satisfied to stick with the mounts that come with the goggles or monocular. Night vision mounts have to provide a sturdy and stable mount while incorporating adjustability for different users, which really takes quite a bit more engineering, design and precisely manufactured parts. The difference between the issue USGI mount (at least for the PVS-14) and the Wilcox G24 mount is huge. As an engineer who works in the aerospace industry, I can see where the cost comes from - these mounts are not cheap to manufacture. When I held the G24 in my hand, the attention to detail and quality was immediately apparent. While the average rifle shooter may not notice a difference in performance between an expensive and a less expensive set of scope rings, any user will notice the difference between the issue USGI NVG mount and the Wilcox G24 - in pretty much all aspects - design, construction, operation and performance.
During a recent night shoot, I found the G24 adjustments and controls easy to manipulate, and the adaptor shoe easier to use than the USGI mount. I have an easier time making adjustments with the Wilcox than with the issue mount, plus the Wilcox has vertical adjustment and the USGI does not. The G24 is pretty much a rock-solid mount, manufactured to tight enough tolerances such that essentially no wobble or play is present. I'm not a frequent user of NVGs - just a hobbyist/occasional user - so wearing NODs with either a head mount or helmet is something I never get used to unless I'm out camping and it's a few nights in a row. With all that weight on the head, 'comfortable' is a relative term (it's more like varying degrees of discomfort rather than comfort), and always gives me renewed respect for those who have to use them for a living, and appreciate companies like Wilcox and Ops-Core who try to make that tough job just a bit more efficient by designing and manufacturing equipment that works well. A high-quality mounting system like the Wilcox is something that can be appreciated by all users - casual and professional alike.
|
9/24/10 - The NRL (NOD Retention Lanyard) from Down Range Gear is a simple, effective and inexpensive way to ensure that your expensive night vision goggles don't end up on the ground if they come off your helmet. Shown here are a couple of variants of the NRL, including the new one for the Ops-Core VAS shroud. It requires no specialized tools to install nor interferes with the operation of the optic. The NRL was designed to retain and prevent the loss of a NOD (Night Observation Device) in the event of a mount failure, or breakaway (as in the case of the Wilcox mount shown above). Soldiers have learned to tie down just about anything that can come loose or get lost/dropped. Typically, 550 cord is the field expedient method used to secure such items, but there are times when a specifically designed lanyard might do a better job than a length of para cord. The NRL is such a product, and was designed using basic hardware familar to the average infantryman. The NRL is made up of two basic components - the part that attaches to the helmet (helmet plate anchor), and the part that attaches to the NOD (Optic tether). Both are connected via a side-release plastic buckle. There are different variants of the helmet plate anchor that accomodate different helmet mounts. A dummy cord clip is also provided that attaches to any 1" webbing, for securinng the optic against loss when stored in a pouch. NRLs are made in the USA with heavy duty stitching, and ITW GhillieTex IR-compliant plastic hardware. Shown here are NRLs for the Ops-Core VAS shroud and the single-hole MICH mount. Ops-Core VAS NRL - The VAS NRL kit consists of the helmet plate anchor, the optic tether and a dummy cord clip. The helmet plate anchor is made out of a double layer of cordura, carefully cut and heat sealed to match the footprint of the VAS shroud. A 3/4" ITW Ghillietex female buckle is sewn at the top. The VAS shroud is removed, leaving the three mounting screws in the helmet, the helmet plate anchor installed, then the VAS shroud re-installed. Since the helmet plate anchor is made of cordura, it can be made in any colour that cordura is available.
The Optic Tether has a loop of elastic shock cord passing through the male SR buckle. A cord lock allows the length of the elastic loop to be adjusted. A short webbing loop is sewn to the shock cord with a plastic zip tie. The zip tie is looped around the body of the NOD, tightened, and the excess end cut off. It's easily replaceable if need be with a new zip tie. When the NOD (in this case a PVS-14) is attached to the mount, the buckles are connected, and the tension in the elastic cord can be adjusted. The tension helps reduce slop in the mount if there's any.
MICH NRL - The MICH NRL is made to fit the USGI MICH helmet mount using the single hole in the helmet. The helmet plate anchor is a length of 3/4" webbing with the female buckle sewn to one end and a slot at the other. The rounded end of the webbing makes it easier to slide through the helmet strap slots on the mounting plate, as illustrated in the photos below. The helmet screw passes through the slot in the webbing, securing it in place. When mounted, the female buckle provides a socket for the Optic Tether to clip to.
The USGI 'rhino mount' is much sloppier than the Wilcox mount, and this is where the elastic tension provided by the NRL helps. THe NRL also works with the PVS-7B. I also found that the dummy cord clip can also be used on the strap ratchet mount for the PASGT helmet.
Notes/observations - After mounting all the components to my helmet and PVS-14, I attached the PVS-14 with the elastic loop going around the mount, as shown on the NRL illustrations on the website. This is with a single cord on either side of the mount. However, when I did so, the buckle would stick straight up when flipping the NOD up, and prevent it from stowing completely. That's why I decided to route the elastic cord to the side, so the buckle stays out of the way when flipping the NOD up. Another thing I did was give the elastic cord a twist before connecting the male and female buckles. This reduces the size of the loop and prevents it from catching on the mount or optic during the stow/deploy process. I used the NRL on my Ops-Core helmet during a night shoot in the desert, and found that it was simple to attach and adjust in the dark by feel alone, once I had become familiar with where everything was. I never had to test out the actual retention during an accidental release, but am confident that it'd have held if the NOD or mount popped off the helmet. Simple 550 dummy cord will work, but not as efficiently as the NRL. The NRL is cheap insurance for expensive NODs; and something you really can't afford not to have. To order, email downrangegear@gmail.com. |
9/19/10 - S.O.D. (Special Operation Department) is an Italian manufacturer of military clothing that collaborates with and produces clothing and equipment that is used by Italian and allied military units in a variety of theatres. Shown here is their Boonie Hat in their proprietary colour, HCS (Hybrid Coyote Sage), as well as Desertico CB62. For more info on S.O.D. and the HCS colour, please read my writeup on their Combat Line apparel. 
The main features of the Boonie Hat are:
Additional Notes - It's a very well made Boonie with nice features. One note on sizing (always tricky, I've found) - the S.O.D. hat sizing runs one size small (at the time of this writing). I'm a size Medium (7-1/8 hat size) head, which is also a size Medium on the S.O.D. sizing chart. I tried both Medium and Large S.O.D. boonies and the medium was too tight. The Large turned out to be perfect on my medium head. I throw my boonies in the machine wash, so they do shrink slightly. I'd rather have it a bit loose and cinch up the elastic shock cord than have it too tight to begin with. From my experience, I'd recommend getting one size larger than your normal size for the S.O.D. boonie. The hat softens with use and washing, and becomes a very soft and comfy floppy boonie. It also wears well with the sides up using the chin strap.
|
ATTENTION! DO NOT LINK DIRECTLY TO MY IMAGES -
IT IS A COPYRIGHT VIOLATION
/ . PLEASE
OBSERVE AND RESPECT OUR COPYRIGHT! . /
©opyright by MilitaryMorons.com. All Rights Reserved. Reproduction, Duplication,
Distribution Strictly Prohibited.
Unless mentioned otherwise, content and images are the
property of militarymorons.com and are not in the public domain.
They are not to be used without
permission. Please Contact
me for permission to use any images or content herein.
