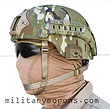
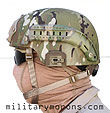
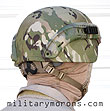
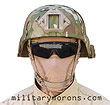
Head Gear Page 1 Page 2 Page 3
TO VIEW FULL SIZE IMAGES: USERNAME and PASSWORD are both "mm"
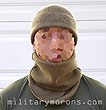
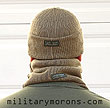
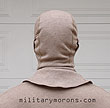
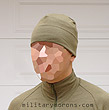
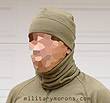
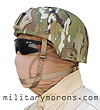
TAD Gear Brain Case Watch Cap & Proline Neck Gaiter
PS50 Watch Cap - The PS50 is a lightweight cap made from Polartec Power Stretch fabric, for both warmth and moisture management (wicking sweat away). It can also be used as a helmet liner. It's essentially a skull cap, but not as tight and restrictive feeling as some other athletic brands. It has a comfortable cut, shaped to the head, and the headband can be turned down to cover the ears for a bit more warmth. Since it's not as heavy as a fleece cap, it's suitable for running in cold weather, when it's cold enough to warrant a cap but you don't want to overheat your head when you get going. Wind Pro Factor Cap - The Factor cap is made from Polartec Wind Pro fabric, which is a hard-face fabric with a low loft fleece inner surface. The cap is shaped with four panels to conform to the head, and covers the ears completely. The sides can be folded up over the ears if desired. The fabric is water and wind resistant - light drizzle will bead up and roll off the surface. It's available in two colours - black, and deep green, which is best described as a dark OD. It's low profile enough to use under a helmet, and the comfortable flat seams throughout won't leave you with imprints on your forehead. The OR logo on the front is reflective.
OR is also collaborating with Massif
Mountain Gear Company, who specialize in Nomex, fire-resistant
(FR) garments to produce OR-designed garments utilizing Massif's proprietary
Nomex fabrics. Two of the fabrics used are Cool Knit, a lightweight,
wicking Nomex designed for warmer temperatures, and HotJohns, a midweight
Nomex for warmth in cooler weather. Both are stretchy and wick sweat
away from the skin. The Cool Knit material is extremely lightweight,
and thinner than the standard Nomex fabric we're used to that's used
for balaclavas etc. The HotJohns fabric is a very soft, medium-weight
material. It's also very stretchy. Neither fabric restricts heavy
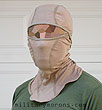
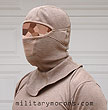
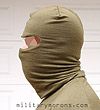
breathing when worn over the nose and mouth. FR Ninja Balaclava CK - The FR Ninja Balaclava in Cool Knit tan fabric shown here is a very lightweight balaclava that can be worn a variety of ways. It's lighter weight than the other nomex balaclavas I've had in the past, and also the best fitting. Instead of a flat pattern sewn together in the middle, it's shaped to the head with six separate panels sewn together with flat seams. The cut, combined with the stretch nomex makes it conform better to the head and neck than any other design I've come across - a 'true' 3-D cut for the head. The bib has ample material for tucking into the collar. It really does look like a 'ninja' hood, hence the name. The eye opening is designed so that it can be narrowed down to a slit or opened up wide without bunching or stretching of the fabric at the sides, like oval-shaped eye-holes on other balaclavas. This design is also more compatible with eyewear temples. The balaclava can be worn the normal way, with just the eyes exposed. The face portion can be pulled down under the chin to expose the face. It can also be worn as a gaiter by pulling back the head portion, and leaving the face covered. Lastly, it can be used as a neck gaiter. All without overstretching the material. A heavier weight FR Ninja Balaclava is available in HotJohns black. FR Omaha Neck Gaiter HJ - The Omaha Neck Gaiter is a simple tube of material. Shown here in the HotJohns black, it's also available in the lighter weight Cool Knit tan. It can be configured a number of ways - as a watch cap (the end of the tube can be tucked in, or left open and loose for ventilation); a headover which covers the top and sides of the head, leaving the face open; a face protector; or a plain neck warmer. I commute to work a couple of times a week by motorcycle, much less now that it's winter and it's cold in the mornings. I figured the early morning rides to work would be a good test for the Omaha gaiter, as it's both cold and windy as I ride the motorcycle. Even though the fabric is unrestrictive when worn over the nose and mouth as a single layer, it didn't allow wind to pass through when worn in a double layer around the neck and chin and kept those areas well insulated. I can also honestly say that the HotJohns fabric is one of the softest, most comfortable fabrics I've worn, FR or otherwise.
Here's the Factor Cap and Omaha Gaiter used on a hike 8/17/07 - FR Ninja Balaclava EL™ - The FR Ninja Balaclava EL is made from Massif® Stretch Nomex® Elements™ fire-resistant fabric to provide warmth when wet, and wind-resistance with full FR protection. As explained in my review of the Massif Elements™ Softshell Jacket and Pants, Massif Elements™ is a softshell fabric that isn't immediately recognizable as the typical nylon DWR softshell fabric. It's actually 'soft', looking more like sweatshirt material than water-resistant fabric. So, people are always surprised when I tell them that it's a windproof/waterproof fabric. Externally, it looks exactly like the other Massif fabrics shown above, only with a slightly finer weave. The Elements fabric a tri-laminate, with an outer face material and interior fleece face sandwiching a fire resistant waterproof/breathable membrane. The face and fleece back are fire resistant DuPont Nomex/Kevlar/Carbon/Acrylic and Lycra which also provide anti-static performance. Elements is a four-way stretch, with more stretch in the width. As a result, it's very comfortable and stretches with the body's movements. Since Elements doesn't have a DWR coating, water doesn't bead up on it and roll off. The outer layer will get wet and soak it up. But that's where the water will stay - it won't make it past the waterproof membrane. Now you have a balaclava that will keep you dry and warm, even when it's wet and cold out. Like the FR Ninja Balaclava CK, the FR Ninja Balaclava EL can be worn in a multitude of ways - as a balaclava with full coverage, with the lower portion under the chin, as a face mask, and neck gaiter. The EL has an extended bib for tucking into the collar, and that combined with the thicker material makes it a bit tight to roll up as a watch cap. If a watch cap is needed, get the Factor Cap shown above. The Ninja design also minimizes pressure on the temples when wearing eyeglasses or sunglasses. There are midweight HotJohns fabric panels over the ears and mouth. The lighter weight fabric allows unrestricted breathing as the Elements wind-resistant fabric doesn't let much air through. The panels over the ears allow better hearing, and have a port at the back though which ear-bud headphones can be routed. You can stick earbuds in your ears without removing the Balaclava. Since the EL has the same six-panel shaped construction as the CK Balaclava, it fits very well. I like how there isn't excess fabric under the chin hanging off it like a turkey's wattle, and it follows the contour of the chin to the neck. It's too hot right now to see how it performs, so I'll leave that for when the weather gets colder. I expect it to be no different than the other Massif-fabric items that I've used, which are extremely comfortable and perform admirably.
|
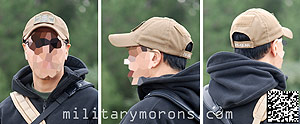
3/27/07 - Rammite Australia is a manufacturer of Australian Merino wool garments and accessories. The military line and the items shown below are offered through MissionPac. For more information on their wool, read my review of their short and long sleeved components of their Merino Layering system here. Featured below are their headwear accessories. All of the Rammite headgear shown here of double-layer construction using their midweight 100% Australian Merino wool fabric. Beanie Hat - The Beanie hat is actually a pill-shaped cylinder sewn at both ends, and one half is folded inside the other to form the hat. After washing, the fold line was gone and I thought it'd have been easier to re-fold and line up the inside and outer layers if they were sewn together around the forehead as well, and at the top. Other than that, it fits well and looks good. It's not as thin as a skull cap, and not as thick as a fleece cap - somewhere in between, so it can be worn under a helmet. It has more than enough length to cover the ears - in the photos below I have it folded back on itself about 3" around the head. Neck Warmer - The Neck Warmer is 8" tall and is also double-layered. It works very well in conjunction with the Beanie Hat; when overlapped at the back of the head, the beanie keeps the neck warmer from slipping down. I'd actually prefer it if the Neck Warmer was just a long, single layered tube, instead of being sewn into a double layer, so that I could double it up or use it extended it if I chose to. It'd add versatility to the garment as it'd be able to be used in more ways. Balaclava - The Balaclava is also double layered, and has the same four-seam shaped crown as the Beanie Hat (some balaclavas are simply two halves sewn together down the middle and don't fit as well). Like the Beanie, I'd like to see the inner and outer layer sewn together at the top. The shaped eye opening is wide enough to accomodate eyewear temples, and I found it easy to adjust. While the wool isn't as elastic as Nomex or some other materials, I was able to pull the eye opening down to expose the mouth.
As I mentioned in the reviews of other Merino wool garments,
I'm on the small minority of people who have very sensitive skin and
can find it uncomfortable (prickly). Cold weather combined with dry
skin can sometimes make skin feel itchy from the get-go, no matter
what fabric you use over it, so take that into account if you know
you're sensitive to wool. 3/28/07 - I just got word from Rammite that they will be stitching along the stitch lines to keep beanie aligned after washing, so new runs will have this modification.
|
OPS-CORE Head-Loc™ Helmet Retention System
Too often, you find harnesses with coarse webbing and
exposed velcro that isn't the most comfortable. The Head-Loc uses custom-weaved,
0.6"-wide webbing which is very supple for comfort against the
skin. All stiching is very tidy, with the densest bartacks I've ever
seen to hold the webbing together. Ops-Core also designed new plastic
hardware specifically for the Head-Loc for the lowest possible profile.
The adjustment Head-Loc Tabs (triglides) have teeth which lock their
position along the webbing when the helmet is in use, and can be used
when wearing gloves. They slide easily along the webbing both ways to
loosen or tighten the adjustments, and then stay in the position you
want. By using these Tabs for adjustment, the Head-Locs eliminate loose
ends of webbing, velcro and elastic keepers. X Head-Loc - In the X configuration, the side straps follow the jawline around the neck and cross at the nape, passing through the padded nape pad. H Head-Loc - Here, the side straps do not cross, but are instead attached to a 6" long padded nape pad. The distance between the side straps can be adjusted along the nape pad, with the maximum spacing about 5". What's the difference between the two? The H configuration is meant to provide a little extra stability when night vision devices are mounted on the helmet. Other than that, I couldn't really find a different in comfort - they both feel much better than the stock harness. The H configuration might also be a more comfortable if you have a thicker neck. Ops-Core offers a more detailed explaination here.
Installing either configuration was simple. All it requires is removing the standard harness, and replacing it with the Head-Loc. The Head-Loc is supplied with four ballistic screws and mounting hardware (T-nuts). The screw goes through the hole in the helmet, and then the strap anchor then T-nut. The holes on my medium Gentex were smaller in diameter than the MICH or ACH, so I opened them up to fit the Ops-Core hardware. You can use a phillips or flathead screwdriver, or even a coin to install the ballistic screws. I also found that the Gentex TBH rear harness holes are spaced wider and higher than on the MSA/Gallet MICH/ACH, so that I almost maxed out the small/medium X-harness side front-rear adjustment and the spacing between the straps for the H-configuration. So, if you're buying a Head-Loc for a Gentex, get the large X Head-Loc. I've heard reports from others who have found that they maxed out the adjustment on the small/medium harness when using it with a medium sized helmet. To be on the safe side, If you've got a medium or larger MICH or ACH, order a large size harness or refer to the Ops-Core sizing guide on their product pages. I found the simplified strap geometry and Head-Loc buckles to make adjusting the helmet easier than any other harness I've tried. Before donning the helmet, I loosened up the straps a bit by sliding the Head-Loc Tabs away from the chin cup. I put the helmet on, adjusted the chin straps (up-down) by sliding the adjustment tabs along the webbing down towards the chin cup, and then adjusted either the side (front-back) straps. Then I made minor adjustments individually. When I achieved the desired tension, I let go and the triglides stayed put. Adjustments can be made on the fly; no velcro to unhook and rehook, or tucking loose ends into elastic keepers. If you look at the photos below, you'll notice that the side straps are straight all the way from the back to the front of the chin. The chin strap is also straight when it runs from the side of the helmet and down under the chin. This is the key to the stability of the helmet. If you look at the photos of the Canadian helmet further down this page, you'll also see a straight-line strap configuration. I also put my PVS-7 goggles on the helmet, and found both configurations to feel more stable, with the slight edge in comfort around the nape area going to the H configuration. Without the weight of the NVG's pulling the helmet forward, both felt pretty much the same - more comfortable than the stock harness. In my opinion, the Ops-Core Head Locs set the standard for ease of adjustability, low profile, stability, simplicity and comfort. Ops-Core also offers APO/FPO and international shipping - click here for details.
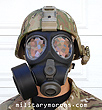
4/26/07 - 3" CBRN/Gas Mask Extender - Shown here with the Tan X Head-Loc is the 3" CBRN/Gas Mask Extender. This installs to the chin strap buckle, adding 3" of length so a gas mask can be worn with the helmet. I've illustrated it here with a Scott M95 mask. I buckled the extender in, adjusted the straps normally, and that's all it took to acheive a comfortable setup with the mask (as far as wearing a gas mask goes). The extender is easily removed to return the harness to it's normal configuration.
|
OPS-CORE ACH Occ-Dial™ Liner Kit
Description - The ACH Occ-Dial kit
consists of an adjustable fitband, the pad system, and ballistic hardware
for installation in the ACH/MICH 2000 and 2002 Gunfighter helmets.
It will NOT fit the ACH/MICH 2001 Special Force Side Cut helmet, RBR
helmets, or any helmets that do not match the exact mounting
hole size and pattern found on the ACH/MICH.
Occ-Dial Fitband - Instead of relying only on pads to keep the helmet snug and stable on the head, an adjustable fitband is used. The fitband is a plastic band that encircles the circumference of the head that can be adjusted via the Occ-Dial (Occipital lobe dial adjustment system) at the back. 'Occipital lobe' refers to where the dial is located - right over the occipital lobe of your brain at the back of your head. It's not unlike the dial ratchet system on some helmets; a rubberized dial on the rear mechanism is turned to either loosen or tighten the fitband around your head. The fitband can be adjusted in height by sliding on the mounting screws before tightening them completely. It can also be 'pre-loaded' before final screw tightening, to better match the shape of your head. The Occ-Dial fitband is covered with soft, synthetic suede-like material pads at the front, nape, side and rear. All of them are removable for washing or replacement. An interesting feature of the fitband is that it detaches in the front to allow the headband of a headset or earphone to fit behind it (between the fitband and the helmet shell), rather than pressing the headband against the user's head. The earphones can be left secured in the helmet. Integrated Head-Loc Retention System - The ACH Occ-Dial fitband has the Head-Loc Retention system integrated with the Occ-Dial adjuster, which provides 4 times the stability than the standard issue ACH helmet suspension/retention system. With the Occ-Dial, it's more similar to the H-configuration than the X Head Loc. The key to the stability of the Head-Loc system is that the side straps are straight, all the way from the back to the front of the chin, while the chin straps are also straight when they run from the side of the helmet and down under the chin. By eliminating the angle or pivot points between the chin cup and straps, the helmet is much more stable on the head than the standard harness. The simplified strap geometry and Head-Loc buckles make adjusting the helmet easier than any other harness I've tried. Note that this particular ACH Occ-Dial kit is fitted with a right-side buckle, as I'm a lefty and normally shoot from the left cheek. Pad System - The Occ-Dial Kit utilizes the existing velcro discs inside the ACH for the installation of the removable/interchangeable pads. My Gentex TBH used strips instead of discs, but they still worked. There are two top pads, two side pads, and one rear pad. Both 1/2" and 3/4" thick top and rear pads are supplied with the helmet for proper fitting. If a headset with headband is going to be used, the top pads are positioned with a gap between them for the headband, and the side pads are omitted. The front/forehead EPP impact liner/pad is non-removable. The pads are not the same foam pads supplied with the ACH or MICH. Instead of closed cell foam or Skydex, the pads are made up of firm EPP (Expanded Polypropylene) for impact absorption and soft LDV (Low Density Vinyl) for comfort, neither of which are affected by moisture, altitude or temperature. The pads are curved, not flat, and are molded to the shape of the head. At first glance, the EPP material looks similar to polystyrene. However, EPP is not the same as EPS (Expanded polystyrene/styrofoam). EPP is a very durable yet resilient closed-cell foam and there is no comparison in structural strength. While you can push your finger into a block of styrene and indent it, EPP can absorb energy over and over without denting or breaking. EPS is commonly found in single-use helmets, like motorcycle helmets. The EPS will crush with very little rebound and the helmet will need to be replaced after a hard hit, whereas EPP will recover after a blow and is good for multiple impacts. The firm EPP makes up most of the volume of the pad. The part that contacts your head is the LDV portion, which is a very soft and pliable closed-cell foam, yet is strong and durable with relatively high tensile strength. During the time I've had my FAST Bump helmet, the thickness of the LDV portion has been increased to provide more comfort, based on user feedback - some of which said that the pads were too hard.
Installation - Installation of the ACH Occ-Dial kit into a MICH/ACH is simple. You order the size for the shell that you have. For the issue ACH/MICH, all it requires is removing the pads and standard harness, and replacing it with the Occ-Dial kit, following the very clear included instructions as you go along. The Occ-Dial is supplied with four long ballistic screws and mounting hardware (T-nuts). The screw goes through the hole in the helmet, and then the fitband/liner, the anchor, then T-nut. The holes on my medium Gentex were smaller in diameter than the MICH or ACH, so for my previous installation of the Head-Loc straps and ACH-ARC accessory rails, I had opened them up to fit the Ops-Core hardware, and had also relocated the rear ones. I found that the front hole spacing on the Gentex helmet also wasn't the same as the ACH/MICH when I tried to install the front pad, so I had to modify the front pad. I don't recommend doing it, as I had to open up the mounting hole in the front pad and cut away a bit of the material, and can't guarrantee that it'll work for other helmets. Stick to issue ACH/MICH helmets. All the adjustments are made during the installation procedure, as well as pad thickness selection and placement. Donning the helmet is the same as when using the Head-Loc harness, except that the rear dial is tightened first, then the Head-Loc sliders. For more details/info on adjustments, read the FAST helmet writeup.
Observations/Notes - The shell of my Gentex TBH is relatively close-fitting on my head, so I had to use all 1/2" pads instead of 3/4". That's an important thing to note; that there's enough room in the helmet shell to install the kit. If there isn't, the shell you have is probably a too small for your head. Also note that if you have the ACH-ARC accessory rail, that the longer 23mm screws will be needed to account for the added thickness. Normally, the 21mm screws will work. The Occ-Dial adds a level of stability over the Head-Loc system alone, with the adjustable Fitband encircling the head and the firmer pads. The Gentex TBH comes with a set of dual-density foam pads that aren't as good for shock absorption as the Skydex or OA pads, but are comfy because they're soft. Comparing the Occ-Dial and Gentex pads, I found the Gentex pads to be more comfortable than the Occ-Dial front around the forehead area, because the Occ-Dial front pad is harder, and the curvature is fixed. Even though the Ops-Core FAST Bump helmet uses the same Occ-Dial fitband, I find it very comfortable, and it's not due to the light weight. There must be a subtle difference in curvature between the two. While it's not as comfortable in the Gentex helmet, I don't find it uncomfortable. Everyone's got a slightly different head, so it might fit someone else's perfectly. I think that my Gentex shell size might be slightly on the small side for my head, so if you have the right size shell, you should be fine. The airflow/ventilation offered by the Ops-Core pads is better, as there's more open space. One thing I did notice was that while the synthetic suede material of the Occ-Dial is the same as on my FAST Bump shell, I did sweat more due to the lack of vent holes in the shell. The suede material is absorbant, but it's too thin to absorb a lot of sweat. The result of this is that I'd sometimes get sweat running into my eyes to a greater extent than with the Bump. When mounting NVGs on the Gentex helmet, the advantage is then realized. It is now much more solid and stable than the Head-Loc system with Gentex pads. The Gentex pads compress over time (which requires the straps to be kept pretty tight) while the Ops-Core pads reach a certain point, then stop at the firm EPP material. The straps don't have to be adjusted as often. Another thing I found was that instead of detaching the fitband at the front so that my Sordin hearing protectors fit under it, it was more comfortable for me to loosen up the Occ-Dial, and just wear the fitband outside the hearing protector headband. The hearing protectors add stability to the helmet by preventing it from moving around, so tightening up the fitband/Occ-Dial wasn't really necessary. If you desire or need a higher level of stability over that of the Ops-Core Head-Loc helmet retention system, while retaining the ease of adjustability, then the Occ-Dial Liner kit would be a worthy investment for your current helmet.
|
OPS-CORE VAS Shroud™ Night Vision Helmet Mount
The Ops-Core VAS Shroud was developed as a low-profile Shroud for mounting Night Vision Devices to ACH, MICH, PASGT, and Lightweight Marine Helmets. It was designed to replace the original detachable helmet “hook and strap” mounting system issued for use with the majority of PVS-7/14 systems currently fielded. While the hook and strap mount system is quickly removable, it has drawbacks with respect to weight, stability and snag hazards. The mounting plate of the hook and strap mount is flat, which contributes to its instability as it's mounted to the curved surface of a helmet shell. Permanent helmet mounts are usually attached to the helmet via one or three hole patterns. Some require custom holes to be drilled. While there are other 'permanent' NVG mounts on the market, most are very expensive and require the user to replace the issue arm with a proprietary one. Many are actually heavier than the detachable helmet mount, and while they have addressed the stability and snag issues, the extra weight must be borne at all times even when the NVD isn't attached due to the permanent mounting. The Ops-Core VAS Shroud is constructed of aluminum and weighs a scant 1.2 oz (34 grams). It comes in DG2 Urban Tan, 504 Foliage Green and Black. It's in the shape of a pentagon, with a slot in the middle for the standard U.S. Army Mount Arm #A3256368. The VAS Shroud attaches to the helmet with the standard 3-hole pattern with screws and ballistic T-nuts. It has no sharp edges or protrusions to snag, and is snag free for HALO, HAHO or static line use. It's shaped to conform to the curvature of a helmet shell, which ensures a stable platform.
My Gentex TBH didn't have the 3-hole pattern but it was a simple matter to drill it myself. I centered the VAS on the front of the helmet and marked the centers of the holes. I then used a very small drill to drill pilot holes then opened them up slowly with a larger drill. The VAS Shroud fit right on and installed without any issues and followed the curvature of the TBH perfectly with no gaps. It's lighter than the detachable issue helmet mount, and much more secure as it's bolted directly to the helmet shell. It's more stable than single-hole mounts, as those can rotate around the hole. The VAS Shroud is rock solid and does not budge at all. Its low profile design is evident in the photos; you can hardly notice it from the top or sides. The standard PVS-7 and PVS-14 #A3256368 Mount Arm shown here clicks into the VAS just like it does the other issue mounts. It's inserted and anchored underneath the top of the bracket and pushed down to snap into place while pressing the adapter's release trigger. A tug or pull is given to ensure that it's engaged properly and securely.
If you have a PVS-7 or 14, and use the Standard U.S. Army Mount Arm (#A3256368), do yourself a favour and ditch your old hook and strap helmet mount or single-hole MICH mount. The Ops-Core VAS Shroud is a must-have upgrade that delivers the increased performance of other high-end mount systems at a fraction of the cost (it's under $100!). Not only does it resolve all of the deficiencies in the original hook and strap design, but it is also the lightest, lowest profile and least obtrusive “permanent” mounting solution currently available. Contact ops-core directly for purchasing information.
|
OPS-CORE ACH-ARC (Accessory Rail Connector)
Description - The ACH-ARC kit as it comes from Ops-Core consists of left and right rails, mounting hardware (longer screws and T-nuts), two picatinny adapters and two wing-loc adapters. The kit as packaged by MSA does not include the T-nuts or wing-loc adapters. Rails - The rails are made of glass-reinforced
nylon, and are shaped to fit the standard ACH shell, or the TC2000
series of helmets from MSA (TC2000, TC2001 and TC2002). They may not
fit other brands of helmets unless they are manufactured to ACH specifications.
They did fit on my Gentex TBH (shown here), but I had to relocate
the rear mounting holes as the TBH does not have the same hole pattern
as the ACH. The rails attach to the helmet using the existing front
and rear chinstrap mounting points. Longer screws are supplied with
the kit. There are two holes at the rear of the rail to accomodate
S/M and L/XL helmet shell sizes. The rails are relatively low profile
and have no sharp corners or edges to minimize clearance or snag hazards.
They are also light weight - the kit weighs only 7oz. A dovetail slot
into which accessory rails are slid into is molded into each rail.
There are vertical locking slots and outer detents molded into the
rail as well. When mounted, the dovetail is horizontal, as will be
all accessories mounted to it unless a swivel adapter is used to angle
them up or down. Accessory mounts - Two types of mounts come with the Ops-Core kit. The picatinny adapter provides a short rail that will accomodate any picatinny-compatible accessory. The adapter is slid into the dovetail and a small tab engages a vertical locking slot. To further affix the adapter to the ACH-ARC rail, a screw can be tightened down that prevents the tab from disengaging. The wing-loc adapter is a small, flat platform with three holes on it for making your own mount or attaching something to it with screws. It has two 'wings', which engage the detents above and below the dovetail to lock it in place. Both adapters are made of polymer, and as a safety feature, are designed to break away/pop-off from the main rail system under stress to minimize injury to the end user if an accessory is snagged or caught on something. They shouldn't pop off accidentally, as it does take quite a bit of force before they come out. Extra mounting accessories will be/are available and can be purchased separately. This includes circular single (22mm) and dual (21mm) camera and light adapters, and a SureFire X200/X300 adapter that will allow pivoting up and down. Ops-Core and several other companies are currently in the process of developing additional products and accessories that will attach to the ARC system. This includes LED lights and strobes, eye protection, lower mandible protection, and detachable COMs headphones. The ARC system uses a shared "open architecture" design approach (a systems design approach that promotes interaction between designers, suppliers and end users through common standards, modularity and open specifications for interfaces), so if manufacturers would like to design and manufacture their own accessories for the ARC system, Ops-Core will provide the manufacturer with the CAD drawings for the rail and adapter geometry free of charge.
General Observations - The ACH-ARC presents a
very low profile on the helmet when mounted - not far enough to
be noticed. As I mentioned before, I had to relocate the rear mounting
holes on my Gentex TBH to install the ACH-ARC. Both adapters are
easy to install, and seem secure enough. End users are cautioned
not to mount items too heavy to the helmet as too much weight can
cause injury to the neck muscles. MultiCam paint job - Since the only colour that the ARC was available at the time of writing was black (tan and foliage green are planned), and I'm too impatient to wait, I spray painted the ARC tan, so it wouldn't stand out against the helmet as much. After I spray painted it, I put it on and decided to go a step further - paint some MultiCam on it and blend it even further. I pulled out some decade-old model/hobby paints (many had dried out), and was lucky to find a few that I could mix and approximate the colours in Crye MultiCam. I didn't bother matching the colours exactly - just close enough. Don't ask me what colours I used - they weren't even close to what I needed. I had to mix and match by trial and error. If you want to do something like this, go to a hobby store and get closer matches. I used a brush and painted it by hand without any template. Any commercially available spray paint can be used - enamel is recommended. Note that if you paint the dovetail, the paint will wear off when installing and removing the accessory rails. I tried to follow the pattern underneath the rails, again, not doing a perfect job, but 'good enough'. After the paint dried, I did a light dusting coat of sand spray paint to blend the lines a bit. I'm quite pleased with the way it turned out.
Contact ops-core directly for purchasing information or an MSA dealer.
|
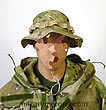
215 Gear Blended Operators Hat
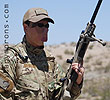
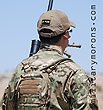
Description - The Blended Operators Hat is made in the U.S.A. and is a six-panel unstructured ball cap that has all the standard features seen on tactical hats with one major difference: the side panels are made of mesh instead of fabric. Mesh caps are nothing new; we're all familiar with the mesh back trucker/baseball caps with plastic rear adjustment strap with holes, but to date, I haven't seen anyone incorporate mesh panels into a tactical hat. Rather than the entire back being made out of the thin nylon mesh, the Blended Operators hat uses the sturdy mesh more commonly seen on the inside of body armour and vests, than the thin stuff. It's thicker, but softens with use and is very comfortable. The mesh side panels offer greater breathability over fabric panels, and increase ventilation to your noggin. This is one of those things where you go 'how come someone didn't make this sooner?' There are 3" x 2" loop velcro patches for flags etc. on the front and back of the hat, with a 1.5" x 1.5" square on top for an IR patch, instead of a button. Adjustment is via the rear velcro closure, which is embroidered with '215 Gear'. The underside of the bill/brim is lined with black velcro-compatible fabric (same thing that Crye Precision did on their shooter's cap). This provides a black, non-glare surface to shield your vision when shooting, and also as a mounting surface for a small bite or keychain LED light (not included). I've illustrated it here with a small keychain light with hook velcro stuck to the back. Mounted in this position, it provides hands-free lighting for close-up tasks in darkness. You can also use the underside of the brim to store an additional patch or IR squares. The Blended Operators Hat is available in Khaki and Crye MultiCam.
I got the Blended Operators Hats just before the weather turned cold, and I found them to be very nicely made. The mesh does make a difference. I went running and could feel the air against my top of my head. At the range in the photos below, it turned out to be a cold day ironically, and when the wind blew, I could feel it cooling my head through the mesh panels. My head didn't get too cold, though, as it does provide more protection than a bare head. But when hot weather returns, this hat will be my go-to hat.
|
215 Gear Visor and Coyote Blended Operators Hat
215Gear Visor - The 215Gear Visor is made from lightweight brushed cotton or ripstop nylon depending on the colour. It's available in Coyote (shown here), Desert Digital, Crye MultiCam and UCP. It's essentially the brim from a hat, sewn to the headband portion. It is lined on the inside with a black headband and adjusts via the velcro strap at the rear which is embroidered with '215Gear'. At the front is a 3" x 2" patch of loop velcro for patches. The underside of the Visor is plain - without the black velcro-compatible material that the Blended Operator's Hat has (see above review). I find myself reaching for the Visor more and more when I'm going out, when I might normally reach for a hat, for jogging or otherwise. The main reason I like it is that I get a cool breeze flowing through my hair and I don't get 'cap hair' when I take it off (unlike in the photos below, which were taken after wearing a hat on my head for half a day). If all you need is a bit of shade, then the Visor will give you that, in military/tactical colours.
I've been wearing my original Khaki Blended hat since I got it, and I think that it does make a difference in hot weather. I was out in the desert on a very pleasant day and wore the new Coyote hat under a Viper ghillie hood. The mesh hat provided some ventilation and it'd have been warmer under the hood if not for it.
|
Description - The ELW is made in the U.S.A. and is a six-panel unstructured ball cap that has all the standard features seen on tactical hats with one major difference: it's made completely of light weight mesh instead of fabric. The Blended Operators hat has two side mesh panels for extra ventilation in hot weather, and it's been pretty much all I use in the summer. With the ELW made completely out of mesh, I expect it to be even more airy. The ELW was designed with maximum breathability and light weight in mind. The mesh fabric is soft, light weight, yet sturdy-feeling. It weighs only 2-1/2 oz and is currently only available in coyote. Like the Blended Operators hat, there are 3" x 2" loop velcro patches for flags etc. on the front and back of the hat, with a 1.5" x 1.5" square on top for an IR patch, instead of a button. Adjustment is via the rear velcro closure, which is embroidered with '215 Gear'. A difference between the ELW and the Blended Operators hat is that the underside of the ELW bill/brim is not lined with black velcro-compatible fabric; it's left as mesh.
One of the things I wondered about with a mesh hat was whether it'd provide enough protection from the sun or cause a funky mesh-pattern suntan on your forehead. I needn't have worried about that, because while the mesh is 'open', the holes are very small and aren't large enough to allow enough direct sunlight in. I just got the ELW, and immediately took it out to see if the mesh makes a difference. Like the Blended Operators hat, it does. The difference is actually more immediately noticeable in winter when there's a chilly wind blowing. It's still winter right now, and I went out with a regular fabric hat and the ELW, swapping both while walking around. I can feel the wind pass through the ELW where I can't with the regular hat. The mesh also dries faster than a cotton fabric hat. Anyways, when the weather starts warming up, I know which hat I'll be grabbing. Summer, I'm ready for you.
|
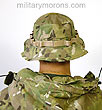
High Speed Gear, Inc. Boonie Hat
|
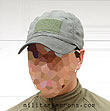
SKD 'Sterile' Tactical Ball Cap
|
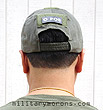
3/10/07 - SKD Tactical is offering a sterile version of the HSGI ball cap seen above, from the same hat manufacturer. Basically the same cap but without any logos. There's no button on top, and 2" x 3" velcro patches on the front and back, and a 1.5" square on the top. The rear elastic band is adjustable. The rear velcro patch is placed slightly lower than the HSGI one. The cap is available in MultiCam, OD, black and khaki.
5/17/07 - UCP and Blaze Orange are now available. The velcro strap also also been lengthened for a more secure adjustment.
|
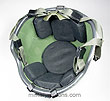
Oregon Aero® BLU® Kit (Ballistic Liner Upgrade kit) Helmets are an essential part of the soldier's protective gear and an ill-fitting or uncomfortable helmet can make a tough job even tougher. While the newer MICH helmet has a greatly improved suspension system over the old PASGT, the PASGT is still the standard issue helmet to most of our troops, and its two-point suspension system and liner have not had the reputation of being the most comfortable. The MICH helmet has a foam pad suspension system, instead of the strap/headband type found in the PASGT and in this Canadian helmet (shown in the previous photos). The pad configuration can be adjusted to fit the individual, as pads can be re-arranged, added, or removed to tailor the fit to the individual's head. Oregon Aero® is the OEM manufacturer of the MICH pad system and also offers their BLU® Kit (Ballistic Liner Upgrade) kit for MICH helmets. The BLSS® Kit upgrades PASGT helmets to the greatly improved MICH pad-type and 3-point harness system. The BLU Kit consists of 7 foam pads (round crown pad, 4 oval, and 2 trapezoidal pads), instructions, and special adhesive-backed hook velcro tape. Standard thickness of the pads is 3/4". Removal of the suspension system in my Canadian ballistic helmet was as simple as unscrewing 3 bolts. After cleaning the inside of the helmet with alcohol, I installed the velcro strips; following the recommended layout in the instructions. I then placed the pads inside the helmet (green side towards velcro). The recommended velcro strip layout worked well. Very little adjustment of the pads was necessary, and I could feel an IMMEDIATE increase in comfort over the original suspension (which I had thought was pretty good to begin with). The pads conformed to my head after a few minutes, and there were no 'hot spots' or concentrated pressure points. Fit was secure without being too tight. I found that I could remove the trapezoidal pad on the forehead for more airflow, and that the pads did not get in the way of wearing my Sordin electronic hearing protectors. It didn't take me wearing it for an extended period to see which system was more comfortable. The soft fabric of the pads are much more comfortable than any headband/strap suspension system I've tried, plus it wicks away sweat. I'm not a soldier, nor one who wears combat helmets for extended periods, and this helmet sees occasional use at best, so I'm not qualified to give a personal testimonial on how it works for months on end of combat use. However, I'm a motorcyclist with at least 8 years of riding, always with my helmet on, so I've got a decent idea of how I like a helmet to feel and fit, and to trust my head to tell me whether something is comfortable or not. Hotspots and pressure points on the head contribute negatively to your overall comfort level can increase feelings of fatigue. After reading the numerous testimonials from people in the service who HAVE used the BLU and BLSS for the PASGT (includes an upgraded harness system) kits for extended periods, I'd have no reason to disagree with their positive comments and recommendations that it's a worthwhile investment for anyone who wants to upgrade their current helmet. |
Skydex ACH Adjustable Pad System 4/23/05 - Skydex
offers their own Advanced Combat Helmet (ACH) replacement pad system
for the MICH (or any helmet with a similar velcro-attached suspension
setup). The first impression is 'That looks just like the Oregon Aero™
BLU™ kit above'. Since I reviewed the OA replacement pad kit earlier,
it does beg comparison, and they do share some features. Safety
Systems Corp distributed this product at the time of this review, but
it's now carried by ADS.
The replacement pad kit also consists of 7 foam pads (round crown pad,
4 oval, and 2 trapezoidal pads) and instructions. It's offered in two
thicknesses, size 6 pads (standard) and size 8 pads (thicker). When I first got the Skydex pad kit, i was wondering how I'd review an identical product to the OA one. However, upon handling the pads, I noticed something different (besides the welded seam). I could feel a semi-rigid structure under the fabric - most noticeable on the velcro side. It didn't feel like foam. The structure could also be felt through the softer side when compressing the padding (reticulated foam). The main difference between the Skydex pads and others is that the Skydex ones use SKYDEX® technology, a high-impact cushioning technology that utilizes a twin-hemispherical design that looks like spheres, cut in half and placed with the rounded sides facing each other. Read here for an explanation of what SKYDEX® is and how it works. Basically, it relies on its geometry to deform and absorb impact repeatedly, with no entrapped air. SKYDEX® claims that it dries faster than foam, and has better shock-absorbing performance. Depending on the application, the basic design can be 'tweaked' by changing the geometry, materials and profile of the padding. While I have no way of verifying any performance data or claims, the Skydex pads felt just as comfortable as the OA™ ones when I first put the helmet on initially. However, the reticulated foam that lies just under the fabric against the head can have some bits sticking out and felt 'pokey' (see upper right hand photo). It's not really foam in the sense we're used to, but more like 3D plastic netting. When cut, the sharp ends can make themselves felt through the fabric after a bit. You can see white bits sticking through the fabric in the photo. Until they fix that issue, I'd have to give the edge in comfort to the OA™ pads. Besides that, I can't discern any difference in weight between the Skydex and OA™ pads - they're so light already, nor heat retention. SKYDEX® is already being used in running shoes, football helmets, pole vault pads, Navy SEAL boats, and other places where durable, lightweight shock absorption is needed. Update 3/7/07 - Skydex has changed the Velcro Veltex material used on the pads to a Guilford Mills fabric, and the feel is improved such that the prickliness I felt before is non-existant now. The new material looks denser and I can't get the reticulated foam ends to 'prick', even when pressing down hard on the pad. The base of the pad has been changed to a foliage green instead of OD. Other than that, all else remains the same, as far as I know. The only issue I had with the original Skydex pads has been resolved, I'm glad to say. Kudos to Skydex for listening to feedback and improving their product.
|
Sordin Supreme Pro
Electronic Hearing Protectors
10/17/04 - The introduction of electronic hearing protection a number of years ago gave shooters the best of both worlds - attenuation from damaging levels of noise, and the ability to hear ambient sounds at the same time. Everyone knows that unprotected exposure to the noise of firearms results in permanent hearing loss, but there are situations in which standard ear plugs or muffs are a hindrance, when the ability to hear ambient sounds is required for situational awareness to be retained. Law enforcement entry teams need to protect their ears against gunshot and distraction device noise, while being able to hear movement and sounds inside a building, and communicating with their team members. On the range, especially during a class, the shooter needs to be able to hear the instructor's commands, without having to take muffs or earplugs out every time. I've used the Peltor Tactical 6 hearing protectors for a number of years, but reports started coming back from fellow shooters at Gunsite, whose Tac 6's didn't last through week-long classes. I had heard of the Sordin (made in Sweden) hearing protectors a while back from Pat Rogers, who recommended them highly over the Peltors, for durability and toughness, so my interest was piqued. I contacted Tactical Command Industries, Inc., in Northern California, a leading provider of tactical communication systems, who carry the Sordin Supreme Pro (SSP) protectors. TCII is run by Don Medine, a former police officer. A couple of days later, a pair of OD green SSP's showed up at my door. The SSPs also form the basis for TCII's Liberator II Tactical headset, which provides hearing protection combined with two-way communication. (Update - 2/4/05) It is my understanding that there is more than one version of the SSPs from Sordin. A water-resistant one (without the 3.5mm audio input jack) and a 'civvie' version with the audio jack, but not advertised as water resistant due to the jack opening. The model shown here was a special run of water resistant SSPs with the audio jack that TCI ordered from Sordin. Current (as of this date) SSPs from TCI are water resistant, but do NOT have the audio input jack. TCI can install the audio jack upon request. Contact them for more info. The SSPs have a more comfortable headband (after I did some minor adjustment) than the Peltors, with a leather covering that provides some padding. They also fold into a very compact package. Here are some of the other features of the SSP:
I liked the one button on/off instead of the Peltor's independent rotary
switches on each side, as the SSP is much faster to turn on and have
at the right level. The only time where independent adjustment may be
needed is if a person suffers different levels of hearing loss in each
ear. I wore the SSPs for an 8-hour carbine/pistol class and pretty much
forgot they were on, even though it was 85°F. Never once did they
get in the way. There was none of the annoying 'clipping' that I experienced
with the Peltors, which would tend to cut off when sensing a sharp,
but non-injurious low level noise (like two magazines hitting each other,
or snapping your fingers). The Sordins also have the best sound quality
from a pair of electronic hearing protectors I've seen. I connected one of my FRS radios to the SSPs via the 3.5mm input jack, and it worked as expected. I'd have to rig up a separate mic and PTT button to use it for two-way comms, but TCII offers dedicated headsets in their Liberator models, which come in one and two radio versions. Besides the SSPs, TCII has a plethora of high-end professional communications devices - do check out their web site - you'll drool over their products (I know I do). In summary, I'm very pleased and impressed with the Sordin Supreme Pro's - they're a good piece of gear. |
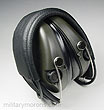 Folded |
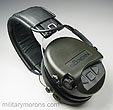 Opened up showing buttons and microphones |
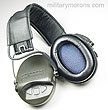 |
 Watertight battery compartment - takes 2 AAA's |
 Cushions and acoustic absorbent foam removed to show electronics |
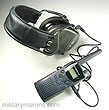 3.5mm input jack |
 At the range |
5/17/07 - I've been using my Sordin Supreme Pros for the past two and a half years, and my only question is: what took so long for gel ear seals to be offered? I tried out and reviewed the MepaBlu hearing protectors with the gel earseals, and they were extremely comfortable. However, MepaBlu didn't do a good job of supporting U.S. dealers and customers, so I retracted my review, which is why it's no longer on this site. I was sold on the comfort of gel earseals, but unfortunately they weren't available for the Sordins. I got these replacement gel ear seals from CSUK, the U.S. arm of the UK-based parent company CSUK (Communication Spares, UK) Ltd, established to market audio and communications accessories in the U.S, including Sordin products. The replacement gel ear seals feature gel-filled bladders attached to hard plastic rings which snap into the Sordin earcups as direct replacements for the standard foam pads. New foam cushion inserts are also provided. I used to worry that the gel seals would somehow puncture and leak all over the place, but after using the MepaBlu pads on my Peltors (I swithced them after finding out they were interchangeable), and nothing has happened so far, I've stopped worrying. The gel seals are the same thickness as the standard pads and do not add any bulk to the setup. They can still be worn under a helmet. The problem with the standard seals is that after wearing them for a while (during the same session), they will bottom out when all the airs is pushed out from the pad. The gel seals won't bottom out, and ensure that there's padding between the earcup and the side of your head. The gel seals also conform and 'seal' better around the ear, as they're softer than the standard ear seals. If you look closely, the gel seals are flat where they contact your head, and provide more contact surface area when they squish out. When I first got the gel seals, I only replaced one side, just for comparison. The difference was definitely noticeable, and they felt as good as, if not better than the MepaBlu pads. I recently spent an entire day on the range with them on most of the time, and was very happy with the way they felt after approximately 7 hours. They're definitely a worthwhile upgrade to the Sordins. Thanks to 'you know who you are' for the use of the range photos below. |
 Gel ear seals and foam inserts |
 Gel vs standard (rear) |
 Gel seals installed |
 On the range |
 |
IBH (Integrated Ballistic Helmet)
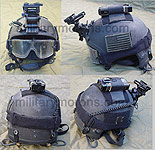 |
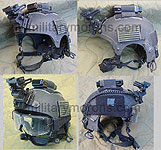 |
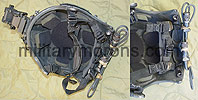
|
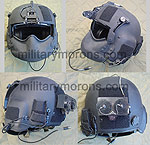
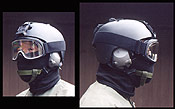
This is the Integrated Ballistic Helmet (IBH) made by ILC Dover. Don't ask me where to get one as I have no idea - it's not mine. MS 2000 strobe mounted on top and shown with Bolle T800 goggles and NOD mount.
160th SOAR Nightstalker helmet
Gentex HGU-56/P helmet like those worn by the 160th SOAR Night Stalkers. This one's not mine either. I just get the pics and post 'em. However, a kind contributor informed me that you can get the same basic helmet with maxillofacial face shield here.
| I'm not sure exactly who makes this helmet (it's
NOT Protec), but it was a carbon fibre finish version of the Protec Classic
Skate -a skateboard helmet. If you want one, just go to your local skate
shop and buy a Protec Classic Skate helmet, remove the stickers, and give
it a shot of matte black spray paint. I prefer this half-hat design to the full coverage Protec helmets. With some minor alterations, I am able to use my Peltor Tactical electronic hearing protectors with this helmet, which enhance your hearing while providing protection from loud sounds. Mounted to this helmet is the night vision mount for the PVS-7 night vision goggles. The green strap is the nape strap which prevents the helmet from falling forward due to the extra weight of the night vision goggles and is part of the NVG goggle mounting system. |
Canadian Ballistic Helmet
 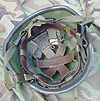 |
 |

PVS-7 mount attached to Canadian helmet. This requires relocating a small hole at the back - a simple modification |
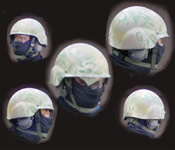
This is the a Canadian ballistic helmet, made by CGF
Gallet; the same company that makes the MICH helmet.
This one has a camo paint job, but it usually comes in a leaf green (see the
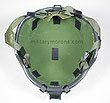
pic showing the inside of the helmet).
This helmet provides impact protection from 9mm bullets and fragmentation.
It is compatible with night vision mounts, goggles and communications packages.

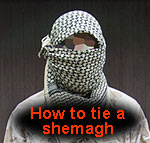
Shemaghs, popular headwear in the desert. Lots of different ways, but click on the right pic to see how I tie mine. |
PVS-7 Night Vision Goggles
 1 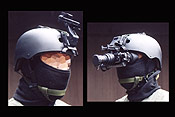 2 |
 3  Paraclete NVG pouch. Too small IMHO and difficult to insert and extract |
 
PVS-7 and pouch |
 Sacrificial filter installed on the lens. This is a clear filter that protects the lens in windy and sandy environments. |
| Here are the PVS-7B Gen III night vision goggles. They have an infra-red illuminator and automatic high-light cutoff to protect the tube. The goggle eye pieces are individually adjustable for diopter and interpupillary distance. They are extremely effective and a LOT of fun to play with. I was out in the mountains camping in October and could pretty much tramp around by star light with them in the brush. It can get really dark in the mountains at night, but with them I was able to get around quite well. The don't turn a really dark night into day, but more like twilight or early evening. The field of view is limited, however, and you have no depth perception, so using it effectively requires a lot of practice. Picture 1 shows the goggles used in conjunction with a head mount. It's not as uncomfortable as it looks, and you soon get used to it. The other pictures show it mounted on the half-hat helmet via a quick-release mount. The left picture in (2) shows the goggle mount in the folded up position. The goggles can be flipped up out of the way but they feel quite awkward due to their weight. When flipped down, the goggles are adjusted forwards and backwards and also in tilt so that they are comfortable. Picture 3 shows a rear view of the helmet and mounting strap. |
ATTENTION! PLEASE DO NOT LINK DIRECTLY TO MY IMAGES
-
IT RESULTS IN MY BANDWIDTH ALLOCATIONS BEING EXCEEDED,
AND MY PAGES GO DOWN. THANKS!
/ . PLEASE
OBSERVE AND RESPECT OUR COPYRIGHT! . /
©opyright by MilitaryMorons.com. All Rights Reserved. Reproduction, Duplication,
Distribution Strictly Prohibited.
Unless mentioned otherwise, content and images are the
property of militarymorons.com and are not in the public domain.
They are not to be used without
permission. Please Contact
me for permission to use any images or content herein.


