1st Line Gear Page
1 Page 2 Page
3 Page
4
1st line gear usually consists of the bare essentials:
what's carried in your BDU pockets and belt kit (pistol, spare mags, survival
equipment).
TO VIEW FULL SIZE IMAGES: USERNAME and PASSWORD are both "mm"
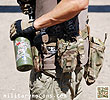
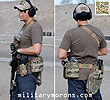
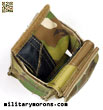
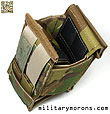
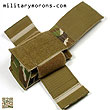
| 9/29/13 - The MSM Bottle Corset from Mil Spec Monkey is versatile little pouch that will fit a variety of water bottle sizes and shapes. The MSM Bottle Corset draws its name from the lacing found on corsets; the garment worn to hold and shape the torso, but is not to be confused with a BDSM Corset ☺ MSM sells diffferent bottle types, so it made sense for them to come up with a bottle pouch, or holder, that would be a 'one size fits most' solution. The Bottle Corset is a very flexible design that can accommodate bottle sizes from 12 oz to 32 oz, and of different shapes (round, oval, squarish etc). The Bottle Corset is made for MSM by Tactical Tailor, and is available in Crye MultiCam (shown here), Marine Coyote, Black, Foliage and Ranger Green. From the MSM website: Since we sell different bottle types we thought a versatile pouch would be appropriate. The MSM Bottle Corset design concept is to be a bottle holder that is very size flexible and built military tough. It can hold 32oz bottles such as the Nalgene while being adjustable down to small 12oz bottles. Being highly customizable, how the cords are routed allows the user to suit ease vs security needs; the bottom flap even allows for additional height adjustment. When not in use, the pouch can be stored flat and alternatively can hold other gear such as rifle magazines. The default cord routing has less power near the bottom to assist in one hand operation, but the user is encouraged to experiment adjusting both the cord routes and jump strap. Made by Tactical Tailor in the USA. Construction is mainly 500D Cordura nylon. Description - The Bottle Corset essentially consists of a front panel, and a rear panel, connected at the bottom by an adjustable flap, and on the sides by shock cord lacing. The rear panel has 5 rows and 2 columns of webbing, for use with long or short Malice clips. The front and rear panels are also padded very lightly which help some shape to the panels. A long flap extends from the bottom of the rear panel, and connects to the front panel. The front panel is covered in loop velcro, to which the flap secures. The flap has a small pull tab to enable the user to pull it apart from the velcro for quick height adjustment. This flap is adjusted to change the depth of the Corset, for taller or shorter bottles. The Corset will also hold other items like spare 30 round AR magazines. Three rows of 1" webbing form loops on each side of the front and rear panels, through which elastic shock cord is laced. The lacing arrangement can be changed by the user to suit his individual needs; but I found the factory lacing worked just fine without any changes. The loose ends of the side lacing come out the bottom, and the lacing is adjusted via the cord lock there. The Corset can be stored flat by cinching up the lacing all the way. A shorter loop of shock cord at the top is used to secure the bottle in the Corset. This loop is also adjustable, and the loose end can be tucked behind the pouch out of the way. This loop has a webbing pull tab.
|
Notes/Observations - The main lacing adjustment works very well to change the size of the Corset to accommodate different sized and shaped water bottles. Note that it's not like the speed-lacing system on a boot where pulling on the laces tightens up the Corset equally - you still might have to do some adjusting to ensure somewhat equal distribution/tension of the lacing between the loops. As illustrated here, the Corset had no issues fitting the bottles shown above and below; including a USGI canteen and the common 32 oz Nalgene. The small and large Liberty Works aluminum bottles also carried well in the Corset. This enabled me to have different sized bottles with me at the range, and to forego wearing a hydration pack on my back. I wore the Corset on my EMDOM CM belt, using two short Malice clips. Bottles are easy to insert and draw, with the USGI canteen being a bit tougher than the rounded cross section bottles due to its wider shape. The security loop worked with all bottle types as well, and kept them locked into the Corset. I think it's a great little bottle holder, and prefer it to a solid, non-adjustable bottle pouch.
|
A couple more MSM items - I'd also like to mention a couple of other small MSM items. First up is the MSM Multi-wrap. The Multi-wrap is MSM's take on the old 'SAS Headover', which is a tube of fabric, usually polypro or wool, that can be configured in different ways. The MSM Multi-wrap is available in two styles: the MSM Logo Multi-Wrap and the Shemagh Multi-Wrap. Both are made of thin, stretchy polyester microfiber material and constructed in a seamless tube shape. The Logo wrap is a dusty brown colour and has the MSM Monkey logo design. The Shemagh Wrap is OD with a black classic shemagh design. Both Multi-Wraps measure 19" x 9.5" unstretched. The MSM Multi-Wrap takes up much less space than a Shemagh, and can be used in hotter weather than the thicker insulated versions. While designed primarily for hot weather use, the MSM Multi-Wrap can also be used for chilly weather. The Multi-Wrap is great for use as a neck gaiter to keep the sun off your neck when the insulated versions would be too warm. It's also thin enough to use as a face mask over your nose and mouth to keep the dust out. Again, it's thin enough such that it doesn't restrict breathing or get too warm in hot weather. The MSM Multi-Wrap can be configured quite a few different ways; like as a neck gaiter, beanie, headband, skull cap or face mask. MSM has an illustration here showing some of them. I recently used the Logo Multi-Wrap during a range session on a hot day to keep the sun off the back of my neck. It also prevented hot brass from going down my shirt and kept my sling off my neck. I soaked it in water and it helped keep me cooler while the water evaporated. It was much more comfortable than a regular shemagh, plus it didn't have to be wrapped around in layers or have loose ends hanging off. Very compact and light - just the thing for hot weather. I suggested to MSM that he come up with a skull facemask design, and he did. It looks pretty mean! The second item I'd like to mention is MSM's Pear-S Carabiner. Commerical carabiners in 'tactical colours' are hard to find, so MSM took the matter into their own hands. MSM now sells their own branded Pear/HMS shape S-Screwlock carabiners in black, ranger green and dusty brown. They're made of light weight aluminum with a classic pin nose for strength. The Pear shape has a large gate opening and can served as a belay device using a HMS knot (an abbreviation for the German term "Halbamstwurfsicherung" which means half clove hitch belay). The screw lock is knurled and the screw is designed such that it cannot be overtightened. It meets UIAA standards. It just so happens that my wife recently joined a rock climbing gym, so I've been using these carabiners when I belay for her. They're a nice alternative to the commercially available 'biners you find at sports stores, and competitively priced to boot. Specs are as follows:
|
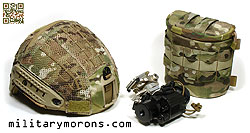
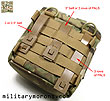
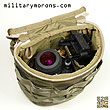
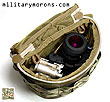
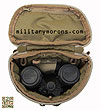
| 3/8/14 - The EMDOM-MM NVG Case from EMDOM USA is a case designed to carry and protect a PVS-14 plus mount, or dual-tube NVGs like the PVS-15. It's MOLLE and belt compatible, or it can be used as a stand-alone shoulder pouch by adding a strap. There are quite a few NVG pouches on the market, but none really offered what I was looking for; to carry and protect my PVS-14. While the PVS-14 is a relatively compact unit and easy to store in a universal pouch, it gets more challenging when you add the helmet mount and J-arm. Development of the NVG pouch with EMDOM took over a year, as we experimented with different materials and features, until we arrived at the production version shown here. What I wanted was a case that could be belt or rig mounted, and also serve as a transport and storage case when in a bag. Soft pouches don't provide crush protection and hard cases tend to be somewhat bulky. Description and exterior features - The EMDOM-MM NVG Case is a semi-rigid nylon case that is designed to accommodate monoculars like the PVS-14 with a helmet mount, or dual-tube goggles like the PVS -15/18 without a mount. The rounded outside corners of the case present a lower profile than a rectangular pouch of the same dimensions without sacrificing much of the volume, and is less likely to snag or catch a corner when you're moving through confined spaces. The case protects the unit in side completely with all-round padding and HDPE sheets.
|
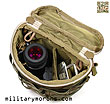
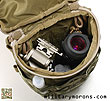
Interior - The interior of the NVG case is lined with smooth nylon and completely padded all around and on the top and bottom with closed cell foam. Loop velcro is sewn inside the case for installing the removable divider. The divider is used to separate the contents; when the NVG is store separately from the helmet mount. I've only tested it with the Wilcox and USGI helmet mounts.
|
The Accessory Insert is a stiff insert that has elastic pockets on both sides. It can be used when the helmet mount compartment isn't in use and can be dummy corded to the loops inside the case. Small items like batteries can be stored in the insert. The user also has the option of removing the divider, and using the case with the Wilcox mount attached to the PVS-14. The USGI rhino mount is too bulky when attached to the NVG to do this. When the Wilcox mount is attached to the PVS-14, it can be opened or folded; it'll fit into the case either way. The dual-tube PVS-15 will also fit into the case, without the divider of course. The PVS-14 with Norotos INVG mount will also fit. The PVS-7 is too long and will not fit the case.
|
The EMDOM-MM NVG Case isn't limited to night vision devices; you can carry range finders or small-medium sized binoculars that will fit into its envelope. Mounted to a belt or rig, the NVG is easily accessed and replaced with one hand without having to secure the flap with a buckle. While not crush-proof, the crush-resistant stiff HDPE sheets help protect the contents by distributing any impacts over a larger area. For transportation in gear bags, the case provides more protection than the USGI NVG soft pouch.
|
Regulation Tactical Reflex Magazine Pouch Mk2
| 4/19/14 - The Reflex Mag Pouch Mk2 (click on the Mk2 tab on the page) from Regulation Tactical is a transformer-like pouch that can be configured as a double-stack or single-stack spring-retention pouch, or a single-stack low profile pouch. Background - Back in December of 2012, I was contacted by Charlie, the founder of Regulation Tactical to see if I was interested in taking a look at their Reflex Mag pouch. The Reflex was designed to save time during magazine changes in tactical situations; when magazine retention was required. The Mk1 Gen 1 Reflex pouch that he sent me looked like a pretty standard double M4 mag pouch, with one exception: it had a steel leaf spring sewn into the rear of the pouch that put spring pressure against the magazines inside the pouch, providing retention for both mags. When the front magazine was removed, the rear one was pushed to the front, ready for use. If the spent or partially spent mag needed to be re-inserted into the pouch, it was simply pushed down behind the front mag and retained. The front mag could then be extracted. It was a neat concept, but I felt that it could use some refinement, so I provided some feedback. Charlie already had a Mk2 concept in mind, so I decided to wait for that to come out. Fast forward to November 2013 - Charlie contacted me again and said that the Mk2's were ready, so he sent me a couple to try out. The Mk1 Gen 2 has additional reinforced stitching and friction pads. The Reflex was designed around the need to retain a spent or partially spent magazine. Whether that's something you want/need to do; that's up to you. I'm not going to go into a discussion about retaining mags vs. dropping them, or returning partially spent mags into a mag pouch simply because I'd be out of my lane. Charlie, on the other hand, is a United States Marine with three combat tours under his belt, and designed the Reflex based on his experience, so he obviously saw a need for such a product. My writeup will therefore focus on how well the Reflex Mk2 does what it's designed to do. What it's designed to do - The Reflex mag pouch was designed to offer a solution to a number of problems.
Description - The Reflex Mk2 is made of Texcel webbing in solid colours as well as the MultiCam pouch shown here. In the photos directly below, the Reflex is configured as a double mag pouch. The inside of the back panel has two types of black fabric sewn to it; the top half is smooth to facilitate insertion of a magazine, and the bottom half is grippy to retain a magazine. Only half of the inside front panel has fabric on it; with more of it covered in the grippy fabric. When the first magazine is inserted into the Reflex, it first bears against the smooth fabric at the top; allowing it to slide downwards more easily and push the Pressure Mechanism to the rear. By default, the single magazine is always held against the front of the magazine pouch. The gap also provides clearance for anything mounted above the Mk2. When the second magazine is inserted behind the first one, it slides against the first magazine and pushes the rear panel back; compressing the Pressure Mechanism. The front magazine is always extracted first. When it is pulled out, it clears the grippy fabric at the bottom and slides out easily. The rear magazine is retained by the Pressure Mechanism pressing the grippy fabric on the back panel against it. When the first magazine comes out, the Pressure Mechanism pushes the second magazine to the front, where it takes the place of the first magazine. When the first magazine is partially spent or empty, it can be reinserted into the Reflex behind the second magazine with a firm push. For extra retention, the Reflex has a removable bungee flap with attaches to the front flap. It engages the velcro at the rear of the pouch; unusual in that there's no overlap of hook-loop velcro. It's just engaged along the edge only. I was skeptical that it wouldn't be strong enough to hold it, but so far it has yet to pop off. Note that Ranger pulls or other base plate extensions will require some adjustment of the bungee cord length which is done by untying the knot and changing its position. The flap is released by pulling the tab and disengaging the velcro. The flap will automatically fall to the front of the Reflex, where it can be neatly secured by the velcro in front if needed. The retention flap is removable by removing it from the front flap.
|
Reconfiguring - The Reflex Mk2 reminds me of one of those card-construction things where you build a car or something after cutting it out from a card sheet, then fold and glue it to make a 3D model. The Reflex has overlapping flaps and adjustments that enable it to be configured a number of different ways:
Note that the height of outer magazine is adjustable relative to the inner one by securing the center panel higher or lower when adjusting the side panels. Having the outer one higher makes it easier to grab, and also allows the baseplates to stagger. As you can see in the photos below, the spring is easily removed by opening up the pouch and the back panel flaps. The back panel flasp simply overlap and are re-secured with the spring removed. The single or double stack configuration, as well as spring tension is determined by the amount of side panel overlap on the front panel. |
Notes and observations - When I first saw a demo of the Reflex Mk2, I thought that it was a bit complex. But, after playing with it for a few minutes and understanding how it works, it's really not. Pretty straightforward, in fact, and I can reconfigure it within a matter of seconds. Figuring out how much to overlap the side flaps to adjust tension requires some experimentation, to find that balance between retention and ease of insertion of the second mag. I noticed that in the low-profile configuration, the instructions state to wrap the internal side flaps around the magazine then secure the external side flaps over them. When I did that, the only friction retention offered is on the inside of the front panel since the flaps covered the grippy material on the rear panel. Also, the internal side flaps aren't secured to front of the rear center panel and sometimes got in the way when inserting the magazine. I discovered that by tucking the internal side flaps behind the rear center panel got them out of the way, and also exposed the grippy material on the rear panel, so that the magazine is retained by grippy material on both sides. It works much better for me this way, so refer to the photo below. For mounting the Reflex Mk2 to my EMDOM CM belt, I just found it easier to tuck the mounting straps behind the horizontal webbing and use short Malice clips. I'd like to see the centers of the horizontal webbing secured with a vertical stitch to create two separate columns instead of the double-wide single column. At the range, the Reflex Mk2 performed as advertised; once I adjusted it, single and double magazines were retained and the 2nd mag could be inserted behind the first mag with a good, firm push. I tried out the Reflex with USGI, HK, Pmags and TangoDown ARC mags. The Reflex worked best with the USGI and HK mags because oft their smooth sides. The waffling on the sides of the Pmags create a bit more resistance (maybe a good thing), and the ARC mags are a bit tight as they're thicker. Magazines with a ridge that runs around the body will not work, like the 1st gen Lancer. Single magazines were secure in the during running - I didn't have any fall out. Since this is an open top and bottom pouch, the magazines are not protected from the elements or dirt/debris, but any dry sand or rocks are going to fall out the bottom. My only concern would be whether crawling around on mud would be an issue if it enters the magazine lips. When extracting the first magazine, a firm grip and quick, decisive tug extracts the magazine without issues. A slow pull tends to pull up the whole pouch. Same thing when re-inserting it - a quick, firm push down works better than a slow one. I don't think there's any other open-top double stack mag pouch that offers the ease of insertion of the second mag, except maybe double-stacked ITW Fastmags which aren't multi-configurable. The downside to having that benefit is added thickness. As you can see in the photo below, the Reflex Mk2 is about 3/4" thicker than the EMDOM double M4 mag pouch. This 0.75" gap helps the mags clear items that are mounted above the Mk2 pouch. The gap compresses to 0.25" in the prone position to reduce the silhouette. You can't insert the 2nd mag into the EMDOM one as quickly or easily with one hand, of course. Used as a quick-reload pouch without having to retain the first magazine, it's as quick as any other open-top speed pouch like the ITW Fastmag or EMDOM IAP. The strength of Reflex Mk2, in my opinion, is its multi-configurability to suit different needs without having to swap out or purchase mag pouches. It may not be as compact and light weight as dedicated single mag pouches or double-stack mag pouches, but it does offer unique features and versatility that no others do.
|
| 5/18/14 - The VERTX Solid Raptor Belt from VERTX is a stiffened shooter's belt designed to hold your pants up (naturally), or a light load of pistol and magazines/tools. The Raptor buckle enables it to be fit once, and worn without adjusting it again; unlike non quick-release buckles. Description - The 'solid' in the name refers to the solid colours that the VERTX Solid Raptor Belt is offered in - Black, OD Green and Earth (shown here). Another version in Kryptek camouflage is called the VERTX Kryptek Raptor Belt. The belt is 1-3/4" wide (actually 1.8") and is made of a single, continuous length of webbing that's doubled back on itself to form two layers. The webbing necks down to 1" wide at the buckle ends without any seams. It's reminiscent of Arc'teryx's Warp Strength Technology but not quite the same. The tapering down to 1" enables a smaller buckle to be used; specifically a 1" Raptor Buckle. This allows the buckle to pass through 2" pant belt loops, which is a matter of convenience as some belts use buckles which have to be removed to thread them through pant belts. From the VERTX website (with my comments added in italics):
The Raptor buckle is a side/quick release buckle made from 7075 aluminum plates riveted together to sandwich the spring-loaded releases. The buckles are anodized then powder coated with a non-glare finish. The male buckle can be inserted into the female buckle rotated 180° which doesn't really apply to this belt under normal pant usage, but might under other applications. The male buckle has a locking bar through which the 1" adjustment end of the webbing is routed. The Raptor buckle is 1.8" wide and about .45" thick at the rivets. The VERTX 'Shuriken' logo is embroidered tastefully on the female buckle side of the belt. Behind the buckle is a webbed tongue, with velcro on it, which engages velcro sewn to the inside of the female buckle end of the belt. There's about 2" of adjustment for the size medium shown. The smallest adjustment is limited by the 1" adjustment end when it widens. The largest adjustment is limited by the amount of overlap/engagement of the tongue. While it's possible to extend the belt such that the tongue no longer connects to the other side, you might as well just buy the right size. The medium is meant for waist sizes 32-34" (measured outside the pant with a tape measure, not what your pant size says). Observations/Notes - It's important to take actual measurements of your waist over the pants which you plan to wear the VERTX Raptor belt with, as many pant waist sizes don't reflect the actual measurement. I wear pant size 32, and knew that the medium Raptor belt fit waist size 32-34". I was surprised when I was near the larger limit of velcro engagment on the tongue. I grabbed a tape measure and measured around my waist, outside the pants, and it was indeed close to 34". So, the sizing of the VERTX belt is accurate; you just need to take an accurate measurement (don't cheat) for the right size. Also, if you plan on using the Raptor for an inside-the-waistband holster, you may want to go a size up to accommodate the added bulk of a handgun. The Raptor belt is illustrated above with a G-code holster with locking paddle attachment. While the weight of the G19 naturally pulls down the belt, the belt is stiff and doesn't sag or twist. I noticed that clip-on accessories for 2" belts worked well with the Raptor. I find it a bit inconvenient to thread any belt through pant belt loops as well as pouch belt loops or holster loops. Also, depending on size of the loop, the Raptor buckle may be too thick to pass through it vs. the end of just a belt. I like the fact that the belt is made from one continuous length of webbing, instead of 1" webbing sewn onto 1.75" or 2" webbing, which is typically done to enable a smaller buckle to be installed onto a wider belt. It's 'cleaner' with less stitching, and lower profile. It's not as thick and bulky as a rigger's belt, but stiff and supportive enough for light load, like an IDPA set up with pistol and two mags. Or, just a very cool pant belt. Note that you can get 10% off any order from PredatorBDU.com with the discount code MM10.
|


