1st Line Gear
Page 1 Page 2 Page
3 Page
4
1st line gear usually consists of the bare essentials:
what's carried in your BDU pockets and belt kit (pistol, spare mags, survival
equipment).
TO VIEW FULL SIZE IMAGES: USERNAME and PASSWORD are both "mm"
Off The Grid Concepts ADR MK3 Holster
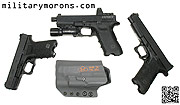
11/25/12 - San Diego-based company Off The Grid Concepts LLC is relatively new to the Kydex scene, debuting only earlier this year. While there are only so many ways to form kydex, OTG has been able to incorporate their own unique touches which distinguish their products from other kydex gear manufacturers. What I found most interesting is that they've come up with a way to make their holsters work for pistols with and without lights mounted, eliminating the need for two separate holsters. Background - I met Rob Tran and Nick of OTG at a handgun class, and immediately noticed the kydex gear they was sporting. It looked well made and had some unique cosmetic features that I had not seen before, I we chatted and I found out more about the company. Over the past few years, I've been using a variety of tactical holsters, mostly because I couldn't find one single holster that met all my needs. I mentioned that to Rob, and he said that he had a solution. I've been using mostly Safariland ALS holsters (as I find the ALS system very fast and intuitive to use when retention is needed) and the Eagle/G-code holsters as they were on sale and were simple, no-nonsense holsters. For attaching my holsters to MOLLE or regular belts, I've been attaching them to the Bawidamann PUPs, and they've been working very well. OTG currently offers two main types of holsters; the Sidewinder (a pancake style holster made of two pieces of kydex riveted together), and the ADR (Adaptive Draw Rig), which is a folded style made of a single piece of kydex that wraps around the front of the pistol sight track and is riveted in the back. I sent Rob a list of my requirements:
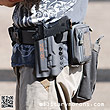
ADR MK3 - The holster I ended up with that you see here is the ADR MK3 with RTI hanger option, nocturnal, light/no-light option, in grey kydex (which I chose for my EMDOM SDU grey rig). The ADR is available in three different thicknesses of kydex; the MK1 is made of .06" kydex, the MK2 is .08" and the MK3 is .09". The slimmer kydex is used for inside the waistband carry while the thicker stuff is more suited for OWB (outside the waistband) use. OTG has kydex in black, grey, coyote, OD green, pink, purple, digital desert and combinations of two kydex colours they've named Dead Bird (grey+coyote), Red Back (red + black) and Ninja Turtle (OD green front, coyote back). I'm a lefty, and requested the RTI mounting hole pattern. My holster came with a right-handed hole pattern instead of LH, but all I have to do is get a RH RTI mount. As of this writing, OTG has switched to the ambi hanger with symmetrical pattern, which eliminates the need for a RH or LH hanger. The holster is held together by three rivets, and two tension adjustment screws with rubber spacers sandwiched between the kydex. My particular ADR came pad-printed with the OTG logo in orange ink, because it was a demo. Production items are hand stamped in black ink. Light/No light - Both the Sidewinder and ADR holster are available in light-compatible versions, called their "Nocturnal option". The Nocturnal Option is available on the Sidewinder, and the MK2 and MK3 versions of the ADR. The issue with most holsters designed for pistols with lights is that if you don't have a light, the holster won't retain the pistol properly. OTG came up with a simple but effective way to retain a pistol without a light in their Nocturnal holsters. This is their "Light/No Light" option. This allows the holster to be used with or without a light, eliminating the need for two separate holsters. A removable cross bar that blocks off the light channel is installed inside the holster, right where the trigger guard meets the bottom of the frame (you can see the grommet hole in the photos below). The bar is threaded on both ends and is retained by screws on each end. It can be removed when not needed. I found that by installing a thin washer on the crossbar at the back (between the back nut and the holster), I could adjust the tension slightly to make the retention a bit more secure, since the holster no longer has the light to retain the pistol.
|
 ADR MK3 with crossbar |
 Back of holster with RTI mounting pattern |
 Crossbar installed |
 Came with RH hole pattern instead of LH |
 Direct-attached to PUP |
 |
I requested that the holster fit three different slide lengths; the G19, G17 and G34. Initially, Rob forgot that I had wanted it to fit the G34 as well, and made it to fit the G17 and 19. So, I sent it back for some minor tweaks. The other small changes I wanted, after using it for a while was more clearance for the RMR and mag release button. When Rob made my holster, he did not have a Glock with a slide-mounted optic, so he made it by referencing the photos I provided. When it arrived, I had to dremel the holster a bit to allow the pistol to seat fully, as the RMR on my slide was a bit further forward than he had anticipated. He had also made it so that it covered the magazine release button, to prevent accidental release of the magazine. When re-holstering, I found that it'd pinch the web between my index and middle fingers sometimes, so I requested that he change that, which he did. He felt that it was better to err on the side of more protection than less, as it's also easier to remove material than add, and he was right. The photos at the bottom of this writeup at the range show the holster prior to sending it back. The photos below show it after Rob had gone over it. You can see the difference in coverage over the magazine release button. Works perfectly now.
|
 G19 |
 G17 |
 G34 |
 |
 RMR clearance |
Observations and notes - So, the performance requirements for a holster like this are pretty simple: does it fit and retain the handgun as expected, can the tension be adjusted to suit the user, is it stable, does it seem durable, does it work as designed/intended? I'd say 'yes' on all accounts (now, after the small changes). The quality of the workmanship on my ADR MK3 is outstanding. The fit is snug, the molding is distinct, and all edges are smoothed and polished. The handguns slide in smoothly and lock in with an audible 'click'. Before I sent the holster back to OTG to make the couple of small changes, I used it in a Kyle Defoor pistol class, where I discovered the pinching issue with the magazine button. No other issues besides that, and it worked very well with my G17 without light installed. After getting it back, I've used it for more range sessions with all three handguns - the G19, G17 and G34, and had no issues with any of them. I initially thought that the G19 might be not be very securely retained, especially without a light, but it definitely felt secure enough when running around and moving. One thing that I should have asked for on this holster was a PACE Clip. This is a piece of kydex that is added to the top edge of the holster to protect it from wear when doing one-handed slide racks off the holster. In the Defoor class, the RMR chewed up the edge (didn't affect its function) from all the one-handed slide racks I did, so next time I'd advocate adding the PACE clip. Off The Grid Concepts LLC is a custom kydex maker, so this means that not everything they show on their website is in stock. There are so many different options that most orders will end up being custom made to order. Contact OTG for turn-around time estimates. OTG is willing to work with the customer on custom projects (within their limitations of course), and these will obviously take longer. Since they're a relatively new company, they may not have the molds for less common handguns and accessories, so bear this in mind if you have an unusual kydex request. One of the curses of getting more well known is that unless the company expands, customer wait times increase to the point where people will take their business to the next up-and-comer for shorter wait times. Until recently Rob was pretty much a one-man shop working full time with occasional help. He has now got an addtional full time helper, and three part time helpers at the time of this writing, to address increases in orders. OTG products are have lifetime guarrantee on them, provided that they are not purposely abused. OTG offers custom touches not shown on this particular holster, like their 'Hexagon cuts' which are scallops on the sides for a unique look (that's what caught my eye on Rob's setup at the range) and dual tone options where applicable. Check out their gallery for examples of what they do. OTG is constantly experimenting with different concepts and designs so keep an eye on them.
|
| 12/3/09 - The M-Harness from CTOMS (Canadian Tactical & Operational Medical Solutions, Inc) is an evolution of their X-Belt PS, featured previously. The M-Harness can be considered as a special version of the X-Belt PS with a integrated Class II climbing harness with removable leg straps that can be donned or doffed without having to unbuckle, disturb or remove the load-bearing combat belt. Background - CTOMS is a company dedicated to providing training and equipment for the medic and soldier, LE officer and paramedic, SAR technician, first responder and health care professionals that go into harms way and those that provide medical care in remote and dangerous places. CTOM's CEO, Chris Kopp, comes from an Army and Air Force Pararescue background as well as a climbing background, so he has always had an interest in those avenues of product development. The inspiration for this new product came from a PJ buddy of his named Mike, hence the name 'M-Harness'. The idea behind the M-Harness was to bridge the gap between having to wear a harness under a padded gun/combat belt by eliminating a second piece of equipment and speeding up/simplifying the process of donning and doffing a harness. While there were other designs on the market of belts with removable leg straps, none really were to his satisfaction so Chris wanted to start with a clean slate and design something that met his particular vision for functionality and practicality. Description - The M-Harness is an evolution of the X-Belt PS; it shares the same padding system with its two side panels, rear panel and rear pad (details below). The difference is in the inner belt. Inner Belt - Instead of the X-Belt QR rigger's-style belt, the inner belt on the M-Harness makes up part of the climbing harness, and is made for CTOMS by CMC Rescue. By itself, when used with the rear V-ring, the belt is a Class I safety belt. There is no front V or D-ring. It is designed with a non-adjustable Cobra buckle as the main front buckle. When designing the M-Harness, the biggest issue was having a quick-release buckle on the main belt. A gun belt without a QR buckle isn't practical, and even with all the safety features built into the Cobra and similar buckles, it still wasn't acceptable to Chris as an attachment on the main belt of a harness. He therefore had to design a system that allowed for both convenience and safety. Adjustments are accomplished via a separate adjuster buckle under the PALS flap on the side. The reason for having separate main buckle and adjustment buckles is to facilitate the leg loop attachment system. On each side of the main Cobra buckle is space for the leg loop front attachment loops to thread through. When the leg loops are attached to the inner belt and connected with a carabiner, they capture the main quick release buckle so that even if it were to come undone, it does not affect the integrity of the harness in any way. While the adjustments are on one side of the main belt, the rest of the belt is stiffened with plastic between the webbing to provide rigidity for a holster. Pouches on the side opposite the holster can be mounted to the PALS webbing on the outer sleeve. In the photos below, the sewn-on labels on the inner belt are upside down because it's reversed for me for left-handed holster mounting. Normally, the adjustment buckle will be on the left side, not the right. Like the X-Belt QR, there is a 'mobile' drop down V-ring for rear attachment during rescue drags and as a quick attach point. This rear V-ring slides on the belt and is removable. Also included are two equipment loops. These are attached to the inner row of PALS sleeve are removable. They're used for hanging climbing equipment from. At the rear of the sleeve are two female SR buckles, for attaching the elastic straps on the leg loops to.
|
|
Padding System - The M-Harness shares the same padding system as the X-Belt PS. It is not just a sleeve through which the X-Belt QR (inner belt) is threaded through. It's actually made up of four separate pieces. Side panels/pads (2) - The two side pads wrap around
the hips at the front and extend around to the small of the back.
They are fully padded and are lined with a Drilex wicking mesh material.
A rigid plastic stiffening insert is sandwiched between the inner
belt and pad to prevent any buckling or sagging of the belt under
load. The center stitch also prevents rolling and slipping of the
pad relative to the inner belt or outer portion and creates a small
'breathing channel'. Normally, padded belt sleeves have a channel
where the inner belt goes through, with the outer portion sewn down
at the top and bottom, with some openings on the bottom for attaching
stuff to the inner belt. The M-Harness sleeve is completely open at
the bottom, and the outer portion is more of a 'flap' than a 'sleeve'.
The outer portion folds over the inner belt, leaving it open at the
bottom so you're not restricted to a single place along the inner
belt to hang a load from. The inner belt is threaded through some
belt loops sewn to the pad, which has a single row of molle webbing
at the bottom. The outer 'flap' secures to the pad with velcro and
a snap tab at the front of the belt. The outer flap has 10 columns
and 3 rows of molle webbing on it. Rear panel - The rear panel is non-padded, and overlaps and connects the two side panels in the rear. At each end of the rear panel is a molle connector, which secures the ends to the side panels. The rear panel can be attached anywhere along the molle webbing on the side panels, thus providing girth adjustability. The inner belt runs through two belt loops on the inside of the rear panel. There are 12 columns of 3 rows of molle webbing on the rear panel. Also on the rear panel are four suspender attach points, the two rear with D-rings. Rear pad - The rear pad slides over the inner belt and is centered between the two side pads. The pad is lined with non-slip material. Leg-loops - The Leg Loops make up the other portion of the M-Harness; also built by CMC Rescue. The loops are adjusted and release by a 1.25" Cobra buckle on each side. The Cobra buckles were acceptable on the leg loops as you can still hang/rappel with only a waist belt (although it'd be uncomfortable), and the likelihood of both leg loops coming undone is very rare. The 1.25" Cobra buckle was chosen over the 1" buckle to provide an added safety factor as the side release buttons on the 1.25" buckle are flush with the body and the ones on the 1" buckle protrude. Cobra buckles are designed not to release when loaded, or even when one button is released. A thick, stiff horizontal section of webbing joins the two leg loops. Above that section of webbing, are two vertical loops, or 'ears'. These loops are threaded through the webbing on the inner belt when the leg loops are installed. They capture the inner belt ends, so even if the main Cobra buckle is released, the ends are still connected via the horizontal section of webbing joining the leg loops. A carabiner (not included) then secures the 'ears'. Two elastic straps at the rear of the leg loops connect to the female SR buckles on the main belt, in the rear. These keep the leg loops up. The M-Harness comes with a zippered leg-loop pouch which mounts to the back of the main belt with Malice clips. For now, the inner belt and leg loops are only available in black.
|
|
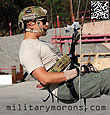
Using the M-Harness - The inner belt is first adjusted to the correct waist size. Once adjusted, no further adjustments are necessary unless needed to accommodate thicker or thinner clothing. The main belt is donned, and the main Cobra buckle engaged. The two leg loop 'ears' are then threaded through the inner belt at the front, pulled through then secured with a carabiner. The leg loops are then buckled around the thighs and adjusted. Lastly, the rear elastic straps are snugged to take up the slack. I got the chance to use the M-Harness back in October when Chris was in my area on a business trip. It'd been some years since I did any rappelling, so I was excited to do some, plus try out new equipment at the same time. Chris has set up my M-Harness beforehand to fit me, and also to accommadate left-handed holster use. At the rappel tower, Chris showed me how to don the M-Harness, and it only took half a minute to put on and adjust. Chris had brought along all the additional equipment, including the rope, anchors and a proprietary/prototype descent control device (which is why it's pixelated in the photos below). A series of errors were made that resulted in an unplanned test of the descender on my first rappel, and me with some nasty rope burn on my hand. First, I had brought along my SWMS/Camelbak Friction Fighter gloves. When we went up into the tower the first time, I found that I had left my gloves in my pack at the bottom. Being lazy, I asked Chris "hey, think we'll need gloves?" and he replied "nah, you shouldn't need them." I should have gotten a clue when HE donned his for his rappel, but I didn't. When it was my turn to go out the window, I made the second mistake of not getting familiar with the descent control device, which I had never seen or used before. I should have walked backwards with tension on the rope, and felt how much control the device gave. It seemed simple enough, so I just went with it. The third mistake was not thinking we needed a belay for safety. We were both complacent since it was only a couple of stories up, and he had trusted my previous rappelling experience. At least I had my Ops-Core Bump Shell on my noggin. On my first rappel, I needed some slack in the rope to position myself on the window sill, so activated the descender so that it'd allow the rope to pass through. Without getting a feel for the descender first, I didn't have a good idea of how much was needed to brake or unbrake the rope. As a result, when I went out the window, I started going down the rope - fast. I realized that all I needed to do was let go of the descender and it'd automatically brake. The descender is designed to not lock immediately, but to slow the rate of descent in a controlled manner (I'm talking something like one second vs. immediately) to prevent injury to the user from an abrupt stop. So, when I released the descender, it started to do its job, but since took a few feet for it to stop me completely and I didn't know when exactly that would happen, I instinctively tightened my grip around the lower part of the rope with my guide hand. The descender brought me to a complete stop just in time for me to come to a stop before I hit the ground. I landed on my feet ungracefully, and otherwise unhurt except for the rope burn on my right hand. We were also using 6mm rope, which is thinner than normal, and it only took a second to take my skin off. After I had apologized for giving everyone heart attacks, and ensured them that I was fine, I grabbed my gloves out of my pack and put them on. Slowly. Then I played around with the descent control device to get a feel for it. Better late than never. (Note that the 6mm rope we were using is NOT the same as 6mm cord - this was specialized rope made from special material and is not commercially available at this time). So, in that first rappel, I unwittingly proved that the prototype descent control device worked as designed, as did the M-Harness (much to Chris's glee). If either had failed, I could have suffered much more than just rope burn. I also learned my lesson to make sure that I try out any new equipment first to familiarize myself with it on level ground, or have a belay. Oh, and wear my gloves, no matter how short the rappel is. The rest of the rappels went without incident, although we DID use a belay/safety line from then on. In the photos below, which were taken after I had put my gloves on, you can see the OD green belay rope and the tan 6mm rope which I'm rappelling down. The M-Harness felt comfortable and secure, whether I was descending or just hanging on the rope for a while. The padding felt good and the leg loops didn't scrunch or pinch any more than other climbing harnesses I've used in the past. Doffing the leg loops took a matter of seconds, when we were done.
|
 |
|
The beauty of the M-Harness is that it integrates a
Class II climbing harness with a battle belt, so there's no intereference
between the two, or overlapping of buckles, webbing etc. By combining
the two pieces of equipment, it reduces weight and bulk while streamlining
the system. By having removable leg loops, you don't have to wear the
leg loops until you need them, and when you do, they're a breeze to
put on. The M-Harness has not been added to the CTOMS website yet, so
call them to order.
|
215Gear Enhanced Rigger's Belt
| 1/16/10 - The Enhanced Rigger's Belt from 215Gear is an alternative to their Ultimate Rigger's Belt for those who don't need the quick-release Cobra buckle feature. What makes it unique among rigger's belts is that it doesn't have the standard parachute hardware that rusts, and the usual metal V-ring has been replaced by a sewn-in attachment point. This makes for a simpler, lighter design. Description - The Enhanced Rigger's Belt (I'll refer to it as the ERB for short) is made to the same standards as the Ultimate Rigger's Belt, but with a coated stainless steel slide instead of the Cobra buckle. The slide buckle is Austrialpin's SlideBloc buckle, which is a self-locking framebuckle made of black coated A4 stainless tool steel with a moving stainless steel middle bar. The belt itself is 1-3/4" wide and made of a double layer of parachute webbing for the main part of the belt (threThe stitching on the entire belt uses heavier thread (instead of the standard #69 thread used on most rigger's belts) on a class 7 sewing machine. There are six rows of stitching along the entire length of the belt, in addition to the 4 inches of WW stitching right behind the sewn-in carabiner attach point, which helps stiffen the belt without the need for an insert, and reduce rollover. There is more than enough loop velcro sewn to the outside of the belt to retain the loose end (tongue) of the belt. The belt is available in medium (30-35" waist), large (35-40"), and X-large (40-45"). The most unique feature of the ERB is the sewn-in attach
point. Rather ingenious, I think. Instead of the forged V-ring that's
used on most rigger's belt, the sides of the outer layer of webbing
are folded inwards and are sewn to form a loop for attaching a carabiner.
The loops is there for instant access, and there is no need to have
an additional velcro tab to secure a V-ring when not in use. The sewn-in
loop is also lighter, and takes up less space at the front of the
belt. Observations/Notes - The Austrialpin SlideBloc buckle is lighter than most forged buckles used on rigger's belts, but also a bit taller, at 2-3/4" vs. 2-3/8". This is the only issue that I encountered with the buckle - that it's tall enough that it can extend above the top of the pant (as seen in the photos below). The edges/corners on the back side of the stainless slider are a bit sharp, and if I'm not wearing a t-shirt tucked into the pant waist, the buckle can poke me in my spare tire if i'm seated or bending down, which isn't the most comfortable. Now, I'm not fat, but I'm not the slimmest around the waist either. At the end of the day, I found myself with a little indentation where the top of the buckle stuck into my fat. One thing that reduced this is to wear the belt with the buckle off-center, and with the loop centered instead. This puts the buckle closer to a belt loop and less likely for the top of the pant to slip further below the buckle. I have rigger's belts with the standard buckle and the quick-release Cobra buckles. I like the convenience of quick-release Cobra buckles once the belt is on, but dislike having to remove the male portion from the belt if I have to thread it through smaller belt loops. Another convenience with a quick-release buckle is that once the belt length is adjusted, you don't have to mess with re-adjusting it every time the pants are unbuttoned, and thread the tongue behind belt-mounted pouches or a holster. So, it's a give-and-take situation when it comes to choosing between a rigger's belt with a quick-release feature or buckle like the ERB where you have to thread the tongue through. The single-layer, rounded end of the tongue also aids in threading it through belt loops and the buckle. Other than my small issue with the buckle, I found the ERB stiff, and otherwise comfortable for every day use. Most of all, I appreciate the light weight, high quality construction, and simplicity of the sewn-in loop.
|
Arc'teryx LEAF H·150 Rigger's Belt
| 11/11/11 - The H·150 Riggers Belt from Arc'teryx LEAF is a departure from the typical thick scuba/parachute webbing riggers belts. Instead, it's utilizes Arc'teryx's Warp Strength® Technology to spread the load uniformly across the entire belt, resulting in a very thin, low profile belt. While supple along its longitudinal axis, it's stiff enough vertically to support a holster and other light weight belt pouches. The H·150 is designed as a lightweight, comfortable belt intended as a 'belt for travel restraint' under the EN 358 standard. This means that it's not meant for mountaineering or climbing, but as a restraint (on a helicoptor, boat etc) to prevent the user from reaching a position where a fall can occur. It does not meet the requirements for fall arrest. In other words, use it to prevent a fall; not as a climbing harness to stop you during a fall. Warp Strength® Technology - Arc'teryx's Warp Strength Technology (WST) equally distributes pressure from edge to edge with minimal bulk and light weight. It's used in Arc'teryx's climbing harnesses (which have leg loops), and now in the H·150. Shown below is a WST sample, that illustrates the technology. A 3/4" wide length of Type 66 flat nylon webbing is spread out to 2" wide by removing the weft yarn (the cross-wise yarn) which 'binds' the warp yarn (longitudinal threads) together. The best way I can describe it is that it's what happens to your Levi's when you have holes in them, and the frays develop into long horizontal strands when the vertical threads are removed. In the first photo below, I've started to unravel the weft yarn in the webbing, which zig-zags across the warp yarn, by pulling it out. The warp threads then separate, without anything to hold them together. The WST removes the warp yarn for a section in the middle of the belt, leaving the ends intact. This creates a continuous, flat webbing belt that's wide in the middle and skinny at the ends. The wide section is laminated, which provides the laternal stiffness for the belt, then covered in stretch woven fabric, to create a 5-ply construction. The result of this design is a very thin belt that's supple along its length, but stiff enough to carry a handgun. It's also much more comfortable than the standard thick rigger's belts. Description - The H·150 comes in a small mesh bag that's recommended for use when storing or transporting it. The H·150 has 2" wide main portion, which tapers at both ends. At each end, the unseparated 3/4" wide webbing exits the main portion to form the buckle end, and the loose end. There are two keeper loops on the outside of the belt to secure the loose length of webbing. On my medium belt, the webbing is 19" long. There are also two black equipment loops at the bottom of the belt - these are normally used for clipping the hook of a lanyard or restraint to, when not hooked up to whatever vehicle the user is in. The buckle is made of 7075 T6 anodized aluminum, and is auto locking. It's actually made up of two seperate pieces, and is attached to the 3/4" webbing that's doubled back to form a loop. There are some very serious bartacks just aft of the buckle, spaced about 3" apart. These form the anchor loop in between the bartacks, and the loop is further reinforced from wear and abrasion. At the loose end side, a white instruction label is sewn behind the 3/4" webbing, which shows the correct way to thread the webbing through the buckle. The H·150 is available in black, Crye Multicam, and Crocodile (shown here), in sizes XS through XXL. The H·150 weighs only 150 grams/5.3 oz (for size medium). Observations/Notes - The swami belt design of the H·150 belt can be traced back to Arc'teryx's climbing harnesses, which incorporate the Warp Strength Technology. Even so, it is not to be used for climbing or fall arrest, but only for travel restraint with a safety tether. When used as a travel restraint, it's important to periodically inspect the H·150 for any wear or damage that might compromise its integrity. Treat it like you would a climbing harness. The H·150 is the lightest, most packable and comfortable rigger's belt I've come across yet. The 2" width enables it to be worn with most tactical pants and BDUs, whereas a regular rigger's belt can be too thick for some. Ironically, when worn with the Arc'teryx LEAF Sphinx or Talos pants in size medium, the equipment loops on the H·150 belt line up exactly, such that they're covered by the belt loops (see photos below). That's something that LEAF should be able to correct quite easily (I think), to ensure that the loops on the belt are offset from the pant loops for the corresponding sizes of their pants. When worn with other brands, the loops are accessible. The loops tend to hang up on belt loops when donning the belt, so it's not as smooth thread through belt loops as say, a leather pant belt. The loops can be cut off by the user, if the user deems fit. When worn normally, the anchor loop is centered in the front, not the buckle. The belt can also be worn backwards with the anchor loop at the rear, to provide a rear tie-in point. The loose webbing end is long enough so that you don't have to thread and unthread it through the buckle to don and doff your pants - handy for keeping anything mounted from sliding off. The belt can also be worn upside down, so that the loose end is on the right. the equipment loops end up on the top of the belt, though. While the H·150 has been tested with a number of different holsters and pouches hanging from it, it was never intended to replace padded 'battle belt' rigs. But, that won't deter people from attempting to use it as such. That being said, it's stiff enough to carry a handgun and a couple of extra magazines, or some light weight pouches. I don't think that it's the most convenient belt to use as a gun belt, because of the long loose end of webbing that needs to go somewhere to be secured (especially for a left-side mounted holster). If pouches or a pistol are mounted there, it can probably be tucked behind the belt then downwards. The same issue crops up when using standard rigger's belts with a longer loose end, vs a leather gunbelt where the loose end goes behind the belt, through the buckle. While Arc'teryx does not recommend it, the long loose webbing can be shortened, as long as the end is folded over and sewn down the same way. Note again that it's up to the user's discretion to alter the product against the manufacturer's recommendation. When worn with a minimal load, like a Glock 19 and one spare mag, the H·150 is very comfortable and stable, with no rigid scuba webbing to dig into your hip bones. The H·150 is also thin enough to wear under a battle belt, just as a pants belt. To the general public, it's also not as 'tactical' looking as a thick rigger's belt with metal V-ring. Like many of LEAF's products, the H·150 is a specialized item. For those who will use it as intended, and are looking for a lighter, more streamlined and comfortable alternative to a standard rigger's belt, it's well worth looking into.
|
Arc'teryx LEAF IE·70 Riggers Leg Loop
| 6/26/14 - The IE·70 Riggers Leg Loop from Arc'teryx LEAF is a single mesh sling that folds into two leg loops and attaches to the H·150 Riggers Belt to form an emergency rappel/belay harness. The H·150 Riggers belt is designed as a lightweight, comfortable belt intended as a 'belt for travel restraint' under the EN 358 standard. By itself, it's not meant for mountaineering or climbing, but as a restraint (on a helicoptor, boat etc) to prevent the user from reaching a position where a fall can occur as it does not meet the requirements for fall arrest. The addition of the IE·70 Riggers Leg Loop to the H·150 Riggers belt turns it into an emergency harness suitable for rappelling or belaying. Together, they're packaged as the E·220 Riggers harness, but the IE·70 is available separately if you already have the H·150 Riggers belt. The H·150 refers to the weight of the Riggers belt; 150 grams. The IE·70 loop weighs 70 grams, so the combo is the sum of the two - 220 grams. EN certification safety ratings: EN 12277 (harness configuration) and EN 358 (Rigger’s Belt configuration). Description - The IE·70 loop comes in XS, S, M, L XL and XXL; and is offered in Black (shown here), Foliage Green and Coyote. Note that the black/grey Kiva mesh remains the same while it's the edge webbing that changes colours. The IE·70 loop is one large loop with two mesh panels that taper at each end, joined by the edge webbing. The edge webbing is the main load bearing material. When the loops is folded in half by bringing the narrow lengths together, two loops are formed with the mesh panels. The mesh is stiff laterally, but flexible longitudinally so the IE·70 can be folded or rolled up. It's compact enough to fit in any small pocket, like a bicep/shoulder pocket. To use the IE·70 loop with the H·150; the user simply steps into the large loop; with the narrow portions centered at the front and back. The rear loop is grabbed and brought to the front underneath the crotch and both loops are secured to the H·150 anchor point. Observations/Notes - I used the IE·70 loop with the H·150 as a climbing harness at the local climbing gym. The IE·70 loop is different from a regular climbing harness since it's not connected to the belt other than at the anchor point on the H·150. Usually, the leg loops on climbing harnesses are connected at the back and cinched around the thighs to keep them from slipping down the thighs when there's no load on the harness. Without a load on the IE·70leg loops, they tend to slip down the thighs. When someone was belaying me, there wasn't constant tension on the leg loops so they would slip down while I was climbing and sort of got in the way. When hooked up to an auto belay device, which takes up the slack as the climber ascends, it wasn't an issue. Belaying for a climber also wasn't an issue as I was in control of the rope tension. Another thing I noticed was that the IE·70 loop can be a bit of a nut-cruncher if not positioned carefully. This is because the individual loops formed are not sewn down and separated from each other, so the load path is closer to the center of the crotch than a standard harness, where the load path is more to the sides. If you look at the photo below comparing my old Blue Water harness, which is a pretty standard/basic harness, you'll see what I mean. That being said, I didn't find it to be much of an issue once 'adjusted' and it was pretty comfortable to sit back on. The two observations above shouldn't detract from the IE·70 loop's intended use. It's intended as an emergency harness, not as a replacement for a climbing harness or for recreational use in a climbing gym. Light weight and stowability in this case trump some creature comfort. When I was using it at the gym, I thought to myself "Arc'teryx could make it a bit more comfortable if they sew the leg loops down so that they're separated at the anchor point." However, I realized that doing that would make the IE·70 harder and slower to don, especially over combat clothing. While slipping separate loops over my my snug little Prana climbing pants wouldn't be an issue, it could definitely be inconvenient out in the field, with combat boots and side cargo pockets loaded up. The IE·70 loop used with the H·150 is also going to be used more for rapelling and descending, rather than climbing up in full gear, so the issue with the leg loops slipping down would no longer be there. As for the 'nut crunching' - the intended users of the Arc'teryx LEAF line have brass balls, unlike me, so problem solved. So, given the intended usage of the H·150 and IE·70; the single loop design makes perfect sense.
|
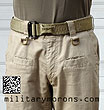
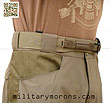
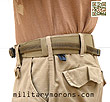
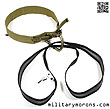
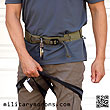
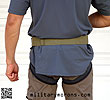
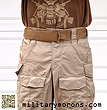
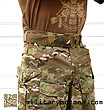
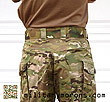
| 3/19/12 - The Adam belt from EMDOM USA is a trouser belt, meant to hold up your pants; nothing more. It's a simple, elegant design, feeling like it's part of the pant waist, rather than a separate belt. Background - I met Adam Stevens through Mel Terkla from Kifaru sometime in 2004 or 2005, over email. Adam was the owner of Smamit, in Israel, where he designed web gear and backpacks based on his love of the outdoors and military experience in the IDF. As fellow gear designers/enthusiasts, we corresponding over the years and often swapped gear ideas. In mid 2008, Adam sent me a simple trouser belt that he had dubbed the 'Tramping Trouser Belt', or 'TTB'. 'Tramping' in this context refers to walking the hills. The TTB had a simple plastic common loop through which the loose end of webbing passed through, and was secured with velcro. The webbing did not fold back on itself. At first, I was skeptical, but I found that it worked very well. It was also very low profile, and very comfortable under a battle belt. For holding up my pants, nothing beat it. During that time, Adam was battling cancer, and was very ill, and never got around to producing the belt except for a few friends. He passed away on Jan 31st, 2010. I used the TTB often over the years since I got it, and in early 2011, thought about resurrecting the design, with some changes I had in mind. I spoke to EMDOM about it, and they were game. But, I first tracked down Gal Stevens, Adam's widow in Israel, introduced myself, and explained what I wanted to do. I would not proceed without her blessing, which she gave. Although she asked for nothing, I told her that I'd give up and pass along my normal design royalty to her, since the original design was Adam's, and I only refined the design. I also named the belt after Adam, in his memory. EMDOM then made the prototypes, which I used daily for some months, then made a couple more changes. The final production model is shown below. Description - The original TTB was made out of 1.65" wide webbing, which we increased to 2". Most of my pants accept 2" belts, and I felt that it gave better support and comfort as it spread the load over a wider area. Instead of the plastic loop, we utilized ITW's 2" to 1" reducer, so that the pull tab would always stay centered. On the original TTB, the webbing was getting slightly fuzzy from the hook velcro on the back of the webbing end rubbing against it, so we used hypalon in that area to eliminate the wear. The Adam belt is shown below. It comes in black, sewer green, coyoteish, and Crye MultiCam. The tan plastic hardware is used for all the colours. For all sizes, the length of the loop and hook velcor is 9", which provides about 4-5" of adjustability. The size ranges are as follows:
Using the Adam belt - To don the Adam belt, it's routed through the belt loops, and then the loose end is inserted through the plastic reducer. A pull tab on the loose end is provided to help pull the belt through. Once it's through, the loose end is pulled in one direction, and the pull tab on the reducer is pulled in the opposite direction. The loose end is simple pressed against the belt and is secured by the overlapping velcro. I've used the original TTB for years, and the Adam belt for months daily, and never had it loosen. Adjustments are easy, and by securing the loose end over a belt loop, the belt stays in place and doesn't shift. The loose end can also be tucked behind a belt loop if desired. The Adam belt is the most comfortable BDU belt I've used, because it's made of thin webbing which conforms to the waist. It feels more like the pant waist band fits exactly, and that you're not wearing a belt. I was originally concerned that the hook velcro on the back of the TTB would cause some wear on my pants, but after more than three years of use, I have not observed any wear on the pants beyond some almost imperceptible fuzzing of the belt loop that I secure the belt over. The Adam belt is perfect for wear under a padded battle belt, as it adds practically no thickness to the pants waist, unlike rigger's belts. When doffing the pants, the loose end of the Adam belt can be left in the loop - there's no need to reroute it through every time. The webbing and velcro is intentionally snug in the 2" to 1" reducing loop to prevent it from slipping out too easily. While we changed some things, it still retains the essence of Adam's TTB. Adam's original design was functional, simple and practical, like much of what he designed. RIP, Adam. |
ATTENTION! DO NOT LINK
DIRECTLY TO MY IMAGES -
IT IS A VIOLATION OF MY COPYRIGHT.
/ . PLEASE OBSERVE AND RESPECT
OUR COPYRIGHT! . /
©opyright by MilitaryMorons.com. All Rights Reserved. Reproduction, Duplication,
Distribution Strictly Prohibited.
Unless mentioned otherwise, content and images are the property of militarymorons.com
and are not in the public domain.
They are not to be used without
permission. Please Contact
me for permission to use any images or content herein.
