TO
VIEW FULL SIZE IMAGES: USERNAME and
PASSWORD are both "mm"
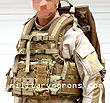
| 6/19/09 - In general, packs are designed to be worn without interference from anything else worn by the user; they work best when worn directly on the user's back with nothing more than his shirt between him and his pack. In the military, soldiers will sometimes have to integrate packs with the rest of the equipment they're required to wear, like LBEs, battle belts, vests, or bulky body armour. Usually, all that can be done to is to lengthen the sholder straps, then stick the pack on your back. The problem with wearing packs over body armour is that the pack is placed further away from your back due to the thickness of the armour (soft panels and plate), and that body armour usually doesn't provide a very good or stable platform for the shoulder strap route. As a result, the pack pulls the straps to the outside, they cut into the armpits or shoulders and generally suck to wear. The Mystery Cinch from Mystery Ranch is a simple yet effective solution to this problem. Description - The Cinch consists of two straps that buckle together, and are attached to any armour or plate carrier that has MOLLE/PALS webbing on the front. The Cinch should be located just above the arm hole in the armour. This location routes the pack's shoulder straps down the front of the armour and keeps the straps from cutting into the armpits and arms. A short length of hard plastic with a male snap in the middle serves as the anchor for the ends of the straps. The anchor is slid behind a row of PALS webbing with the male snap facing forward, either from above or below the attach point, then through the loop on the end of the strap, then through the second row of PALS webbing. The Cinch strap is anchored between rows of PALS and faces outwards. The female snap on the Cinch is snapped onto the anchor, which prevents the anchor from sliding out. One strap of the Cinch has a ladder lock for adjustment which is attached to the male end of a metal spring-loaded cam buckle. The loose end of webbing has velcro wrap sewed onto the end so it can be rolled up and secured. The other strap has the female cam lock buckle, with a quick-release pull tab that secures to the strap with a snap so that it isn't unintentionally pulled. The Mystery Cinch is illustrated below on the BattleLab Predator armoured vest. You can still fit pouches on the upper chest but I left them off so the Cinch could be clearly seen. Installation was a breeze, and when not in use, the Cinch stays buckled and out of the way.
|
 Coyote and Foliage Cinches |
 |
 |
 Attached to vest |
 Unbuckled |
 Buckled up |
|
Using the Cinch is as simple as lengthening the pack shoulder straps, then putting the pack on your back. I found it helpful to lean forward a bit when doing this, to get the weight of the pack higher up on the back and to help in pulling the shoulder straps down. The Cinch straps are routed around the outside of the pack shoulder straps and then brought together in the middle and buckled. The Cinch can be adjusted to pull the shoulder straps closer together or farther apart. The shoulder straps can also be tightened. In the first photo below, the pack is being worn without the Cinch used. I left the sternum strap on the pack shoulder straps. When the Cinch is used, it's not necessary and can be removed if possible so that it doesn't interfere with chest-mounted pouches. Note that you don't want to forget you have the sternum strap engaged and get choked expecting the pack to fall off when you pull the Cinch's quick-release. Anyway, you can see that the body armour doesn't really provide a good platform for the pack's shoulder straps. They either have to ride over the armour's shoulders or off them. If they were off them, they'd simply slip off my shoulders. The sternum strap keeps them together, but doesn't do anything to keep the pack from riding down my back. Since I'm wearing body armour, the pack's hip belt cannot be used as intended. The pack is also unstable in this configuration and will slip to one side or the other and move around. With the Cinch, the pack literally feels like part of the armour - it's that solid. The pack and armour move as a single unit, meaning it's very stable on my back. There's no slippage of the shoulder straps as they're routed straight down in front of the armour. The Cinch will work with any size pack - small or large. Even the smaller assault packs can do with some added stability when on the move. Just as important, there's none of the discomfort, pressure and chafing from before. The Cinch keeps the pack's straps from cutting into the armpits, arms or shoulders. A tug of the quick-release tab dumps the pack on the ground (remember that sternum strap, though) as the shoulder straps are looser than when worn without armour. The Mystery Cinch is a simple, small item that can make a huge difference in comfort and stability when wearing a pack over body armour.
|
| 7/17/09 -Mystery Ranch makes a lot of products that don't make it onto their website - sometimes because they're of a proprietary nature, and other times because the guys are just too busy to take photos and stick it up on the site (they've been added since this writeup). The One Man Duffel is one of those to which the latter reason applies. How the One-Man Duffle got its name is shrouded in
mystery (haha), but there are stories that say that it's called that
because you can fit a (small) man inside one, or it's just about the
biggest load one man can carry. The truth is somewhere in-between,
but what we do know is that the One-Man Duffel was originally built
for internal Dana Design use, to shuttle assemblies and components
of packs between production sites. They kept having to build more
because everybody involved needed one (or more) for themselves. When
forming the Mystery Ranch, the early One-Man Duffels were still used,
but they continued to disappear...
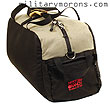
Description - The One-Man Duffel is simply a big duffel bag, with a capacity of about 10,000 cubic inches, but built better than most cheap duffels you see at the store. It's made from 1000D ballistic nylon. Seam-seam measurements are approximately 35"L x 20"W x 15"H. There are 1" webbing grab handles at either end, and D-rings for a shoulder strap (not included). The handle straps are long enough for over-the-shoulder carry, which is the way I find most convenient. Two compression straps run across the top. The main zipper is a heavy duty YKK coil with dual nickel plated pulls. Inside the cavernous compartment is a single pocket at one end. The neat thing about this pocket is that when you turn it inside out, it becomes the storage pouch/pocket for the entire bag. I found it easiest to turn the whole duffel bag inside out, then fold it in half and roll it up. It then stuffs neatly into the pocket and is zipped up into a 15" x 5" x 4" package. Two rows of webbing loops on the outside enable it to be secured or lashed to other packs. Notes - The One-Man Duffel is the bag you use to haul other bags. When my buddy and I used to go camping, the One-Man Duffel would have been great as a weather-resistant bag in which to keep smaller packages all together like my tent, pack, sleeping bag etc while they were in the bed of his truck. I've used it to haul a small duffel, a pack and carbine case, just to consolidate my gear into one package. The only caveat to that is the package can get real heavy, depending on what you're putting in it of course. I can defintely overload the One-Man until I can't lift it. Then it'd be a two-man duffel - one on each grab handle at the end.
|
 Storage pocket inside |
 Rolled up |
 |
 |
Spandura Duffels
| The Spandura Duffels are Mystery Ranch's take on the simple duffel, with a few of their own unique features thrown in for good measure. The Spandura Duffels come in three sizes: Small (2000 cu.in.), Medium (3000 cu.in.) and Large (7000 cu.in.). They're lightweight, yet semi-structured for ease of use. Their relative sizes are shown in the overlay photo below.
The Mystery Ranch Spandura Duffels have a unique expandable Spandura panel at the top, which allows the top of the bag to stretch, which allows the duffels to hold a bit more than their seam dimensions, and also to help keep the contents of a stuffed duffel from shifting around by providing some internal 'pressure'. The duffels also feature a double wall, into which a sheet of closed cell foam is inserted, which gives the duffels shape, while protecting the contents. The three sizes of Spandura Duffels share the same basic features, differing mainly in size:
Small Spandura Duffel - The small Spandura Duffel is about the size of a common smaller gym bag; a very handy size and easily carried just about anywhere. It'd make a good overnight bag. Approximate dimensions are as follows: Length (main bag, not including end pockets) 19" In the photos below on the right, you can see the zippered entrance to the foam insert compartment, which creates the 'double wall' on the front, bottom and back of the duffel. The single sheet of foam becomes a U-shape, protecting the contents of the bag and providing the bag with shape. It's much easier to load up a duffel with some structure vs. a fabric-only sack that is constantly collapsing. The foam can be removed if desired, if you just want a floppy duffel without shape, that can be rolled up and stuffed. The Small Duffel has a single compression strap over the top.
|
 Small duffel |
 Front |
 Top |
 End |
 End details |
 Removable foam insert |
 Foam removed |
|
Medium Spandura Duffel - The Medium Spandura Duffel is about the size of a large gym bag and would be a good travel duffel for a trip lasting a few days (depending of course on what you pack). Length (main bag, not including end pockets) 23" Like the Small Spandura Duffel, it has internal organizer pockets at each end for smaller items. Two compression straps run across the top. The small tabs on each side of the end pocket zippers are pull tabs, to aid in opening and closing the zippers when the pocket isn't full. They just give you a convenient feature to grasp when you're pulling the zipper the opposite way.
|
 End |
 End details |
 Compartment |
|
Large Spandura Duffel - The Large Spandura Duffel is a good-sized bag, suitable for hauling a vest/plate carrier, plus other misc equipment. I'm able to fit a rifle in there, as the bag can stretch to accommodate it. Length (main bag, not including end pockets) 29" The Large Spandura Duffel has three compression straps running across the top. This is now my go-to gear bag for a day at the range when I bring all my gear (vest/armour, belt, holster etc), as can fit my gear in there, plus ammo etc. Rifles are carried in a separate case. The stretch Spandura panel is really nice to have when the bag is stuffed just a bit too much, and you need to close that main zipper.
|
 Large Duffel |
 Front |
 Top |
 End |
 M4 for scale |
 M4 inside |
|
Observations/Notes - The Spandura Duffels are very smart looking, with their two-toned colour scheme. All of them have the same smoke coloured top panel. The foam insert provides just enough structure to the duffel without adding much weight, and also protects the contents from bumps and knocks. The internal end pockets are loose, so they may not retain their contents if jostled around a lot with a partially full bag. Use the external ones for smaller items. When not in use, they Duffels nest inside each other for easy storage. A set of all three sizes will cover a lot of your needs. Contact Mystery Ranch directly to order.
|
Gen 2 NICE Frame and Crew Cab Bag (NICE Frame Compatible)
| 11/24/06 - Not too long ago, Dana Gleason and his crew at Mystery Ranch introduced the Gen 2 version of the NICE (Nylinear Individual Carrying Equipment) ALICE-compatible frame featured on page 1. It's constructed of 500D cordura for weight savings, and it was found that 500D waterproofs better and holds less water than 1000D when saturated. The tighter weave also helps with tear strength due to an increased number of fibers in the seam. The carbon/fiberglass components of the main frame remain unchanged. Overall, the Gen I and Gen II both look very similar; but a side-by-side comparison reveals the the following changes:
The area of the Futura yoke/framesheet that contacts the back is narrower than before. The Gen I NICE framesheet needed a 'slip tool' for torso length adjustments, which was a flat sheet of plastic that was inserted in between the framesheet and the frame, disengaging the velcro and allowing the framesheet to be adjusted up and down. The Gen 2 yoke now has a removable stiffener, which doubles as the slip tool. To adjust the yoke height, the stiffener is removed from its pocket in the yoke, and shoved in between the back of the yoke and the frame, disengaging the velcro and allowing the yoke to slide up and down. If the pack is being used alternately with and without body armour, and quick adjustments are necessary, I recommend making small marks with a marker on the yoke to indicate pre-set positions after setting the pack/frame up. Also changed is the Load Carrier Accessory. The Gen 2 load carrier (go here for the Gen 1 load carrier writeup and photos) does away with the rubberized mesh 'wings' on the side; instead relying on the side and vertical compression straps to keep the load stabilized. The inner surface of the load carrier has a textured, rubberized non-slip surface. A fiberglass stiffener has been added to the outside. The side compression straps extend from the load carrier instead of from the frame - a change that was made quite early on in the product line. The strap kit is partially illustrated in the far right photo. It includes four short straps for the side compression straps, and four long ones for vertical compression and lashing. They utilize National Molding's new non-slip male buckles. Under certain conditions, loads shifting or movement can cause straps to loosen up if tension is relieved, and the webbing starts working its way back through the buckle. The non-slip buckle incorporates a tensioned bar, which only allows the webbing to be pulled through when being tightened. The bar wedges itself when the webbing is pulled backwards. The bar is released by pressing on the front of the bar, and must be depressed while pulling the webbing back through the buckle. Releasing it locks the webbing again.
|
 Gen 2 and Gen 1 NICE frames |
 Gen 2 yoke |
 Gen 2 stiffener |
 Gen 1 and Gen 2 load carriers |
 Non-slip inner surface |
 Stiffener |
 Strap kit |
|
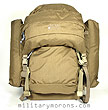
The Crew Cab is one of the NICE/ALICE frame-compatible packbags offered by Mystery Ranch. The Crew Cab is quite a unique animal, and when Dana described it as 'origami-like', he wasn't kidding. It's an expandable design, but expands in a most unconventional way. The Crew Cab must be used with a NICE or ALICE frame. It has no shoulder straps of its own nor provisions for attaching any. Like the NICE frame, it's made out of 500D cordura (coyote shown here), and weighs only 2lbs 10 oz (without the frame). At the top of the packbag is a frame pocket which slips over the top of the NICE frame. The packbag is then buckled and strapped securely into the NICE frame. Main bag - Starting out with the
fully collapsed/compressed bag; it extends no further than the sides
of the NICE frame. In this configuration, all that's visible is the
main bag. The main bag has a capacity of 1000 c.i., and has a main
compartment and outer pocket with zipper closure. The front of the
bag flips almost completely open when the main compartment zipper
is unzipped. Inside the compartment are two slot pockets for small
items. There's also a zipper above the pockets for access to a full
size compartment that houses a removable foam stiffening sheet. |
 Empty, compressed |
 Main bag full |
 Main bag compartment filled |
|
Side pockets and Hydro pocket
- Say you've filled up that main bag and need more storage space. Here's
where the origami comes in. By releasing all the compression straps,
the main bag swings down to expose two vertical and separate long pockets
behind it. Each pocket has a capacity of 450 c.i., and has a zippered
opening on the sides. They can be accessed by disengaging only one or
two of the compressions straps on that side.There is a stiffening sheet
on the inside of each pocket. The two pockets connect to each other
in the center with two side release buckles. By releasing the buckles,
the two pockets swing outwards to expose the back panel pocket.
|
 Main bag folded down to show long pockets |
 Stiffening sheet in long pocket |
 Back panel pocket |
 100 oz Camelbak bladder |
 Long pockets and main bag filled |
 Main bag and long pockets filled |
|
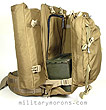
Load Carrying Space - Now, say you've stuffed out both side pockets and the main bag and need to carry even more. Unbuckle the side pockets in the middle and swing them out. Connect them to the compression straps on the main bag, and you now have a space in the middle of the pack for carrying large items, formed by the two side pockets and the main bag. The accordian-like panel which connects the bottom of the main bag to the back panel flattens out to provide a platform for the load. I illustrated the space with a large ammo can below. You can put ammo cans, a sleeping bag, bulky clothing etc in that space. The size of the load isn't limited to the perimeter of the panel - the side pockets and main bag will wrap around a much larger load with the compression straps extended. In this configuration, the crew cab functions very much like the Load Carrier accessor, except that the load height is fixed instead of adjustable. Daypack Lid - For even more additional volume, the optional NICE Daypack lid is available (also shown on the previous page). It can be removed and worn as a small day pack. It has two compartments, for a total volume of about 800 c.i., with horizontal zippered openings. The shoulders straps stow in their own pocket and include a sternum strap.
|
 Cargo space |
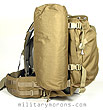 Long pocket connected to main bag |
 Daypack lid attached |
 Shown with all compartments filled |
 |
 Daypack lid worn |
|
The Crew Cab definitely has some surprises in store for those who haven't seen it. The key descriptive phrase would be 'and wait...there's more!'. Dana has gone outside the box and utilized the main bag and side pockets to form additional load-carrying space, instead of the familiar method of adding external pockets to a main pack bag. The Crew Cab/NICE frame combo offers a daypack, 3-day pack (or more), and load carrier, all in one self-contained, expandable unit. |
Oneiros OV Belt Guide & MEAN Pad
| 12/10/13 - The OV Belt Guide and MEAN Pad are two products from Oneiros Valley designed for the Mystery Ranch NICE Frame. Oneiros Valley (based in Las Vegas, Nevada) creates products for the hunting, outdoor and tactical markets, with a focus developing products for military personnel. Many current and upcoming products aim to improve existing military products, like the two shown here. OV Belt Guide - The OV Belt Guide is a simple attachment that converts a hipbelt to tighten through a forward motion and fits most Mystery Ranch and larger Dana Design packs. OV designed this primarily for military users of Mystery Ranch products, as a forward-pulling belt is a huge advantage when wearing body armor. The OV Belt Guide consist of a short length of 2"-wide webbing sewn to a 2" looploc. It can be installed on any hip belt that has a 2" triglide on it. The webbing end of the OV Belt Guide is slid through the triglide buckle and the hip belt's webbing is routed through the plastic loop. The OV Belt Guide essentially changes the direction that's required to tighten the hip belt. I've always found it a bit difficult to cinch up a hip belt by pulling away from the center; which is the way most hip belts tighten. Kifaru's packs have the 'Power Pull' which features the plastic loop already sewn into the hip belt. Especially with the NICE frame, I usually use the opposite arm to tighten the belt while the other arm presses the hip belt inwards. So, to tighten up the left strap, I use my right hand across my torso, and pull it to the left. This is made more difficult if armour is worn as chest pouches can get in the way. With the OV Belt Guide, the straps are tightened by pulling forward; where I have the most leverage/mechanical advantage.
|
 OV Belt Guide |
 NICE Frame without guide installed |
 Guide installed |
 Installed on right side |
 |
 Cinching up hip belt |
|
MEAN Pad - The MEAN (Man-Ergonomic Adjustable NICE) pad is another product designed specifically for the Mystery Ranch NICE (Nylinear Individual Carrying Equipment) frame. The MEAN Pad increases the thickness of the frame's lumbar region and is intended to help bridge the gap between the frame's lumbar area and the user when wearing the NICE Frame over body armour. This aids the NICE Frame fit properly over body armour and utilize the hip belt; transferring weight to the hips. It also gives the frame a more pronounced shape for those that feel the flat profile doesn't fit them well. Removable foam pads of varying thickness ensure a proper fit for any size. The MEAN Pad weighs only 2 ounces, and is made of 500D nylon, ITW hardware and mil-spec/Berry compliant webbing. The MEAN Pad features adjustable thickness via removable sheets of padding. The sheets that came in mine were 3/8" spacer foam (white), 1/4" and two 1/8" layers. The spacer foam is meant to placed against the side closest to the user. The MEAN pad is simply opened up and the top flap inverted to expose the foam inserts. The user can remove sheets as desired. To compensate for reduced thickness when sheets are removed, the velcro closure has extra engagement surface so that the flap can be cinched down tight - good attention to detail here. A non-slip rubberized surface contacts the lumbar area of the user.
|
 MEAN Pad |
 |
 Adjustable thickness |
 NICE frame hip belt |
 Attached to NICE frame |
 Tightened up |
 |
|
To install the MEAN Pad to the NICE Frame, the wingtip stabilizers can be separated from the belt to facilitate easier installation, and the MEAN pad attached. Being a bit lazy, I just installed the MEAN Pad without doing that. I just routed the MEAN Pad's straps around the lumbar pad, then used a pair of pliers to help tighten them, as there's too little space behind the lumbar pad for my fingers to get goo purchase on the strap ends. Once I got a hold of the strap ends, I just cinched them up alternately until both were tight. When installed, the MEAN Pad is solidly attached to the NICE Frame; it's not going anywhere. As you can see in the photos below, wearing a plate carrier creates a gap below the rear plate in the lumbar region. The full weight of a framed pack with a waist/hip belt worn over the armour is borne by the shoulders as a hip belt requires firm contact with the lumbar area to provide load transfer to the hips. Cinching up the hip belt just pulls the frame away from the shoulders at the top, and doesn't do anything for load transfer. The MEAN Pad fills the gap below the rear plate and allows the hip belt to make contact with the lumbar region and offload some of the pack's weight onto the hips. The MEAN Pad's non-slip surface keeps from slipping. The MEAN Pad doesn't have to be used solely in conjunction with armour; some people (like me) have more of a curvature of the spine in the lower back, rather than straight up and down, and can benefit from having the MEAN Pad there to fill that contour (after adjusting the thickness of the pad). If you have a NICE Frame and wear it over body armour, or feel that the NICE frame lumbar region is a bit flat for you, then the MEAN Pad is going to be a worthwhile accessory to get for it.
|
 Bottom gap |
 NICE frame over plate carrier |
ATTENTION! PLEASE DO NOT LINK DIRECTLY TO MY IMAGES
-
IT RESULTS IN MY BANDWIDTH ALLOCATIONS BEING EXCEEDED,
AND MY PAGES GO DOWN. THANKS!
/ . PLEASE
OBSERVE AND RESPECT OUR COPYRIGHT! . /
©opyright by MilitaryMorons.com. All Rights Reserved. Reproduction, Duplication,
Distribution Strictly Prohibited.
Unless mentioned otherwise, content and images are the
property of militarymorons.com and are not in the public domain.
They are not to be used without
permission. Please Contact
me for permission to use any images or content herein.


