Weapon Lights Page 1 Page 2 Page 3 Page 4 Page 5
TO VIEW FULL SIZE IMAGES: USERNAME and PASSWORD are both "mm"
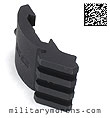
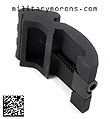
| 6/27/10 - The Offset Flashlight mounts from Gear Sector share the same base platform as their Rail Sling Mounts, with their curved cross section and ergonomic design. They're designed for optimal placement of a weapon light and can be installed in any of eight different positions to suit most shooting styles and grip configurations. Offset light mounts have increased in popularity over the past few years as shooting grip styles change - the first offset mounts were used to place the light in a position (usually at 4:30 and 7:30) where the thumb could activate the tail cap when using a 'wrap around' hold on a vertical grip, where the thumb went under the rail. Some people, however, started using a 'thumb forward' grip with the support thumb pointed forward along side the upper part of the rail, and found that using an offset mount was more comfortable than just mounting the light on the 9 or 3 o'clock rails. Instead, the light would then be in a 10:30 or 1:30 clock position, right where the thumb is. Offsetting the light and placing it in the 'corners' between the rails brings them closer to the bore, and reducing the width of the weapon. There are quite a few offset light mounts on the market now, each with slightly different features and attributes. The Gear Sector light mounts shown here share the same ergonomic platform as their Rail Sling Mounts, which consists of a base which looks like the cross section of a rail panel with an offset ring that slides onto the rail and is held securely by a screw/clamp assembly. The ring has a gap with a retaining screw that tightens it down. The mounts are CNC machined from 6061-T6 aluminum and finished with a mil-spec type III, class II hard anodize. They are then Cerakoted in black, foliage green, OD green, or FDE (flat dark earth). Each mount weighs about 1.4 oz. The mounts come in three different ring sizes that fit SureFire E-Series lights, 6P lights and G2 lights. The size of the rings are 0.825", 0.995" and 1.020" respectively. Note that these dimensions are intentionally undersized, and will result in a snug fit on the light bodies, sometimes requiring a flat head screwdriver placed in the ring gap to expand the retaining ring while inserting the light. This was done so that the lights could be adjusted and fixed in place before tightening down the clamp screw. I do not have any E-series lights, so I was unable to try the E-series mount out, but I had a variety of G2 and 6P lights to use the mounts for. The 6P mount fit my 6P bodies perfectly, and I didn't have to use a screw driver to expand the ring. The G2 rings were very tight. I measured my two G2s and the bodies came in at around 1.030"-1.034", which required quite a bit of expansion of the rings. Without expanding the rings, I could not insert the lights. I think that I could have done with a looser fit, and speaking with Jason at Gear Sector, the ring diameter for the G2 lights has been increased slightly. The G2 lights, being plastic, aren't as consistent as the 6P bodies, and the variances in diameter results in different fits.
|
|
On the back side, the mounts have a screw and clamp assembly, which are removed for installation. Each mount comes with an allen wrench and small packet of Vibra-tite VC3 thread locker, which is applied to the screw threads and allowed to dry. The mount is then slid onto the rail (usually from the front); the screw/clamp assembly is inserted and tightened down. The screw prevents the mount from sliding along the rail. One of the reasons for the slide-on/half-clamp design vs. a 'rock on' design with a full-length clamp is that if the screw ever loosens and the clamp comes off, the mount is still attached to the rail and will not come off unless it slides off completely. This prevents loss of the light if the screw and clamp ever come loose. Another reason is base commonality with the other Gear Sector products.
|
|
The caveat with any slide-on mount is that the configuration of the weapon might limit the ability to install and place the mount where you want it. With a fixed front sight base, you have to remove the rear sight or optic, and slide the mount all the way from the rear of the receiver if you want to mount it on the top rail. Depending on clearance, front folding sights can also prevent the sliding of the light mount from the front, and might have to be removed and reinstalled. For example, on the receiver above with the Troy folding front, I was unable to mount the light on the right side for thumb actuation (I'm a lefty). The mount needed to be located behind the front sight so that it'd have clearance. If I removed the Troy sight to allow the mount and light to slide on, I could not access the sight mounting screw as the light body would be in the way. If I slid the flashlight mount without light onto the rail so that it'd behind the front sight, I could no longer access the ring clamp screw to secure the light in the mount. So, I mounted the light on the left side of the rail and used a top-mounted pressure switch. I'd love to see Gear Sector offer a rock-on mount for the lights as that would provide a bit more mounting flexibility. The SCAR's design makes it a challenge to mount a light at the 10:30 or 1:30 position. The SCAR sling loop prevents installation of the light mount from the front as the ring won't clear it. The light head prevents the mount from being slid from the rear. The only choices on the SCAR with the GS mount are with the light at the 7:30 and 4:30 positions. For a flashlight mount, given the choice, I'd sacrifice the security of a slide-on mount for the convenience of a 'rock-on' mount with a full clamp that can be 'rocked' onto any place on the rail. I'd just make sure that I used thread locker. The GS Light Mounts are well made, streamlined, low profile and compliment the look of the weapon.
|
| Gear Sector SF X-Series Light Mount 10/29/10 - The SureFire X-Series Offset Flashlight mounts from Gear Sector are designed to place a SureFire X-series (200, 300, 400) light at the 'corner' positions on a rail (vs. the ones on axis). This provides additional mounting options for users and allows them to tailor their setup to suit their shooting styles. The X-series light mounts share the same base platform as the Rail Sling Mounts and Offset Flashlight mounts shown in the above writeup, with their curved cross section and ergonomic design. They're designed for optimal placement of a weapon light and can be installed in any of eight different positions to suit most shooting styles and grip configurations. The main difference between the X-series mount base and the rail or offset flashlight mount base is that the clamp and screw is centered, rather than offset. The base installs by sliding onto the rail and is held securely by the screw/clamp assembly. The X-series mounts are CNC machined from 6061-T6 aluminum and finished with a mil-spec type III, class II hard anodize. They are then Cerakoted in black, foliage green, OD green, patriot brown or FDE (flat dark earth). Each mount weighs about 1 oz. The X-Series mount is about 1.35" long, and has a short length of picatinny rail machined at an angle, with 3 cross-slots. The mount is designed so that it tucks the short rail section into the quadrail as closely as possible without causing clearance issues. It can be mounted on any of the handguard rails - top, bottom, left or right. The SureFire X-Series light (or any other similar light like the Streamlight TLR-1) installs onto the rail as it would on the handguard.
|
|
Note that in the photos below, the mount is shown installed on a KAC URX II rail with integral front sight. On handguards where a clamp-on front sight has been installed, the X-Series mount will have to be installed behind or in front of it, as there is not enough clearance to place the light beside the front sight. The X300 is tucked into the corner pretty much as close to the rail as it will go, shown here in the 1:30 position. This position places the toggle/rear switch of the X300 in a convenient position for right thumb (I'm a lefty) activation. The X-Series light mount also can do double-duty as an offset optic mount for a back-up sight like a Aimpoint Micro T-1 or H-1, or the Burris FastFire illustrated below, in front of a magnified optic. The FastFire is mounted beside the scope and requires only a cant of the rifle to the right to line it up on target. A higher mount would probably be better, as it's quite low to the bore line. Note that mounted as shown, beside the scope, adjusting the FastFire requires removal of the scope to access the windage adjustment screw on the right side, unless it is placed further forward in front of the scope.
|
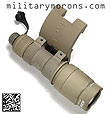
| Gear Sector SF Scout Light Mount 11/18/10 - The SureFire Scout Mounts from Gear Sector are offset light mounts designed specifically for the popular SureFire Scout series of weapon lights, enabling the user to install them in one of eight different positions on a rail for optimal positioning. This allows the user to better tailor their setup to suit their individual shooting style. The SureFire Scout lights reviewed more than five years ago have proven to be very popular choices despite their relatively high price. They've improved in performance over the years, and a single-cell Scout, the M300A has been added to the lineup. FDE anodized Scout lights are also available. The Scout lights are compact and light weight, but part of their high cost comes from the integral mount machined into the otherwise cylindrical body. The factory Scout mounts are available with thumbscrew rail clamps or throw-lever rail clamps. I've had issues with the thumbscrews loosening, so switched over to LaRue throw lever mounts which took care of that issue. I always wondered why it took so long for someone to offer an offset mount for the Scout lights to place them in the 10:30 or 1:30 position. Gear Sector recently released their offset mount for the SF lights, and it shares the same base platform as the X-Series Light Mount shown in the above writeup, with the same curved cross section and ergonomic design. It can be installed in any of eight different positions (up/down on the side rails and left/right on the top or bottom rails) to suit most shooting styles and grip configurations. The base installs by sliding onto the rail and is held securely by the single screw/clamp assembly. The Scout Light mounts are CNC machined from 6061-T6 aluminum and finished with a mil-spec type III, class II hard anodize. They are then Cerakoted in black, foliage green, OD green, patriot brown or FDE (flat dark earth). Each mount weighs about 1 oz. The SF Scout mount is about 1.35" long, and has the two-screw Scout light interface machined at an angle. New screws are supplied, as well as allen wrenches and thread locker. Like the other GS offset mounts, the Scout mount is designed so that it tucks Scout light into the space between handguard rails as closely as possible. It can be mounted on any of the handguard rails - top, bottom, left or right. To install the light to the mount, the factory mount is first removed. The light is then attached to the mount with the two supplied screws, and some thread locker. The mount is then slid onto the rail; the screw/clamp assembly is inserted and tightened down. The screw prevents the mount from sliding along the rail.
|
|
Note that any rail-mounted front sights will have to be removed and re-installed each time the Scout Mount is installed and removed, as the Scout mount is a slide-on/half-clamp design vs. a 'rock on' design. This applies to most mounts that slide in instead of rock on. That's also one of the reasons I like the KAC URX handguard so much with its integrated front sight - it's streamlined and allows slide-on mounts to be installed right beside it. The SureFire Scout lights have a narrow body, which is one of the features that appeals to me. The narrow body has more clearance between rail mounted front sights than a regular 1" light body. The mount itself, and the head of the light will not clear a rail-mounted front sight, so the sight will usually end up in the space between the mount and head. The head may have to be removed during installation of the mount, and the mount/body slid to the rear of the rail so that the front sight can be reinstalled. In the photos below, the M600C is shown mounted for left-handed thumb activation on the URX. This is a rifle-length URX and provides enough rail space to mount the Scout light far enough forward. Activation with the thumb feels natural and I like the fact that the Scout light is tucked in more than if it were mounted on the side rail. On some shorter handguards, there may not be adequate room to mount the light and also activate it with the support thumb. This is illustrated on the FN SCAR 16S, which has a carbine-length rail. With the position of the support hand, there is no room to mount a light or easily activate it with a tail switch. In this case, the M300A is mounted on the strong side and activate via pressure switch on the right side. The LaRue index clips are most useful for keeping the cables neatly routed. Note that I cut off the left front sling loop on the SCAR so I could mount the light without interference. The Gear Sector SF Scout light mount is a product that's long overdue, but I'm glad it's finally here.
|
| LaRue Tactical LT752 Scout Offset Mount 4/10/11 - If you've been waiting for an offset mount for the SureFire Scout light with quick-detach capability for what seems like years (like I have), the LT752 SureFire Scout Offset Mount from LaRue Tactical has finally been released. LaRue Tactical has offered Scout Light mounts before, for the SureFire series of Scout Lights. The LT172 is still an upgrade from the standard SureFire thumb screw mount (which has loosened up on my and fallen off), and is more compact than SureFire's new throw lever mount (which replaced the A.R.M.S. lever used on some of their other lights). The only thing I didn't like about the LT172 was that it placed the light right on the rail without an offset. That's not really a fair complaint, as it was designed to be a direct replacement for the stock mount without changing the position of the light. As shooting grips change over time, and I explored different support hand positions, I found myself preferring offset lights positioned between the top and side rails, rather than mounted only on the side. Placed at the 10:30 and 1:30 position, it's easier to activate a push button switch with the thumb, when using the 'thumb forward' support grip. While offset mounts for 1" lights and such were common, dedicated offset Scout Light mounts were not. I know I asked Vltor to make a Scout version of their excellent SM-OCG mount when it came out almost three years ago, but they had too many irons in the fire at the time. It was only last year that Gear Sector released their offset Scout Light mount (above), which filled the long-empty niche in the market. The only thing the Gear Sector mount doesn't have is quick-detach/attach ability. For a dedicated light on a weapon, it works wonderfully. However, if you have fewer lights than rifles and want to move them around, something with a QD feature makes it much more convenient. That's where the new LT752 comes in. Description - The LT752 utilizes the familiar and proven quick-detach locking lever system. I've got LaRue Tactical mounts on all my optics and many accessories, and they are SECURE and will NOT loosen when correctly adjusted. The LT752 is a replacement mount that replaces the integral thumbscrew mounts on the SureFire Scout lights. It'll work on both the 2-cell M600 series and the 1-cell M300 series lights with the thumbscrew mounts. It will not fit the 620-series of Scouts with the QD mount. It's a direct replacement for the stock thumbscrew mounts and require only a couple of minutes to install. It comes with all the necessary hardware and tools, plus a little vial of blue Loctite. All you do is unbolt the thumbscrew mounts, then bolt on the LaRue one. Like the other LaRue mounts, they're type III hard anozided with a matte black finish, with steel locking levers. The LT752 has the lever safety lock, which prevents the locking lever from being opened unless the safety lock is slid open. It's a redundant feature if the locking lever is correctly adjusted.
|
|
iThe LT752 was designed to position a Scout light as close to the rifle as possible, putting it in the optimum position for thumb activation. The mounts can be attached to the lights with the locking lever pointing forward or backward, and on any of the four rails, which gives the user eight different mounting options. The mount has a rail portion (the flat part with the 'LaRue' engraving) and the light mount portion, which is angled. The top inside edge of the light mount is beveled to provide additional clearance to rails and folding sights. You can see that it's angled just about as close as it can go. Which folding front sights it can be mounted next to depends on the sight. It's shown below next to a KAC front sight. Typically, the mount will be behind the sight with the body of the Scout light beside it. The head of the Scout is usually too large to fit beside the sight. The good thing about having the QD feature is that you can rock the mount onto the rail behind the front sight; you don't have to remove the front sight in order to slide it from the front. This also makes mounting the LT752 easier on the top rail if the weapon has a fixed front sight. If there was something I'd change on the LT752 (besides also offering it in FDE, please), it'd be to make it a bit shorter front-back for the angled portion. It doesn't have to be any wider than the Scout light 'feet' spacing. This way, it'll provide more clearance for various front sight mounts. You can see that I got lucky with the KAC sight - it looks like it interferes but it doesn't. I've also found that longer rails (at least midlength) are more conducive to using the Scout light like this than carbine-length rails, as they provide more space to mount the light and place your hand properly behind it. So, if you were waiting for an offset Scout mount with QD feature, the LT752's your huckleberry!
|
| Badger Ordnance M7 Scout Light Mount 8/3/11 - The M7 Flashlight Mount from Badger Ordnance is an offset scout mount that also incorporates a mounting point for a QD push button sling swivel. It's well made and designed, which is what we've come to expect from Badger Ordnance. I'm glad to see yet another offset scout flashlight mount offered to the market. After a number of years of no offset mounts for Surefire's M600 and newer M300 Scout lights, we're finally getting some more choices. Placed at the 10:30 or 1:30 position, it's easier to activate a push button switch with the thumb, when using the 'thumb forward' support grip. Description - The M7 Scout flashlight mount is designed to work with the Surefire M300 and M600 (shown here) series of flashlights, as well as provide a rotation-limited QD sling swivel mounting point. The M7 mount is designed specifically to work with laser aiming devices such as the ATPIAL/DBAL and all other issued aiming lasers by providing the necessary clearance for the beams to operate without interference from the flashlight or user's hand. It is made of mil-spec hard anodized 7075 aluminum in black only, and weighs 1.27 oz.
|
|
The M7 mount differs from other offset scout mounts by the lack of an angled mounting surface for the light. Most offset scout mounts have an angled platform extending from the base, that the flashlight bolts to. On the M7, the flashlight is bolted directly to a horizontal platform on the base and secured with two T-15 torx screws. While this increases the width of the base over other mounts, it doesn't extend any further to the side of the rail than the light body. The lack of an angled platform means that there is nothing between the light and the top rail, and there is now more clearance for rail mounted front sights. Some offset mounts cannot be mounted to the side rail right beside a rail mounted front sight as they conflict with the front sight base, but this less of an issue with the M7. As long as the sight clears the flashlight body, it's good to go. Incorporated into the base is a rotation limited QD push button sling swivel mounting point. The QD swivel can be installed in four orientations and the rotation is limited to about 40° in each orientation, which prevents the sling from twisting. The base has a clamp that allows the mount to be 'rocked on' to the rail - it doesn't have to be slid on. A single recoil lug prevents any fore-aft movement once it's secured with the single T-15 torx screw. I found the tailswitch to be located in just the right spot, and all I have to do is move my thumb to activate it. While I don't use a forward sling mount location, there are lots of folks who do, and will appreciate having the convenience of an integrated QD swivel mount right in their light mount.
|
|
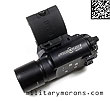
10/23/11 - The WML (Weapon Mounted Light) from INFORCE is a dedicated weapon light that provides white and IR (Infrared) illumination without the use of filters, variable output, an integrated mount and ergonomically angled activation button. Emissive Energy Corp is an American manufacturer that designs, engineers and produced optoelectronic systems. Founded in 1991, Emissive Energy Corp spent the first 10 years developing and manufacturing custom laser and LED-based products. In 2000, the more familiar INOVA® brand of LED lighting equipment was developed. I featured the INOVA 24/7 LED Smartbright here a few years ago, and still use it today. Emissive Energy sold the INOVA brand to Nite Ize, Inc. in 2010. In 2008, the INFORCE® brand was established to develop products specifically for military and law enforcement applications. Description - The WML (Weapon Mounted Light) is a distinctively shaped dedicated weapon light, intended for close to mid-range engagements with a carbine. It has a carbon fiber composite-covered aluminum body with integrated mount and attaches to any mil-std 1913 rail. The WML produces 125 lumens with a tight, hot spot beam for close to mid-range applications and balanced peripheral light (spill/corona) for discernment of the surrounding area. Here's a rundown of the WML's features:
|
|
The rubber activation switch/button on the rear of the light is used to switch between the various light modes:
The White LED/IR model has an extra thumb-operated lever on the side, opposite the mounting clamp. With the lever in the forward position and the little white dot visible, the WML provides white light. The lever is rotated to point towards the rear of the light, with no white dot showing, for IR operation. No filters are needed to switch from white to IR operation. The IR mode has no strobe or the ability to reverse from high/low to low/high. It does have the momentary, high, low switch features. The single CR123A battery is changed by unscrewing the light head completely. The head is aluminum covered in the same material as the body for protection. The slots on the side of the head are vents that are supposed to keep the head cooler. The WML uses a Cree emitter.
|
 |
|
Notes/Observations - When I first saw the WML, it instantly reminded me of the LITE is saw back in 2008 made by Insight Technology, which is essentially a low output nav light. I haven't seen too many of those around, though. The WML is simple to install, and doesn't require any tools. I was worried that the small thumb knob would loosen under fire, but so far that has not happened. There's a very slight amount of fore-aft movement, but that's due to the recoil lug being sized to accommodate out of spec rail slots. The WML begs comparison to the SureFire X300, which I use on a carbine instead of a handgun, and it's about the same width at the base, similar height and just a bit longer. I prefer the WML mount to the X300 mount, which is either too tight or too loose, depending on my rail. I usually adjust it such that it's tight on a rail, so it's a bit of a pain to take off. I prefer the rubber switch of the WML to the switch on the X300; it's more comfortable than pressing on the small tab. The X300 is brighter (it uses two batteries), though, but I found that the WML's reach is still pretty good to about 50 yards. It was difficult to test the IR mode with NODS due to ambient lighting conditions, as I live in the suburbs and it's hard to find anywhere that's actually dark for 50 or 75 yards without street lights, so my gain is turned down. Switching between white light and IR is fast, bonehead simple and can be done by feel alone. The manual 'safety bar' that covers the switch partially is also convenient to flip up or down, and will help prevent the switch from being pressed in a bag etc. The WML can be mounted in any position on a rail; wherever you can reach the switch, that is. Illustrated below are a few of the possible mounting positions. It can also be mounted on an angled/offset mount, like the Gear Sector X-series light mount, for a 10:30/1:30 position. The WML works best for me mounted on the side rail and activated by my thumb, exactly in the same position as I had the X300. Overall, I really dig the WML except for one thing: the rubber switch is used to control the different modes. I don't mind this on a hand-held/utility light, but prefer a weapon-mounted light switch to have only one function: momentary on/off. The delay for momentary is currently a 1/2 second, which might seem like a very short amount of time, but it's not if you're used to using short bursts of light. I'd rather have the switch perform a singular function, and have the head rotation control the different modes. My 'ideal' configuration would be to have the head rotate to provide high-low-lockout, with detents at each setting that will allow you to see what setting it's on. As it is, I'd press and release the button too quickly, so the light would just remain 'on', or I'd sometimes press it too quickly and get the strobe mode instead of going from high to low. INFORCE actually has made WMLs with a single mode for customers that requested it like that, so I'm really hoping that they'll offer that as a standard option to the general public as well, instead of only for large scale orders. If you'd like a single-mode WML, let them know at mwolfe@inforce-mil.com
|
|
2/28/15 - INFORCE has updated their Weapon Mounted Light (WML) and introduced a new model: the WMLx, which uses two batteries and puts out 500 lumens. Updated WML (White) - When the WML was first introduced (see the above writeup from Oct, 2011), it was available in two models - the White and White/Infrared models. The White model utilized the rubber push button as a multifunction switch that switched between the different modes of high, low, constant on, momentary and strobe. The White/IR model had an additional LED selection lever that switched between white and infrared modes. One of my wishes that a momentary-on only model be offered was fulfilled in 2012. Some people (like me) prefer that a weapon light have only one function - momentary on only, and felt that having different functions on a weapon light that was controlled by the on/off switch could be confusing or hard to use. Other people liked the multifunction switch. Now, the White light WML offers both - it now incorporates the LED selection lever on the side that allows the user to quickly switch between momentary-on only, and multifunction. The updated WML is different from the two previous versions by the incorporation of the LED selection lever on the side, which was only found on the White/IR version. The LED selection lever switches between the 'momentary on' mode to the 'full function' mode when flipped forward and the white dot is visible. When the lever is flipped back, the light is 'momentary-only' when the angled rubber activation switch is pressed. The output has also increased from 125 lumens to 200. Run time is 1.5 hours vs 2 hours. When the LED selection lever is in the forward position and the white dot is visible, the light is now in 'multi-function' mode. The original WML had constant on, momentary (when the button was held by more than 1/2 second), high, low and strobe. The updated WML has constant on, momentary (when the button is held for more than 1/2 second), and strobe. The strobe function can also be disabled or reactivated by the user. The WML is available in Graphite (shown here), Flat Dark Earth, and Desert Sand. WMLx (White) - The WMLx (Extended) produces 500 lumens of white light with a concentrated spot and generous peripheral area, for those who may need to use their weapon light at longer distances. It uses two 123A batteries instead of a single one, and has a longer body and larger head. The WMLx is 5.34" long, vs. 4.1" for the WML. The bezel diameter is 1.125" vs. the 1" bezel on the WML. The WML and WMLx heads are not interchangeable. The weight of the WMLx is 4 oz whereas the WML weighs 3 oz with batteries. The WMLx shares the same controls and modes as the updated WML; it has the LED selection lever on the left side that switches between the momentary-on mode to multifunction mode. The WMLx and WML share the same rail clamping system. The mount is integrated into the light body, and has a single recoil lug that prevents it from sliding on the rail. It has a hinged clamp which is locked by tightening a single thumb screw. The thumb screw is loosened, which allows the spring loaded jaw to open when pressed at the bottom, and the WML/WMLx is installed onto the rail. The screw is then hand-tightened; no tools are needed. Shown below are some comparison shots between the WML and WMLx. The extra length and larger head are all forward of the mount, so the WMLx will just extend further forward than the WML when mounted to a rail. I'd recommend that the WMLx be mounted on handguards 10" or longer, to ensure that you have enough hand space and the light clamp is fully engaged. The batteries are replaced by unscrewing the head, just like on the WML. Notes/Observations - I've used the WML for over three years now, and it's my favourite weapon light alongside the SureFire Scout. The integral mount does limit it to mounting it at the 12, 3, 6 or 9 o'clock positions unless you use an offset angle mount (which I think make it stick out too far). The Scout is more suited to mounting close to the handguard at the 10:30 and 1:30 positions. I've also tried the WML and Surefire X300 lights at the 12 o'clock position for anbidextrous use, but always have an issue with where to put the front sight, so I've gone back to using the WML on the side, and prefer it there. I don't have an issue with barrel shadow. In the photos, you see the WML and WMLx mounted to a AR pistol upper with midlength handguard (MRP carbine). Since the handguard is short, I mounted the WML and WMLx beyond the rail, which I don't recommend you do for serious use. It's more secure with the base fully engaged on the rail vs. cantilevered forward. I've since mounted the WMLx on a longer handguard. Another thing I noticed with the updated WML and WMLx is that the strobe function is different from the original WML. On the original, the strobe had a fixed flash pattern; it flashed at a constant frequency/hertz (cycles per second). On the new WML and WMLx, it no longer flashes at a constant frequency; it varies in speed. I find it a lot more disorienting, which is the point of the strobe. I can't tell whether it's a random pattern, or a repeating pattern, but it's more effective than the fixed-cycle strobe. I didn't get a chance to take pictures comparing beam shots of the WML and WMLx, but did compare them visually. Obviously, the 500-lumen WMLx is noticeably brighter and has more reach than the 200-lumen WML. Double the lumens doesn't mean that the light appears twice as bright to the human eye (actual vs. perceived brightness). I'm able to make out details on objects roughly 1.5x further away with the WMLx than the WML. I think that utilizing the existing LED selector lever from the White/IR model to switch between momentary/multi-function was a smart move by INFORCE. By doing that, they're able to please customers who wanted one or the other. Now, everyone gets both capabilities. Kudos again to INFORCE for listening to their customers.
|
ATTENTION! PLEASE DO NOT LINK DIRECTLY TO MY IMAGES
-
IT RESULTS IN MY BANDWIDTH ALLOCATIONS BEING EXCEEDED,
AND MY PAGES GO DOWN. THANKS!
/ . PLEASE
OBSERVE AND RESPECT OUR COPYRIGHT! . /
©opyright by MilitaryMorons.com. All Rights Reserved. Reproduction, Duplication,
Distribution Strictly Prohibited.
Unless mentioned otherwise, content and images are the
property of militarymorons.com and are not in the public domain.
They are not to be used without
permission. Please Contact
me for permission to use any images or content herein.


