AR15 Accessories Page 1 Page 2 Page 3 Page 4 Page 5 Page 6 Page 7
TO VIEW FULL SIZE IMAGES: USERNAME and PASSWORD are both "mm"
Bravo Company USA BCMGUNFIGHTER Charging Handle
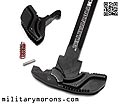
10/15/09 - Bravo Company U.S.A. teamed up with Vltor Weapon Systems to produce their new BCMGUNFIGHTER™ charging handle for the AR-15/M-16 family of weapons. The BCMGUNFIGHTER was designed to address the issues that the AR-15 platform is seeing with the ever evolving manual of arms, as fighting and weapons manipulation techniques have changed since the M-16 was first put in service.
The release latch on the standard charging handle is small, and doesn't provide much purchase for the crook of the first finger or knife edge of the hand to pull back on. Enter the extended tactical latch. Extended latches allow the shooter to operate the charging handle by using the crook of the index finger or knife edge of the palm to grab the latch and pull back on the charging handle. The problem with this is that a side load is now introduced into the shaft of the charging handle, and much of the rearward force is taken up by the roll pin when the latch hits its stop in the handle. Actually, there are all kinds of forces that the whole charging handle assembly is subjected to, and this repeated and forceful racking of the charging handle can eventually result in (cheaper) charging handle bodies bending and roll pins shearing/breaking, which is obviously undesirable. So, when Bravo Company Manufacturing (BCM) decided to make a better charging handle that would address this issue, they enlisted the help of Eric Kincel at Vltor. Eric came up with a design, and with input from BCM, the BCMGUNFIGHTER was born. It's essentially a Vltor design and manufactured by BCM. Description - The BCMGUNFIGHTER is not just a standard charging handle with new latch design; it's a brand new charging handle and extended latch system. Both the handle and latch are machined from 7075 T6 billet aluminum and hard coat anodized per Mil-A-8625F, Type III, Class 2. It's available in two variants for now - the Mod3 (large latch) and Mod4 (medium latch). Both the body and latch of the BCMGUNFIGHTER have been redesigned to reduce the shear load seen by the roll pin, by transferring the force into the body of the charging handle during support-hand only manipulations. This is done by designing a backstop into the rear of the charging handle which the extended latch contacts when the latch is opened. The backstop acts to limit the travel of the latch, and by geometry, reduces the moment arm and force seen by the roll pin, which acts as the pivot. The rear of the latch is scalloped to allow debris to be cleared (like sand cuts). The rear of the charging handle is closed, instead of having the open slot on the standard charging handle. Sometimes, this lower portion can get bent - eliminating the slot and weak point prevents this from happening on the BCMGUNFIGTHER. The Mod3 and Mod4 latches are taller than the standard latch; almost the same thickness as the charging handle body to give the shooter more to grab onto. The front is serrated for a positive, non-slip grip. The photos below illustrate the BCMGUNFIGHTER and compare it to the standard and PRI Gasbuster for reference.
|
 |
|
Observation and notes - My initial impression of the BCMGUNFIGHTER is that it's a solidly-made and designed handle/latch. There's no wobble in the latch, and the return spring feels stronger than standard. The BCMGUNFIGHTER Charging Handle offers two advantages: As with any new charging handle, the BCMGUNFIGHTER needed a bit of wearing in. Straight from BCM, the non-glare matte anodized finish isn't as smooth as worn-in shafts, so I lubed it during installation. With any charging handle that has an extended latch, there's going to be some side load to it - more or less depending on the design. I've always found it beneficial to reduce friction by lubing the handle shaft with oil or grease. I'm a lefty, and make use of extended latches and ambi charging handles. While the BCMGUNFIGHTER isn't ambidextrous, the longer Mod3 is well suited to operation by reaching over with the right hand (for lefties). If there was anything I though I'd like to change; it'd be to make the edges of the latch a bit rounded so they aren't as sharp when you're not wearing gloves. The BCMGUNFIGHTER feels solid and looks like it'll provide years of service to hard users. If you don't have need for an ambi charging handle, and want to upgrade your standard one, this is it. |
Bravo Company USA BCMGUNFIGHTER Mod A44 (Ambi) Charging Handle
4/13/13 - Bravo Company U.S.A. has finally introduced their ambidextrous version of the BCMGUNFIGHTER™ charging handle, called the Mod A44 (Ambi) for the AR-15/M-16 family of weapons. The BCMGUNFIGHTER was designed to address the issues that the AR-15 platform is seeing with the ever evolving manual of arms, as fighting and weapons manipulation techniques have changed since the M-16 was first put in service. The Mod A44 is a collaboration between BCM and Vltor Weapon Systems
The original Gen 1 T-handle/body was 'slab sided' on the top and bottom. The Gen 2 T-handle is more refined looking, and incorporates a raised lip on top to reduce the amount of gas blowback exiting between the upper receiver and top of the T-handle. The rear of the T-handle has the edges smoothed out and broken on top, and a couple of small 'wings' on the bottom. The 'wings' are cosmetic. It actually took a while for an ambidextrous version of the BCMGUNFIGHTER charging handle to be introduced, but it's finally here, and dubbed the Mod A44, for Ambidextrous, and using two Mod 4-sized medium latches. Description - The BCMGUNFIGHTER Mod A44 now has a forged 7075 T6 handle (earlier ones were machined from billet) and the latch is still machined from 7075 T6 billet aluminum and hard coat anodized per Mil-A-8625F, Type III, Class 2. It's available in only the single variant for now with twin Mod4 medium latches. As with the right-handed BCMGUNFIGHTER charging handles, both the body and latch of the Mod A44 have been designed to reduce the shear load seen by the roll pin, by transferring the force into the body of the charging handle during support-hand only manipulations. This is done by incorporating a backstop into the rear of the charging handle which the extended latch contacts when the latch is opened. The backstop acts to limit the travel of the latch, and by geometry, reduces the moment arm and force seen by the roll pin, which acts as the pivot. The rear of the latches have scallops to allow debris to be cleared (like sand cuts). The rear of the charging handle is closed, instead of having the open slot on the standard charging handle. Sometimes, this lower portion can get bent - eliminating the slot and weak point prevents this from happening on the BCMGUNFIGTHER charging handles. The BCMGUNFIGHTER latches are taller than the standard latch; about the same thickness as the charging handle body to give the shooter more to grab onto. The front is serrated for a positive, non-slip grip. The photos below illustrate the BCMGUNFIGHTER Mod A44 and compare it to the Gen 1 Mod 4 and Mod 3 charging handles.
|
|
Observation and notes - Ever since the original BCMGUNFIGHTER charging handle came out, I had been bugging Eric Kincel at Vltor to develop an ambi version. While the Badger and Armament Dynamics ambi charging handles worked well, I also saw the benefit of having an extended latch on the right side to clear the forward assist. There were other designs on the market, but none I had real interest in. I gave up waiting for the BCM ambi version and when I had the chance to give some input into the ambi charging handle that AXTS Weapons was working on, I did, and that eventually became the Rainier Arms/AXTS Raptor, which did everything I'd asked for and wanted in an ambi charging handle. So, by the time the A44 came out, my excitement had been somewhat quenched. The A44, however, does the job extremely well. It's what I'd have expected from Vltor/BCM. Actually, it's better than what I originally expected because of the Gen 2 changes. At the range, the extended Mod 4 latches provide a secure grip while pulling back the charging handle with a pinch grip, and don't stick out too far. Operation is smooth after initial break-in of the matte anodizing, and is helped by keeping it lubricated. I know that people are going to ask 'which one is better - the GUNFIGHTER or the Raptor?' Operationally, they accomplish the same thing equally well, in my opinion. They're just executed differently. The BCMGUNFIGHTER is symmetrical, while the Raptor has a slightly shorter latch on the left side and the longer one on the right. As a result, the Raptor is slightly narrower than the A44. I didn't experience any pinching with the Gen 2 Mod 4 latch with chamfered edges, so that issue has been taken care of. The front full-face latch on the Raptor feels a bit more comfortable because it's the same thickness throughout, vs the A44 latch which has the full height/thickness only at the outer part of the latch. It's actually a negligible difference, and I think that personal preference with the aesthetics are going to be what set the two apart. What I do know is that it's a win-win situation for those who want ambi charging handles; you can't go wrong with either choice. As a long-time advocate for ambi controls on weapons, I'm happy to see the slow but steady increase in ambi controls available for the AR-15 series of weapons. In time, the folks that want to keep their rifles 'standard' might just have to update their weapons with ambi controls, as more and more people see the advantages of being able to operate the weapon from either side, using the same mirrored controls.
|
Bravo Company USA BCMGUNFIGHTER Gen 3 Charging Handles
3/11/18 - Bravo Company U.S.A. has introduced four new versions of the BCMGUNFIGHTER™ charging handle. There are two right-handed models and two ambidextrous models; all for the AR-15/M-16 family of weapons. The latest incarnations of the BCMGUNFIGHTER charging handle are the sleekest yet.
The new charging handles are designated as follows:
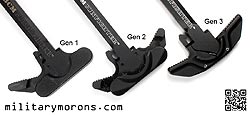
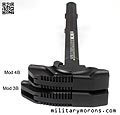
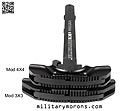
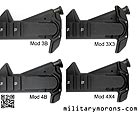
All four models are forged from 7075 T6 aluminum and hard coat anodized per Mil-A-8625F, Type III, Class 2. The original Gen 1 T-handle/body was 'slab sided' on the top and bottom. The Gen 2 T-handle was more refined looking, and incorporated a raised lip on top to reduce the amount of gas blowback exiting between the upper receiver and top of the T-handle. The rear of the T-handle had the edges smoothed out and broken on top, and a couple of small 'wings' on the bottom. The 'wings' were cosmetic. The Gen 3 has been completely redesigned, and rather than having the T-handle with separate latches, the latches make up the T. Description Mod 4B and 3B - The 4B and 3B are the model designations for the non-ambidextrous charging handles. The end of the charging handle forms a 'T', with the right side of the 'T' being thicker, and the left one thinner to accommodate the latch. The right sides of the T are the same size on the 4B and 3B, with only the left side latches being different (the 4B is the shorter one). The latch pivots on a coiled spring pin (which is stronger than the standard roll pin) . Spring tension is achieved with a dual spring assembly (spring within spring). Both front and rear surfaces of the left side latch have vertical serrations to aid a 'pinch grip'. As on the Gen 2 charging handle, the Gen 3 incorporates a semi-circular raised lip on top to reduce the amount of gas blowback exiting between the upper receiver and top of the T-handle. The hole on the bottom of the latch is for weight reduction, as is the step on top of the latch. The Mod 4B and 3B are covered under design patent USD798409S1. Mod 4X4 and 3X3 - The ambidextrous variants are designated 3X3 (large latches) and 4X4 (medium latches). The Gen 3 mechanism (patent 9739540) is different from that of the Mod A44 (patent 9104393) and is referred to as a 'push rod' mechanism. When the right latch is pulled back, and internal edge creates pressure on a 'push rod', which is a curved, flat piece of metal riding in a channel. The push rod in turn transfers the force to an internal edge on the left latch, which rotates it and disengages the hook from the receiver. As on the non-ambi charging handles, the end of the charging handle body forms a 'T', but now accommodates a dual latch set up. Both handles/latches pivot on the coiled spring pins and have the vertical serrations on the front and back surfaces. Note that the double spring setup is only on the left latch; the right latch has a single spring which is also weaker than the one on the left. The ambi charging handle can be operated with either the left or right latches, or both.
|
|
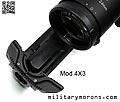
Observation and notes - The overall look the Gen 3 charging handles is much refined, and the new latches eliminate the possibility of any 'pinching' of skin between the latches and handle body; something that had been brought up on the previous generations. All edges are smooth and rounded. I found that the dual-spring set up on the left side latches to be stronger than previous versions. This is to preventing any accidental dislodging of the latch hook from the receiver, or 'notch jumping' (I've experienced 'notch jumping' with prototypes of other ambi charging handles that later changed their springs to stronger ones). This also means that it take a bit more force to move the right side latches on the 3X3 and 4X4 ambi versions. It's by no means a lot; it's just more than before. This may also be due to the changed pivot point for the latches. On the Gen 1 and Gen 2, the pivot point was further forward and closer to the hook; like the USGI standard latch. But, having the pivot point further back also means that less travel of the latch is necessary to disengage the hook from the receiver notch. I tried cycling the new Gen 3 charging handles on a variety of uppers, and as expected, they worked well - the new latches are comfortable and I really like the look of them. The only caveat is that I'd avoid using the ambi models on .22LR uppers. .22LR bolt assemblies don't have much spring tension/resistance, so the latch hook may not be fully disengaged as the handle is pulled back. The latch hook can catch and ride the notch edge, and possibly cause some rounding and wear of the notch corner. My personal preference is for the longer latches; especially on the ambi charging handle. This is because the forward assist on standard upper receivers is right where the hand needs to be for right-side charging handle actuation. The left side of the receiver is slick, so it's not an issue for right handers. For lefties, I try to look for receivers with forward assist assemblies that are located further forward on the receiver, like the Vltor MUR (or the new upcoming BCM upper receiver). Or, no forward assist as shown on the BAD upper receiver below. Mod 4X3 and 3X4 - Never one to leave things alone, I decided to tinker. Being a lefty, I'm normally shooting from my left shoulder and use the left latch less often than the right. So, given the choice, I like to have a longer latch on the right and a shorter one on the left. Right handed shooters would probably like a longer latch on the left and a shorter one on the right. So, I decided to take a Mod 3X3 and 4X4 and swap levers to create two new configurations, which are not currently available from BCM. The left latches are interchangeable; all it takes is to punch out the coiled spring pin. Note that the 3B and 4B latches are NOT compatible with the 3X3 or 4X4 charging handles. I punched out the pins on both 4X4 and 3X3 left side latches and swapped them over. It also gave me a chance to look at how the ambi latches operate. If you're interested in some further reading, check out Patent 9739549. Swapping the left side latches created two new configurations which I dubbed (following the BCM naming convention): the Mod 4X3 (left medium, right large) and Mod 3X4 (left large, right medium). As a long-time advocate for ambi controls on weapons, I'm happy to see the steady increase in ambi controls available for the AR-15 series of weapons. I'm hoping to see ambi controls become the standard on AR15s, as more people see the advantages of being able to operate the weapon from either side, using the same mirrored controls.
|
Battle Arms Development - Ambidextrous Safety Selector
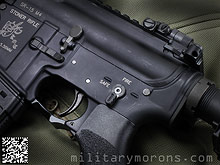
5/30/10 - After more than a year of development, testing and refinement, the Battle Arms Development - Ambidextrous Safety Selector (or 'BAD-ASS') has finally been released, which is very exciting for me as a left-handed user of the AR-15. The BAD-ASS is user-configurable and addresses the issue of lever interference with the trigger hand when rotating the lever from 'safe' to 'fire'. The BAD-ASS is designed for both left and right handed shooters who believe that ambidextrous controls on a weapon are an advantage, and allow the user to operate the weapon as efficiently as possible no matter which side they're firing from.
I had my own ideas on how to approach the problem, and so did BAD. There are basically two ways to reduce the lever interference with the hand - make the lever shorter, or lower profile (thinner). The challenge was to design the lever so that it would minimize interference but still allow the user to manipulate it positively when switching sides. There's no point in having a lever that doesn't interfere, but is so hard to flip to 'fire' that you fumble with it. For a short lever, it needs to be wide enough to provide a 'shelf' for the thumb to rest on. For the thin lever, it needs to be long enough for the thumb to have enough leverage to flip it off without slipping off. I gave BAD my ideas and input (as a lefty), and they also came up with their own proposed solutions. After down-selecting the ideas, prototypes were made and put to the test with selected beta-testers, both left and right handed. This was pretty eye opening, and some ideas did not work in practice as thought in theory. During testing, some testers preferred the short, wide lever, and some preferred the thin, long lever. BAD smartly decided to offer both solutions to users, to choose which one they liked better, in the BAD-ASS package. Additional levers would be made available if the user wanted to use a lever combination other than the standard package offering. Description - The BAD-ASS package comes with the selector axis and three detachable levers (standard, thin and short), which are installed using torx mounting screws. A torx wrench is included in the package. The standard lever is about the same length and thickness as the standard USGI lever. It just has a different profile. To maximize 'shelf' area for the thumb to engage positively, the cross section is more rectangular than rounded/pyramidal. The thin lever is the same length as the standard lever, but half the thickness of the USGI lever. The short lever is the same thickness, but shorter than the USGI lever. The levers have broad, angled serrations on their surface to provide a sure and positive purchase for the thumb, and also the 'crook' of the finger (when it is used to flip the lever from 'fire' to 'safe'). I find that with an ambi safety, I flip the lever from 'safe' to 'fire' with the thumb, but use the crook of my trigger finger plus the thumb to flip it back to 'safe'. There is a groove machined into the pocket of the lever, as well as the round part, which can be filled with paint for a more visible identification of lever position. I must mention that the initial inspiration for the lever shape came from a one-off custom ambi safety that my friend Shin Tanaka made for me, that I've been using for the past few years. BAD and I came up with and tested different shapes/profiles, but in the end, arrived with a profile similar to that of the Shin lever, through natural evolution and progression of the design based on testing and evaluation. A great amount of thought, time and effort went into the design of the levers from all involved. BAD-ASS Specs: Installation - Installing the BAD-ASS is the same as replacing the stock safety. The pistol grip screw is backed out enough to lower the pistol grip and relieve tension on the detent spring, allowing the stock safety to be removed. The new selector axis is then installed, and the pistol grip screw tightened. The levers are then installed with non-permanent thread lock (I use blue loctite). The BAD-ASS levers are also available in Cerakote Flat Dark Earth and Foliage Green. Besides being a nice cosmetic touch, contrasting coloured levers against a black receiver provide an easier visual check of lever position from afar. |
|
Observation and notes - I've been using the various prototypes of the BAD-ASS since conception of the project, and the final pre-production prototype for the past few months. I think that the BAD-ASS is a huge improvement over the standard profile ambi-safety, and almost completely addresses the issue of interference with the trigger finger. I say 'almost' because the distance from the axis to the pistol grip makes it difficult to be completely eliminated unless you just use a non-ambi, single lever on the right side (for a lefty, due to the location of the rotation axis). But then, it's not ambi. As you can see from the photos below, the standard BAD-ASS lever shares the same length and thickness as the standard USGI lever, with ample shelf space for postive manipulation. The short lever ends right at the bottom of the receiver, where it meets the pistol grip. Any shorter, or if it had a rounded profile, and it would increase difficulty to manipulate. We chopped up standard USGI levers to test this out. Short and rounded was no good. The thin lever needs the length to allow positive manipulation. Any shorter or thinner, and the result is decreased purchase. However, early customer comments indicated that some would like to see a short version of the thin lever. I didn't think that it was practical. So, I decided to try it for myself and chopped a thin lever to short lever length. For righties, it's not as bad as I thought - I was still able to flip it on and off. I encountered a little more difficulty with gloves, but it was workable. When mounted on the left side for lefties, it's definitely more difficult because of the stop on the receiver (see pic below). The stop now covers the end of the lever where you get the most leverage/purchase. I was still able to manipulate it, but it's a bit more 'iffy'. After trying it out myself, I'm now more open to the idea of a short version of the thin lever (mostly for righties), as long as the customer understands that decreased purchase is to be expected. Short vs. thin lever was one of the points where there was no clear 'winner'. However I realized that some of the beta-testers were right-handers. It has more to do with ease of manipulation when operating the lever with the weak hand than interference with the strong-side hand. For a right handed shooter who mounts the thin lever on the right side, when he switches to his weak/left hand, the lever is relatively positive to disengage. However, for a lefty like me, with the thin lever on the left side, the lever 'stop' which protrudes from the left side of the receiver prevents me from getting a full thumb purchase on top of the thin lever. The thickness of the stubby lever is needed in that case, as it extends beyond the width of the stop. So, preference is also dictated by whether the user is left or right-handed, as the lower receiver isn't identical on both sides. I can see that for right handers using the BAD-ASS, the thin lever doesn't present the issues a lefty might encounter. It was a good decision on BAD's part to offer both as options.
|
|
For the reasons above, as a lefty, I found that I prefer the short lever on the left side with either another short lever or the standard lever on the right side. A right-handed shooter might prefer the thin lever on the right side, combined with the standard on the left side. While the standard lever interferes with the hand, just like the USGI one does, it's something the user can usually deal with on the occasion that he switches to the 'weak' side. For 'true' ambi configuration, I'd go with short levers on each side. The short levers also feel quicker to flip back and forth due to their reduced length and radius of travel. As mentioned above, BAD will eventually offer the levers separately for users who want different combinations. The levers are designed to have a gap between them and the sides of the receiver. Due to different receiver widths between manufacturers and sometimes with the same manufacturer, a gap was necessary to accommodate the different widths and ensure clearance. It's not a large gap, as seen in the photo below. BAD took a sampling of more than a dozen lower receivers, and based the measurements on Colt (which tends to be on the wider side). As a left-handed shooter, I'm grateful to have been involved in this project and am very pleased with the high quality that BAD manufactures these to. Much nicer than any standard USGI selector I've seen. Rotation is smooth and positive, due to the machined detents in the selector. It doesn't hurt that the look of the lever compliments/adds to the rifle, in my opinion. BAD is also working on a model called the BAD-CASS (Combat Ambi Safety Selector) and the M16 BAD-CASS where the left-side lever and selector axis are machined as one piece (to alleviate any concerns that the primary lever might come loose as it's secured by a screw). As long a you use loctite, it shouldn't be prone to backing out any more than a properly installed scope ring screw, pistol grip screw, or backup sight screw. I believe that the AR-15/M4 platform should be 'universalized' with ambi controls, which are becoming standard on many new weapon designs like the FN SCAR, ACR, or the first truly ambi AR-15 lower, the KAC SR-15 IWS. In my biased opinion, the BAD-ASS is a leap forward for lefties like me, much like the Norgon Ambi-catch and Armament Dynamic ACLM charging handle were. I also feel that right-handers can benefit from ambi features as well. |
 |
Battle Arms Development - BAD-ASS-ST and BAD-CASS-3P Safety Selectors
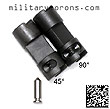
12/30/10 - Battle Arms Development, Inc (BAD) continues to add to their options for the Battle Arms Development - Ambidextrous Safety Selector (or 'BAD-ASS') for the AR-15 platform with the introduction of the BAD-ASS-ST (Short Throw 45°) and the BAD-CASS-3P (Combat Ambi Safety Selector - 3 Piece). The ST offers a reduced throw of 45° instead of the normal 90° arc for the fastest safety selector manipulation possible, and the CASS-3P is an M16 (full auto) selector designed for military, LE and professionals that demand the toughest safety selector possible. BAD-ASS-ST Ambi Safety Selector Short Throw 45° BAD-ASS-ST Background - One of the reasons that I wanted shorter levers on my safeties was that in the 'fire' position, the levers can interfere with the firing hand. The next thing, however, was to have a short throw safety for the AR-15. The advantage of a reduced, 45° throw is two fold. It's quicker due to the shorter arc it has to rotate, and the levers don't extend as far. I've actually been using a reduced throw safety for a few years; the one that my friend Shin Tanaka made for me (which was the inspiration for both the BAD-ASS and ST). It had something like a 50-60° throw, and I found it to be easy to get used to, and very efficient. When BAD and I were in the midst of discussing the design for the BAD-ASS, I also mentioned that I'd like to see a 45° short throw lever. It took a little nudging to convince BAD that there was a market for one, as they were initially resistant to making something that would be different from what people had been used to. There's always a concern that customers will not want to change the way their weapon functions, and are worried about 'muscle memory'. This is not for those people. The short throw lever is intended for users who are willing to give new products a try, that enhance their shooting experience and make weapon manipulation more efficient, even if it means getting used to something new. There were also legal concerns to deal with, that made them hesitant about pursuing this project. A 45° lever no longer points at the 'fire' marking on a standard AR-15 lower receiver. In today's sue-happy environment, BAD had to protect themselves legally, to minimize the chances of someone handing a 45° safety-equipped rifle to someone else unfamiliar with the new feature, and that person mistaking it to be on 'safe'. To address this, the 45° axis has a small pin/nub installed in it (not shown here), that prevents it from being installed in a standard AR-15 lower. The intention is to have lower receivers that are properly marked for a 45° safety that can accommodate this pin. BAD is currently working with lower receiver manufacturers to enable the BAD-ASS-ST to be installed with proper markings. The BAD-ASS-ST can be installed in any standard AR-15 lower by grinding off the pin, but doing so is a modification to the safety selector, is not recommended by BAD, and renders the warranty null and void. Description - The BAD-ASS-ST kit comes with the ST selector axis and two detachable levers. Customers can choose from standard, short, thin, short+thin, and hybrid. The hybrid is a half thin, half standard lever. The BAD-ASS-ST is optimized for use with the short (stubby) levers on both sides. I've tried all the different combinations and this is the one that I've found to work best. Note that all BAD-ASS kits come with a hardened stainless steel safety detent from KNS, which ensures the smoothest and most positive function with the BAD-ASS axis. The different ST axis can be seen in the photo below - the detent stops are machined closer together, which limit the rotation of the lever to only 45°. Except for the shortened throw, the BAD-ASS-ST has the same specifications as the original BAD-ASS, and all levers are fully interchangeable.
|
|
Observation and notes - Ever since I started using the short throw safety that Shin made for me on my AR-15, I've been an advocate of the concept. Short throw safeties are used on other weapon systems like the HKs and FN SCAR. It's quicker, and on the AR, virtually eliminates the issue of ambi safety levers interfering with the trigger finger. When flipping the safety on and off, my hand does not have to move as much, and I don't have to change my grip at all. Transitioning from a standard throw to the short throw was quick for me, and I have no problems transitioning back to a 90° lever. I've since converted all my lower receivers to use the BAD-ASS-ST with short/stubby levers on both sides. The short levers also feel faster than the standard length levers, as they sweep a shortened radius. Once you use the BAD-ASS-ST, I'd be surprised if you prefer to go back to the standard configuration. Thank you, BAD, for making exactly what I've been wanting for my AR ever since I started shooting them 25 years ago. BAD-CASS Combat Ambidextrous Safety Selector - M16 Full Auto BAD-CASS-3P Background - When the BAD-ASS was originally introduced, there were some grumblings heard about the levers being held on by screws, vs a solid, one piece construction like the standard ambi safeties. All 'standard' ambi safeties have one lever made as part of the axis, and the other one (usually on the right side) held on by a screw. I've had levers break before, so I understand folk's concerns. For a hobbyist like me, the worst that can happen is that I'm inconvenienced. For someone whose life depends on a functional weapon, having a lever break off when flipping from 'safe' to 'fire' could have dire consequences. While the BAD-ASS is a solid design; much improved over the standard ambi safety; BAD wanted to address the needs of users who would not accept a safety with the screw taking all the load. This project became the BAD-CASS (Combat Ambidextrous Safety Selector). One idea was to make the BAD-CASS with one lever as a solid piece machined with the axis. This would, however, eliminate the ability of the user to change out the levers, and limit them to the standard lever (which I felt was too long). Back in July, I emailed George at BAD and suggested a dovetail design, that would take the load off the screw, and relegate it only to preventing the lever from sliding off. He replied that the design was in the works already, and that he had been toying with the dovetail concept for a few days. The final design is what you see below. It wasn't as easy as it would seem, and the BAD-ASS was pretty much completely re-designed to create the BAD-CASS-3P. The BAD-CASS-3P (3 Piece) is a 3-piece design like the BAD-ASS, but with an M16 (full auto) axis (standard 0-90-180 positions), and interchangeable levers. The axis has a male dovetail at each end machined into it, which interfaces with the female dovetail machined into the beefed-up round part of the levers. The levers slide onto the axis, then the screw is installed. By transferring rotational and bending loads to the dovetail, the screw is basically under no load under normal use. Since all components are CNC machined from solid bar stock steel, maximum strength is assured. I'm willing to wager that the CASS-3P is stronger than standard one-piece selectors and levers.
|
|
The BAD-CASS-3P kit comes with everything necessary for installation, like the T10 torx allen wrench, a KNS stainless steel safety detent, and torx screws. The customer can choose from any two lever combination, from the standard, short or thin levers (3rd lever is optional). Of course, the CASS-3P levers are not interchangeable with the BAD-ASS levers. An end cap is also available as an option if the user prefers not to have an ambidextrous safety. Due to the dovetail design, the round part of the CASS-3P levers are a little thicker than those of the BAD-ASS levers, but it's pretty much unnoticeable unless you're made aware of it, and do not affect functionality or feel. The edges on the round portion are chamfered. The BAD-CASS-3P has undergone extensive beta testing before its release, and has performed as brilliantly as expected. If you have the need for an M16 ambi selector, the BAD-CASS-3P is the one to get.
|
|
BAD-ASS Scalloped Safety Selector 5/1/15 - Battle Arms Development finally introduced the Scalloped Short Lever that I had asked them to make four years ago. It was called the '7th lever' for a while, before the 'Window crank' lever was introduced, but it's actually the 8th lever in the BAD-ASS lineup. Even with the short lever, I still found that when using a high grip when shooting, the lever would contact the base of my trigger finger. The natural solution was to incorporate a scallop into the short lever (which is completely opposite of the Window Crank lever which actually adds thickness at the end of the lever). I made a prototype back in 2011 and have been using it ever since. The Scalloped Lever is a modified Short lever, and is designed for use only on the Strong hand side. The Scalloped Lever is intended to provide the best balance of finger purchase for actuation, with the least amount of interference with the firing hand. It still has enough meat on the lever to engage with the thumb when the rifle is switched over to the support side. It's best used with lower receivers without selector stops, as the stops tend to interfere with the shorter and thin BAD levers. Out of all the levers I've installed on the strong side, I found the Scalloped one to work best. The thin levers were unobtrusive but didn't provide enough purchase for my thumb when I was shooting from the support side. The Window Crank levers work well for thumb actuation, but they interfered with my hand when mounted on the strong side and I didn't find them comfortable. I recommend the use of the Scalloped Lever in conjunction with a Short Lever on the support side. I'm a lefty, so for a right-handed shooter, the Scalloped Lever would be mounted on the left side of the receiver.
|
Griffin Armament M4SD Compensator
5/2/11 - The M4SD Tactical Compensator from Griffin Armament is a black-oxide, stainless steel military-style muzzle device offering low concussion, flash and excellent muzzle control, as well as compatibility with a number of sound suppressors. There has been a market for muzzle devices as far as I can remember - flash hiders, brakes, compensators etc. The standard A2 compensator is still the most economical choice, but there are always folk looking for improved performance over the standard. Flash hiders reduce flash signature while compensators or brakes either aim to reduce felt recoil or muzzle jump/movement. The idea is to keep the muzzle as neutral as possible when shooting, so that any movement seen by the shooter is due to his own input. Less movement means quicker follow-up shots, or less need to adjust one's position after firing a shot. Granted, the 5.56mm round doesn't have much recoil to begin with, but if you could make it shoot like a .22 LR, why not? For the most part, muzzle brakes do a decent job of reducing muzzle movement but at the expense of increased side blast, flash and concussion. Then there are muzzle devices that attempt to strike a balance between all the desired attributes, like the PWS FSC556 and Battlecomp. A new entry into this market is the M4SD tactical compensator, from Griffin Armament. Description - The M4SD is a military-style muzzle device, designed to reduce muzzle rise and offer recoil control, while keeping concussion and flash levels to a manageable level. The M4SD is named after Griffin's M4SD sound suppressor, and it's compatible with the Gemtech HALO, SRT Typhoon with Atlas mount, Quicksilver's QD223, Coastal's FDX-FHM and the AAC Omni (basically, any A2-compatible suppressor mount). It's made out of 17-4PH stainless steel, and finished in black oxide. The M4SD is the same 22mm diameter as the standard A2 compensator, and is 1.75" long. The main portion of the comp has a slightly reduced diameter, and has 11 rows of 5 ports/holes drilled into it. The 55 holes are .078" in diameter and have .025" chamfers. At the front are 6 holes, of the same size. The concept is similar to the KAC Triple Tap and Battlecomp, but using holes instead of slots. The comp is closed on the bottom. The M4SD was designed to be optimized for use with sound suppressors, and is constructed with thick walls to prevent expansion of the comp inside a suppressor under use, where it's exposed to a very harsh thermal environment. Strength is the reason why the ports are configured in rings, rather than staggering or offsetting them.
|
|
The M4SD can be installed with a crush washer to achieve the correct clocking so that the closed section is on the bottom, but peel washers are recommended for use with some suppressor mounts. I mounted the M4SD on my Addax Tactical ATAC GPU, which is one of my favourite uppers to shoot. It's a very soft-shooting piston upper, and feels no worse than a DI gun, unlike most other piston guns I've shot. At the range, I brought along a standard A2 hider to swap out with the M4SD, and found that the M4SD definitely had less muzzle movement during drills like the 1-5 drill, and others which entail quick follow-up shots. I've also used a Battlecomp on this same upper, and found the recoil and muzzle jump reduction of the M4SD to be about the same. Very little difference between the two in that respect - same thing with concussion. The concussion of the M4SD was more noticeable than the standard A2, but no one standing off to the side felt that it was particularly obnoxious. It has less concussion than the PWS-556, probably because of the many small ports vs. large ones. I didn't feel that it was noticeable to me as the shooter. Flash signature is about on par with the Battlecomp, which is definitely more than a standard A2, especially on the first round I found. Users of any muzzle device need to choose them based on the attributes that's most important to them. No muzzle device does it all (except a suppressor), and I've had to remove muzzle brakes and replace them with flash hiders when shooting with at night with NODs. For shooters who mainly shoot during the day, and occasionally at night, the M4SD provides a balance between muzzle control, flash and concussion. It's also worth considering for those who want the additional muzzle control without pissing off fellow shooters to the side from excessive muzzle concussion. I've posted a short video clip here.
|
Griffin Armament M4SD II Muzzle Devices
12/10/12 - Griffin Armament has updated their line of muzzle devices and added some new ones, including the M4SD II Flash Comp which is based on their M4SD compensator and offers additonal flash reduction over the M4SD compensator. The discussion over the need for muzzle devices that provide compensation still goes on. Some believe that the standard A2 is enough, and that muzzle control should only depend on skill and not aftermarket devices. Some want whatever advantage the addition of a performance-enhancing device may provide. I'm in between the two schools of thought, and believe that both arguments have merit. In the meantime, the market for muzzle devices has only grown, as evidenced by the increasing number of different muzzle devices available. Flash hiders reduce flash signature while compensators or brakes either aim to reduce felt recoil or muzzle jump/movement. The idea is to keep the muzzle as neutral as possible when shooting, so that any movement seen by the shooter is due to his own input. Less movement means quicker follow-up shots, or less need to adjust one's position after firing a shot. Granted, the 5.56mm round doesn't have much recoil to begin with, but if you could make it shoot like a .22 LR, why not? For the most part, muzzle brakes do a decent job of reducing muzzle movement but at the expense of increased side blast, flash and concussion. Then there are muzzle devices that attempt to strike a balance between all the desired attributes. During my shooting session, I was talking to my friend on a local SWAT team, and he said that they had pretty much switched back to flash hiders only, as the additional side concussion from any comp, however small, was something that they would rather not deal with (they also use suppressors indoors). So, it's going to be up to the user to weigh the advantages and disadvantages of the different muzzle devices and choose the one best suited for his needs. To suit the different needs of their customers, Griffin offers all three types of devices; a flash suppressor, a muzzle brake, and two compensators that balance blast and flash. I've already reviewed the M4SD Compensator above, so please refer to that writeup for more information. Note: Griffin Armament's M4SD suppressor utilizes a 'snap-on' attachment compatible with NATO STD A2 compensators. One of the difference between the current Gen II M4SD and the Gen I model is that it is able to accommodate longer muzzle devices. Griffin has introduced a 'Gen II' lineup of muzzle devices that are compatible with the Gen II M4SD suppressor. The M4SD Comp (previously reviewed above) is the only one in that line up that is backwards-compatible with the Gen I M4SD suppressor and with other suppressors that are A2-compatible. Note that the newer M4SD II Comp and M4SD Comp are dimensionally identical - the only change is the inclusion of a tabbed washer that acts as an over-insertion stop when used with the M4SD suppressor. The M4SD II Comp is compatible with the Gemtech HALO, SRT Typhoon with Atlas mount, Quicksilver's QD223, Coastal's FDX-FHM and the AAC Omni (basically, any A2-compatible suppressor mount). The Flash Comp, Flash Suppressor and Muzzle brake are longer than a standard A2 device and are compatible with Griffin's M4SD and Coastal's XDS FHM suppressors (so far). The tabbed washer supplied with all their muzzle devices is a locating stop. It's not absolutely required for use with their M4SD Suppressors but it is desirable for it to be used in order to prevent difficulty in locating the groove for locking the suppressor to the muzzle device. The M4SD muzzle devices are OD ground to .8627" ± .0003" in an effort to fall in the upper 2/3 of the A2 printed tolerance range in order to have a better fit with suppressors. These are the two raised indexing rings around the body which contact the inside of the suppressor. The body themselves are .830" in diameter. Griffin recommends using the supplied peel washers for installation of their muzzle devices, rather than crush washers. Crush washers may work if the muzzle devices are not going to be used with suppressors, but may still have issues with timing. The laminated peel washer can be easily separated by heating it over a stove, holding it with a pair of pliers. After it cools, the layers will de-laminate, allowing the installer to stack them up to ensure proper timing of the device. Unless otherwise specified, all the Griffin muzzle devices pictured here are CNC machined and OD ground from 17-4 precipitation hardened stainless steel and black oxide finished. They all have 1/2 x 28 threads. M4SD II Flash Comp - The M4SD II Flash Comp brings additional flash reduction to the popular M4SD II compensator with the addition of three prongs at the front. While retaining the low concussion muzzle control, the Flash Comp provides a mounting system for the M4SD-II sound suppressor as well as a 2.25” length for end users requiring the appropriate length for 14.5” to 16” permanently attached, Non-SBR, M4 carbine builds. The Flash Comp is CNC machined from high strength, precipitation hardened, 17-4 stainless steel. The Flash Comp promises durability, low concussion, flash and recoil reduction - designed for users who want a balance between flash and muzzle flip reduction. The Flash Comp was the logical extension of the Comp, for those who wanted additional flash suppression. Like the M4SD Comp that it's based on, the Flash Comp is a military-style muzzle device, designed to reduce muzzle rise and offer recoil control, while keeping concussion and flash levels to a manageable level. The M4SD is named after Griffin's M4SD sound suppressor, and it's also compatible with Coastal's FDX-FHM suppressor. The M4SD II Flash Comp has .863" diameter raised interface rings and a .830" diameter body. It weighs 3 ounces. At first glance, the Flash Comp looks exactly the same as the Comp, except for the addition of three prongs in the front to further reduce muzzle flash exiting out the front. The Comp has 11 rows of 5 ports/holes around its body, but on the Flash Comp, the top row of holes has been eliminated. I was a beta tester for the Flash Comp, and the original sample I was sent was identical to the M4SD Compensator, except for the prongs/tines in the front. When I tested it, I felt that it over-compensated slightly, pushing the muzzle down. I suggested to Griffin that the top row of holes be deleted. My feedback was seconded by another beta tester, so that's what Griffin did. The 50 holes are .078" in diameter and have .025" chamfers. The Flash Comp is closed on the bottom. The openings between the front prongs are located at 12 o'clock, 4:30 and 7:30 (120° apart). The M4SD II Flash Comp was designed to be optimized for use with the M4SD II sound suppressor, and is constructed with thick walls to prevent expansion of the comp inside the suppressor under use, where it's exposed to a very harsh thermal environment. Strength is the reason why the ports are configured in rings, rather than staggering or offsetting them.
|
M4SD II Muzzle Brake - The M4SD-II Muzzle Brake provides high efficiency recoil reduction and two durable, sacrificial baffles for use inside M4SD-II sound suppressors. It's a two-port design, looking similar in configuration to the AAC Blackout muzzle brake and SureFire MB556K (it's not, though). The M4SD II Muzzle Brake is 2.25" long, which provides a mounting system for the M4SD-II sound suppressor as well the extra length needed for 14.5” to 16” permanently attached, Non-SBR, M4 carbine builds. The Muzzle Brake is designed for users who aren't as concerned with side blast and flash reduction, but want the maximum in felt recoil reduction. The Muzzle Brake isn't designed to provide muzzle rise reduction, but reduces felt recoil by approximately 60% (according to Griffin) and in doing so results in less muzzle rise as well. It's supposed to be a very stable brake. The M4SD II Muzzle Brake has a .863" diameter and weighs 2.7 ounces. It has two ports; the rear one larger than the front, with openings on each side. There are no holes or ports on the top and bottom of the Muzzle Brake. The Muzzle Brake has a very thick conical blast baffle that encourages gas to pass through the .260" primary baffle aperture. The conical shape also reduces blast baffle wear because the particles impact at an angle rather than normal to the surface. In theory, by pushing gas through that aperture (mostly around the bullet), gas loses some temperature and also results in less flash due to lost efficiency in the combustion of the gases. The gas that gets around the bullet is then redirected by the second baffle at the front of the brake.
|
M4SD II Flash Suppressor - The M4SD-II Flash Suppressor provides M4SD-II sound suppressor end users a high-performance flash suppression alternative to compatible A1/A2 “Birdcage” flash suppressors. The M4SD-II flash suppressor provides optimal suppressor fit and enhanced signature reduction to Griffin Armament customers. Like the other muzzle devices, it's CNC machined and outside diameter ground from heat, corrosion, and wear resistant, precipitation hardened, 17-4 stainless steel for maximum durability. The M4SD II Flash Suppressor is black oxide finished. The M4SD Flash Suppressor is a military-style muzzle device, designed mainly to reduce flash signature. It has four large slots, 90° apart. It's 2.25" long, like the other devices, so that it can be used on 14.5" barrels to bring up the length to 16" for pinning and welding. It weighs 2.4 oz. It's currently compatible with the Griffin M4SD II Suppressor and the Coastal FDX-FHM.
|
|
Notes/Observations - I'm not able to scientifically 'test' muzzle device effectiveness, so the comments here are based on my subjective observations. The most objective setup would be a machine set up to somehow measure recoil and muzzle flip, high speed photography to record flash, and a decibel meter to measure sound (blast) to the side of the muzzle devices. Without those, I tried to remove as many variables by using the same gun and ammunition to compare the muzzle devices. Instead of using crush or peel washers to mount the muzzle devices, I used a jam nut to facilitate easy and quick swapping out of devices. A couple of Hammerhead tools made wrenching on the flats easy. Shooting was done with a 16" barrel with midlength gas system and a variety of ammunition - mostly M193 and PMC Bronze. I also used it on a couple of other upper receivers. Note that the amount of compensation depends also on barrel length, ammunition, bullet weight, etc. There are many variables to consider, so remember that my 'test' was valid for my setup only. To compare devices, I did it on a 'relative' basis - as in 'device A has more movement than device B' or 'device A has more concussion than device B' . Muzzle movement only affects follow up shots. If you're shooting one shot per minute, you don't need a muzzle device for control. If you're shooting fast, then it becomes a factor as the more the muzzle moves after a shot, the longer it will take to get back on the same target or the next one. So, ideally, we'd like the muzzle to remain neutral with no upward, sideways or downward movement. To get an idea of how much the muzzle moved with each muzzle device, I placed my red dot on a target, and observed the amount the red dot moved off the target after each shot (I aimed at the 10-ring and observed which ring the dot moved to on average). I did this at a different distances out to about 25 yards. I tried holding the rifle two ways; the first was just supporting the fore end in the palm of my hand and allowing it to move.The second was holding it more normally, but not trying very hard to control the muzzle. I found that holding it more normally worked better and was more consistent than just letting it jump around on my palm. It wasn't scientific at all, but good enough to get a feel for the differences between muzzle devices. I ran the various muzzle devices through a day's worth of different drills, and also got feedback from fellow shooters. The muzzle devices I brought along to the range were: A2 compensator as the 'standard', Battlecomp 1.0, M4SD Comp, Flash Comp, Muzzle Brake and Flash Suppressor.
Controllability (Felt Recoil or Muzzle jump). Rated 1-6 with 1 being most effective
Concussion. Rated 1-6 with 1 being least noticeable (this is a combination of perception of the shooter and bystander to the side and to the side/rear of the shooter)
Flash suppression - Unfortunately, we couldn't stay at the range past dusk, so I wasn't able to do any night time testing (if I do, it's usually on an overnight trip out in the desert). However, Griffin Armament has done their own flash testing and has an album on Facebook with photos. It's obvious from the photos that all muzzle devices are more effective at suppressing flash the longer the barrel is. We took some video clips of the Griffin muzzle devices (we were running out of range time) at the end of the day. It was late in the afternoon with the sun going down, so it wasn't quite dusk yet. With no muzzle device, the flash is very visible. There's definitely some with the Muzzle Brake and we could see a tiny flame in the BattleComp, M4SD Compensator and M4SD II Flash Comp (in the holes). I couldn't see anything with the A2 or M4SD II Flash Suppressor. I also observed them throughout the day while letting other shooters shoot my rifle, and I didn't notice huge flashes that would catch my attention. In the video, the cluttered background actually serves as a reference to show the amount of muzzle movement. If you compare the clip of the Muzzle Brake and Flash Comp (at the end), you'll see how little the muzzle moves in comparison to the other clips. It's a straight-back push with no muzzle rise or dip. Here's a link to the full size video.
Bottom line/conclusions - The M4SD II Flash Comp is my favourite all-round muzzle device at the time of this writing as it strikes a good balance between compensation, concussion and flash. It's the most effective one I've tried so far; even better than the Muzzle Brake but without the concussion. I found it to be an improvement over the original M4SD Compensator as the amount of compensation was better dialed in for my setup. The Flash Suppressor doesn't offer any compensation, but is a pure flash hider and offers a better-toleranced mount than the A2 for Griffin's suppressors. The Muzzle Brake definitely cuts down on felt recoil, but at the price of side concussion, and in my mind, more of a competition device than a tactical one. Whatever muzzle device you're looking for - flash hider, brake or comp, Griffin's lineup covers those needs. Which one to pick? The user will ultimately have to determine whether the benefits offered by any muzzle device outweighs its cons, and that's going to depend on the user's specific needs and priorities.
|
Badger Ordnance AR-15 Universal Safety
7/14/11 - The AR-15 Universal Safety from Badger Ordnance is a single lever, reversible safety for the AR-15 family of weapons. As a lefty in a right-handed world, I always welcome new products designed to make the AR-15 platform more adaptable to the wrong-handed folks like me. Some folks like ambidextrous safeties, some don't. For those that don't need an ambi safety, but would still like to have the safety on the right side of the receiver, a reversible safety might be a good option. When installed on the right side, there is no left-side lever interference with the trigger finger/left hand, which sometimes happens when rotating the safety from 'safe' to 'fire' with ambidextrous safeties. Colt (and some other companies) make a reversible safety in the standard configuration that converts a weapon to left-handed configuration. The Badger Ordnance AR-15 Universal Safety is such a safety, and can be installed on either the left or right side of the receiver. It has the detent track machined into both sides of the drum instead of only the right side. The control side lever has the standard profile for familiarity, but has the addition of a high-visibility paint marking. The offhand side of the safety is also marked with high-vis paint, but it's also raised for both visual and tactile confirmation of the selector position. It's a very well made piece and I found operation to be smooth and positive. If you prefer a reversible safety to an ambidextrous one, and want the standard lever profile, this would be the one to get. The AR-15 Universal Safety is machined from billet 4140 hardened steel with a mil-spec parkerized finish.
|
BattleComp Enterprises Tactical Compensators
12/16/11 - BattleComp Enterprises, LLC, is a relatively newcomer to the industry, yet in the short time they've been around, they've made quite an impact with their line of compensators. Shown here are their 1.0 and 1.5 comps. The market for compensators is competitive, and full of options for the customer. Muzzle devices that either reduce flash, recoil or muzzle jump have been around as far as I can remember. Repeating what I wrote in other writeups: flash hiders reduce flash signature while compensators or brakes either aim to reduce felt recoil or muzzle jump/movement. The idea is to keep the muzzle as neutral as possible when shooting, so that any movement seen by the shooter is due to his own input. Less movement means quicker follow-up shots, or less need to adjust one's position after firing a shot. The 5.56mm round doesn't have much recoil to begin with, and a solid stance and hold are the biggest factors to controlling the weapon, and these should be learned before a comp is used. However, you don't always have the chance to be in that 'perfect' stance; like when you're shooting on the move, assymetrical or awkward shooting positions etc. For those who can't shoot well in any situation, a comp probably isn't going to help much. But for those who can take advantage of the benefits a comp has to offer, it can make a difference. The BattleComps are designed to provide a balance between muzzle control and the excessive concussion and blast that normally accompanies muzzle brakes, without increasing the flash over a standard A2.Description - Shown here are the BCE 1.0 and 1.5. The 1.0 was the first comp offered by BattleComp. The 1.5 is an extended version of the 1.0, designed for permanent attachment on 14.5" barrels, bringing the overall barrel length to 16.1". Both are made from 17-4PH heat treated stainless steel bar stock and are available in a black oxide or matte stainless finish. They're standardd 1/2 x 28 RH threads. There's also the BCE 2.0 (not shown here), which has the same external length and outer diameter as an A2 compensator, so that it's compatible with suppressors that mount to an A2, like the Gemtech HALO. The 1.0 and 1.5 outer diameter is slightly less than an A2, and suppressors which require an A2 mount will be too loose on them. An A2 has an outer diameter of about 0.860"-0.862", and the 1.0 and 1.5 measure around 0.850". I measured the overall lengths of the BCE 1.0 at 1.756" and the BCE 1.5 at 2.150". The 1.0 has rows of slots/ports around the body, which alternate between two and three ports per row. There are 15 rows, and 38 ports total. The bottom quadrant of the body has no ports (where the logo is laser engraved). The muzzle of the 1.0 is concave, and has four round ports drilled into it. The 1.5 body extends beyond the muzzle (which is also concave), creating a 'stand off hood' extension with 8 more ports in it. There are four subtle crenellations on the hood leading edge. The 'ports' at the muzzle level on the 1.5 are false; they don't go through, but they're there for visual/aesthetic continuity, which is a nice touch. The 1.5 is also pre-drilled for a pin, at the bottom, for permanent attachment to a barrel that requires pinning and welding. Both comps come with crush washers for installation. Testing has shown the 1.0 and 1.5 to have identical performance.
|
|
Notes and observations - I've been using the BCE 1.0 for over a year now, and recently installed the 1.5 on one of my uppers. I don't notice a difference between them in performance. Any difference in muzzle flash was unnoticeable as I've only shot the 1.5 during the day. Installation of the comps is much like any other; remove the old muzzle device, clean the threads, put the crush washer on, and install. The comps are installed with the logo on the bottom, where there are no ports. Quality of the machining and finish of the BCE comps are superb. I've used quite a few different muzzle devices over the years; flash hiders, brakes, and comps that do both, like the PWS FSC-556 and M4SD both reviewed previously, and others like the AAC Brakeout (which doesn't hide flash well at all in my experience). I think that as far as muzzle jump reduction is concerned, the BCE, FSC-556 and M4SD are very similar. You have to swap them out quickly to notice whatever small difference there might be. The FSC-556 does have more side concussion, while the BCE and M4SD are on par with each other. As far as brakes/comps go, the BCE's concussion is one of the milder ones, and I've had no complaints from shooters to the side. On one or two 1.0-equipped rifles, I did sometimes notice first round flash to be more noticeable than subsequent shots in a string. This might have something to do with available oxygen in the barrel on the first round. When I first tried out the BCE 1.0, it performed just I expected it would - muzzle jump was reduced such that rapid strings of fire were easier than with the A2 comp. Some folks have actually reported it working too well, and pushing the muzzle down instead of being 'neutral'. I haven't experienced that with using them on my rifles, and am very happy with their performance. While comps should not be used as a substitute for good weapons handling, they can certainly be beneficial to those who already handle their weapons well, and want the extra edge that they might provide. As long as the user understands the cost/benefits of brakes, hiders, comps etc, and understands that there's no free lunch when it comes to physics. But as far as comps go, the BCE does a great job of finding that balance. Besides the 1.0, 1.5 and 2.0, BattleComp also makes the AKBC for the AK platform, and the BABC for larger calibers like 6.5, 6.8, and 7.62.
|
 |
/ . PLEASE
OBSERVE AND RESPECT OUR COPYRIGHT! . /
©opyright by MilitaryMorons.com. All Rights Reserved. Reproduction, Duplication,
Distribution Strictly Prohibited.
Unless mentioned otherwise, content and images are the
property of militarymorons.com and are not in the public domain.
They are not to be used without
permission. Please Contact
me for permission to use any images or content herein.


