Packs/Bags Page 1 Page 2 Page 3 Page 4 Page 5 Page 6 Page 7 Page 8
TO VIEW FULL SIZE IMAGES: USERNAME and PASSWORD are both "mm"
For packs from the following manufacturers, please go to my pages below:
Kifaru
Mystery Ranch
Maxpedition
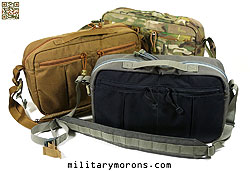
| 7/25/14 - My latest collaboration with EMDOM USA is the Charge Satchel. It's a small but versatile shoulder bag for EDC and travel when a pack is too much and you don't need to carry a whole lot of stuff. Think Indiana Jones's satchel, but modernized. Background - Around town or on travel, I sometimes have the need to carry more than what fits in my pockets, but I may not want something as large as a pack or even a laptop-sized bag. For many years, I've been using a Kifaru dock-n-lock long pocket as a small shoulder bag/man-purse; usually to carry an SLR camera, bottle of water and other small items. While it's very convenient, I did wish that it was slightly taller and had some structure to it, and organization. Actually, something similar in size to Indiana Jones's shoulder bag (actually a WWII British gas mask bag) was what I wanted. Not seeing exactly what I had in mind on the market, I came up with an idea and collaborated with EMDOM on it. I wanted to keep it relatively simple, and also have some structure to it. This was very important for heavier items like SLR cameras and water. It also needed to provide more protection than a fabric-only bag. Overall description - The EMDOM/MM Charge Satchel is a small, structured shoulder bag with seam-to-seam internal dimensions 14" x 8.5" x 3.5". External dimensions can expand to 15" x 9" x 4" when stuffed out. It has one main compartment that is lined with loop velcro for use with the included dividers for organization, or any velcro-compatible accessories. The back panel is stiffened with HDPE to provide structure, and the front panel, bottom and sides are lightly padded with closed cell foam. There are two zippered pockets on the front, with pleats that allow them to expand. The Charge Satchel comes with the same shoulder strap that's on the EMDOM/MM TNT bag; it's fully adjustable and removable. There's a low profile webbing carry handle on top. The Charge Satchel is made of 1000D Cordura nylon and is offered in Urban (Black and SDU grey), BFE (Coyote brown), Khaki and Crye MultiCam. Charge Satchel specs and features (detailed descriptions are below):
|
|
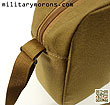
Exterior features - The Charge Satchel has a simple rectangular shape with rounded corners, much like the EMDOM PMC (Padded Multi-purpose Case). The dimensions are different, with the Charge being slightly larger. The first prototype was the same size as the PMC and I found it a bit too small for EDC use, so I had the dimensions increased slightly (an inch in length and depth). I based the depth and height on a 1 litre Nalgene bottle, which I wanted to be able to carry standing upright in the satchel. The Black and SDU Grey two-tone colour scheme of the Urban Charge Satchel is the same as that on the Urban EMDOM TNT GYM bag. For the BFE Charge Satchel, however, we chose a darker Coyote Brown, instead of the lighter Coyoteish that EMDOM makes the BFE model of the TNT GYM Bag in. The carry handle is made of 1" webbing and lies flat on the top of the satchel. We found that sewing a loop so the handle stands up wasn't needed as it's easy to grab as-is, and less snag prone. You can also hang the satchel from a hook or door handle. The main compartment has dual 550 cord zipper pulls with ITW ends, and come long so the end user can shorten them if desired. The shoulder strap is from the EMDOM TNT Bag. It attaches via low profile 1" metal loops on the sides. I've been very satisfied with the TNT bag shoulder strap design after using it for the past 6 years, and no changes were needed. The 18"-long padded portion is 2" wide and the straps are 1" webbing with dual ITW ghillietex metal bar sliders. It's more comfortable than webbing-only straps, and with the fixed drilex-lined pad, there's no separate pad to slip and slide on the strap. It's also more low profile than most padded shoulder straps. I found that there was no reason to have 2" wide webbing for the entire strap - the 1" webbing gets in the way less and with over 1500 lbs of breaking strength, it's more than strong enough. It has the quick-adjust Z-pull for convenient length adjustment. The shoulder strap is supplied with extra length that can be cut off by the customer, or folded up and retained with the elastic keeper. I've illustrated how a loose end is meant to be retained by the keeper, which also covers the metal triglides. Pleated external pockets - I really wanted to have two external pockets on the Charge Satchel for organization of small items. The first prototype had flat pockets, but they weren't very useful as they couldn't hold much. I asked EMDOM to include and expansion pleat, which worked like a charm. The pleat allows the pocket to expand outwards so that it doesn't encroach on the main compartment volume. The pocket itself measures 9" tall and 7" wide, but the actual zippered openings are 5" wide and about 1.5" below the top. A lanyard clip is sewn inside the upper right hand corner of the left pocket. I typically keep a ball point pen and my keys clipped there for quick access. The photos below illustrate how much the pockets can expand when stuffed out. The actually end up being pretty roomy and you'd be surprised what you can fit in there. Structure - One of the issues with unstructured shoulder bags is that they tend to flatten out/collapse when worn on the side of the hip, as the shoulder straps pull the corners of the bag and force it to contour to the curvature of the hip. This was my main gripe with using the Kifaru long pocket as a shoulder bag as it'd flatten out and it'd be difficult to insert and extract items from it. With the Charge Satchel, I knew that it had to be structured, but there's a point where it's too rigid or too soft. I didn't want it to be so rigid as to feel like an ammo can hanging off the shoulder. We experimented with padding, and HDPE inserts to provide both protection and structure, and the final version ended up with a HDPE stiffening sheet inside the back panel, against the body, while the front panel behind the external pockets, and sides and bottom have closed cell foam padding. The HDPE stiffening sheet still allows some curvature, and also provides support for anything mounted to the velcro inside the rear panel. Interior features - Even though the Charge Satchel is a small bag, I wanted to be able to organize the contents inside, mainly to keep them from moving around and knocking into each other. This was important to me when carrying a DSLR and extra lens. Keeping it organized would also make items easier/quicker to access and re-insert. Instead of sewn-in pockets or dividers, the logical solution was to use movable dividers. The Charge Satchel is lined internally with loop velcro on both the front and back panels. Two 7" tall x 3.5" wide dividers come with the Charge so that the main compartment can be divided into three separated compartments. The dividers are stiffened with a HDPE insert and padded on one side. When placed inside the Charge, they also serve to provide structure to the compartment and prevent it from collapsing. The dividers can simply be stored flat against the inside of the panels if not needed. Organization - When I got my second prototype, I experimented with different configurations of the internal dividers. As you can see from the photos below, the dividers keep the contents much neater by providing separate compartments as well as preventing the satchel from collapsing. I carry my Arc'teryx Wraith wind breaker just about everywhere I go, and I used one of the dividers to create a 'stuff compartment' into which I just stuff the windbreaker without folding it up or stuffing it into its own pocket. I also carry a bottle of water with me, and created its own little section up front for it. Without the dividers, the jacket, bottle and camera just end up laying on top of each other inconsistently. Carrying a water bottle upright was important to me as I've often found 'leak proof' bottle caps to be non leak-proof. I'm not a big fan of using too many velcro-compatible pockets inside such a small bag, but the loop velcro lining inside if compatible with any aftermarket velcro accessories. I took the holster/pistol holder from my EMDOM TNT bag and used it to carry a Glock 17 on the rear panel. The rear panel's stiffeneing sheet helps keep the pistol from flopping around. The elastic mag holders are also from my TNT bag. While not specifically designed to hold rifle magazines, I knew that some customers would want to do that, so the Charge Satchel height was sized to accomodate 30-round AK mags. The Charge can hold 13 M4 30-round magazines or 10 AK mags. To illustrate its max capacity, it'll fit a Nalgene bottle plus a small ammo can inside the main compartment. Notes and Observations - As mentioned above, the Charge Satchel was dimensioned with certain common items in mind, like the Nalgene 1 litre bottle. I based this on what I usually carried in my Kifaru long pocket, and what I wanted to carry in addition to it. It was important to me that a DSLR and extra lens or flash were prevented from moving/knocking around inside the satchel, and that it would have adequate room for longer lenses if need be. I never intended the Charge Satchel to be used to carry laptops as it'd make it too large, but it'll fit iPads or tablets with room to spare. When I received my 2nd prototype in Urban colour scheme, which eventually became the production version (with the addition of the caryr handle), I used it every day and also brought it overseas with me when my family and I visited Singapore. The Charge Satchel functioned as well as I had hoped, carrying snacks, water and other small items around town. Because it had structure, items were easy to insert and retrieve, and the dividers kept everything in place. I also used it on the airplane as my carry-on, with our passports and other essentials, while I put the Arc'teryx LEAF Covert C/O in the overhead compartment. One thing I did was shorten the zipper pulls, as shown below. The pulls ends are easy to pop off, and re-install once the 550 cords pulls are cut and melted. On a recent camping/shooting trip, I used the MultiCam Charge to hold mags and ammo, as well as my bottle of water. The difference between EMDOM's 'Coyoteish' and 'Coyote Brown' is shown below. It's subtle in the photo, but more obvious to the naked eye. It's a very nice shade that's a bit redder/warmer than tan or khaki, and goes well with everyday, earth-toned outdoor attire, whether it's around town or BFE. The Charge Satchel is made with EMDOM's attention to quality and function - I hope you'll find it as useful on a daily basis as I do.
|
Blue Force Gear Dapper Organizers
| 12/5/15 - Blue Force Gear has updated their line of Dapper Organizers that works with any velcro-lined pack or bag. The line consists of Ten-Speed type pouches, elastic loops and zippered utility pouches. Overall Description and features - Several years ago, Blue Force Gear came out with a line of products called the DAP (Denied Area Pattern) Line, which included packs, cases and pouches/accessories. While the original packs and cases were discontinued, BFG showed a new Micro DAP pack at this year's SHOT Show, along with some new Dapper Organizers. The Dapper Organizers are modular/configurable accessories that can be used on any loop velcro-lined platform to organize items. Dapper Ten Speed Mag Pouches - Most of us are familiar with Blue Force Gear's Ten-Speed ultra low-profile pouches; designed to offer a blend of speed and security in a pouch with the least bulk possible. BFG offers both molle and belt-mounted versions. Ten-Speed pouches are constructed of military-grade elastic forming the front panel while also providing the main means of retention. Typically, the rear panel is made of BFG's laser-cut, light weight, high-performance laminate - ULTRAcomp, which is similar in properties to Hypalon. For the Dapper pouches, the elastic is sewn to double-sided Velcro One-Wrap material. The hook in on the back and the pile is facing the front. By having both hook and pile, the pouches can be overlapped so that they take up a little less space. The extra material around the perimeter of the pouch is necessary to keep them adhered to the platform, as the pouches no longer remain their flat shape when items are inserted. Shown here are the Single (DAP-TSP-M4-1) and Triple (DAP-TSP-M4-3) Dapper Ten Speed M4 mag pouches. The Single measures 6" tall x 4" wide (velcro backing) and the Triple measures 6" tall x 10" wide. Also shown are the Single (DAP-TSP-PISTOL-1) and Triple (DAP-TSP-PISTOL-3) Dapper Ten Speed Pistol mag pouches. The Single measures 5" tall x 2.5" wide, and the Triple is 6" wide. Ten Speed pouches are very versatile as they fit items other than what they're designed for, due to their elastic nature. Smaller items are retained, where a dedicated non-elastic pouch would be too loose. The Ten-Speed M4 pouches also fit flash bangs, bandages, small radios, and i-Phones. The Pistol mag pouches fit folding knives, multi tools, flashlights, pens etc. |
|
On the Full size strips, the Small Loops (DAP-LOOP-S) have six of the flat-sewn elastic loops. The Medium Loops (DAP-LOOP-M) feature six of the loosely-sewn loops, and the Large Loops (DAP-LOOPS-L) have three loosely sewn loops for larger items like bandages. I've illustrated some of the Loops mounted in my EMDOM Charge Satchel, which is the perfect platform for using these in. For heavy items like loaded magazines, the loops help keep them organized and in place inside the satchel. The elastic is not strong enough to suspend magazines, like from the back of a seat or velcro plate carrier. You'd have to use the Ten Speed mag pouches for that.
|
|
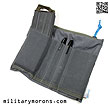
Dapper Admin Pouch - The Dapper Admin Pouch (DAP-ADP) is a simple rectangular nylon pouch with single zippered main compartment. It's essentially a flat pouch, that measures 7" tall x 8.5" wide. On the back are two 2" wide strips of hook Velcro to hold it to a platform. On the front is 5" tall elastic, divided into slot pockets. The two larger compartments on the side are 3" wide and will each hold an M4 magazine. The three in the center are narrow and suitable for pens or chemlights. |
|
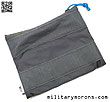
Dapper Zippered Vinyl Utility Pouches - The Dapper Zippered Vinyl Utility Pouches come in two sizes: 01 (larger - DAP-U-VINYL-01) and 02 (smaller, vertical - DAP-U-VINYL-02). Both feature clear vinyl front panels so the contents can be readily identified, and dual zipper closures with blue zipper cord pulls. They also have blue loop carry handles so they can be ripped from the platform quickley and carried or hung from a hook. Inside, they're lined with loop Velcro, so that the Dapper Accessory Loops or Ten Speed pouches can be used inside for additional organization of the contents. The smaller size 02 Pouch measures 7.5" long x 5" wide x 2" deep. The larger size 01 measures 10" long x 7.25" wide x 2" deep. Both have hook Velcro on the rear for securing them to Velcro platforms. Just for sizing reference, I'm able to stuff three 30-round M4 magazines in the smaller pouch. I'm able to fit seven 30-round M4 mags in the larger one. I currently have the size 01 in my Arc'teryx Khard 30 pack. |
|
Observations/Notes - The Dapper Organizers are typical BFG products - well designed and utilitarian. Using the Velcro One-Wrap material cuts down on thickness and having to sew velcro to nylon. The Organizers are compatible with just about any Velcro-lined surface or gear, which I much prefer over molle webbing inside a bag or pack. Velcro pouches are lighter, less bulky, and easier to attach and detach. Even if you don't have a Blue Force Gear DAP pack or case, you'll still be able to make good use of the DAP accessories.
|
Pantac USA Sling Shot Armour Carrier
|
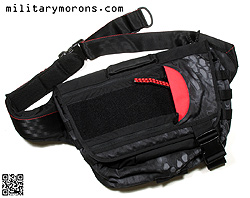
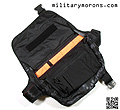
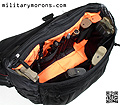
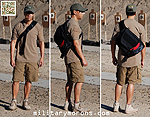
12/19/15 - The PDG (Pantac USA) Sling Shot Armour Carrier looks like a mundane messenger-style sling bag, but it's designed around armor protection and quick access to a weapon. Description - The Slingshot Armor Carrier is a mid-size messenger-style, concealed-carry sling bag with a practical layout of organized pockets, as well as the capability to carry a concealed handgun in a quick-draw compartment, spare magazines, and an armored insert pocket. The idea behind the Slingshot is to provide quick access to your weapon as well as armour protection for those when it may be impractical to carry a handgun in the waistband. Important note - The Slingshot is currently available only in a right-handed configuration (worn over the right shoulder). The left-handed configuration shown here is a prototype and was made for this writeup (since I'm a lefty). It will eventually be offered in both configurations. Slingshot specs and features at a glance (detailed descriptions are below):
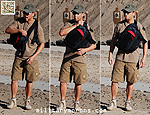
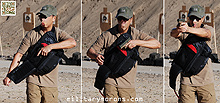
Exterior features - The Slingshot has a messenger bag type of profile, and would not look out of place on a guy riding a fixie bike. The Kryptek Typhoon patterned bag is shown here; it's also available in Black. The Typhoon pattern is subtle enough to not draw most people's attention; except for those who are familiar with Kryptek (of which there probably aren't many in the general population). To most, it'll just look like you got some grey or white paint on your black bag. The overall shape of the Slingshot is trapezoidal. Taking measurements off the back panel, it's 17" across at the top, 13" across at the bottom, and 11" tall. The Slingshot is designed to be worn over the same shoulder when in use; it is not designed to be ambidextrous. It currently comes in a right-handed configuration; the left-handed configuration shown here was made for this writeup as I'm left-handed. When worn, the shoulder strap goes over your 'strong' shoulder - in this case, my left shoulder. The Slingshot has a 2" wide, seatbelt-webbing single shoulder strap that is padded for the portion that goes over the shoulder. The padding is 0.5" closed cell foam, and the padded portion is mesh-lined for comfort and breathability. A female side-release buckle is sewn to the end of the padded portion. The non-padded webbing that is attached to the other end of the bag has the male buckle that connects to the female one. There's a loop on the loose end of the strap that can be adjusted in size (to reduce the length of the loose end). The loose end is pulled to shorten/tighten the shoulder strap and snug it up. Right above the female buckle is a surface mount female buckle, oriented horizontally. This is what the stowable stabilizing strap connects to. The stabilizing strap is stowed at the very bottom of the bag in a little pocket. When deployed, it connects the bottom of the bag to the shoulder strap, under the arm. When connected, it minimizes any lateral movement and shifting of the Slingshot when moving around (running). It's suprisingly effective. One each end of the bag are three rows x two columns of PALS webbing. It probably makes most sense to attach a water bottle pouch there, or hang a couple of 'biners from the webbing. A 1.5" wide piece of webbing that spans the top width of the bag forms the carry handle. It's wrapped in neoprene padding for comfort. The Slingshot has a large front flap that is secured by velcro (on the inside), and also by a 2"-wide buckle at one corner. There's a reason why the buckle is so large; more on that later. Armour Pocket - The Slingshot can be purchased alone, or as an Armoured Package, which combines the Slingshot with a DKX Level IIIA plate. Level IIIA means that the plate is meant to stop pistol rounds, not rifle rounds like Level III plates. NIJ doesn't currently certify level IIIA hard armor, but DKX tests its level IIIA armor against the same threats as those required by NIJ 0101.06 standard for level IIIA soft armor. Those threats are the .357 SIG FMJ Flat Nose (FN) bullets with a specified mass of 8.1 g (125 gr) and a velocity of 448 m/s ± 9.1 m/s (1470 ft/s ± 30 ft/s) and with.44 Magnum Semi Jacketed Hollow Point (SJHP) bullets with a specified mass of 15.6 g (240 gr) and a velocity of 436 m/s ± 9.1 m/s (1430 ft/s ± 30 ft/s). A back face signature of 44 millimeters or less must be achieved. The DKX Level IIIA plate is a a double-curve, 0.25" thick plate. It's the 'full size' model (vs. the 'shooter's cut') and measures 10" x 12". It's constructed out of Dyneema, weighs about a pound, and floats due to its positive buoyancy. Unlike ceramic rifle plates, it does not require x-ray examination for cracks, it's drop resistant, and has a 7-year recommended lifespan. The armour pocket is accessed via a zipper at the top of the Slingshot, and can also double as a magazine (the paper kind) compartment. It can also hold soft armour panels. The advantage of a rigid pistol plate over a soft insert is that provides some structure to the Slingshot. It's not uncomfortable against the body due to the curve of the plate, but obviously won't conform as well as a soft panel. Quick-draw compartment - The Quick-draw compartment is a zip-open compartment designed specifically for fast access to a handgun mounted within. The opening itself measures 9" x 6" (from the end to the red coloured opening), but the compartment spans the width of the bag and is 15" wide at the top. The handgun should fit in a 9" x 6" space for easy access, which includes most full sized handguns; oversize handguns will fit in the compartment but will be slower to extract. The inside of the compartment is completely lined with loop velcro, to which an elastic holster secures to. The holster can be positioned where needed, but usually ends up at the far end of the compartment. The inside of the flap is also velcro-lined, and engages the end of the webbing strap that goes around the handgun to keep it in the holster. The webbing strap can also be used between the cocked hammer and slide on a cocked-and-locked single action semi-auto pistol. The elastic holster measures 4" x 4", and will fit most handguns with and without lights. It was a bit tight on my G17 with light, but worked pretty well. The flap closes with zippers along the top and bottom, and is opened by pulling the 5" long, red and black braided pull cord with one hand while the other grabs the red-coloured 'handle' to keep the bag from moving. There's also a loop velcro field on the front of the flap for patches. The pull cord is attached to a metal split ring, attached to a small tab sewn at the end of the flap. The end of the flap has a stiffening insert to aid in flipping it over and unzipping the zips on the sides. To use the compartment, the handgun is inserted into the holster. The webbing strap then goes around the handgun, and is secured to the inside of the flap as it's closed. The end of the flap is tucked under the red handle/opening, and both zippers are closed. A quick tug of the pull cord rips open the panel and the handgun is then exposed. Interior features - One of the things I dislike about messenger-style bags is that to access the contents, you have to unbuckle and lift up the main flap (which gets in the way if you're wearing the bag). I was glad to see that the Slingshot has a top zipper that enables full access to the main compartment. The main flap is secured at one corner with a 2"-wide side release buckle and 2"-wide velcro on the inside. When the flap is opened up, there are two 'gussets' that connect the flap to the sides of the bag body. They help keep the contents from falling out of the gap between the top of the sides and the flap when it's closed, but also fold back on themselves to allow the flap to open all the way (they have velcro that keeps them secured to the inside of the flap). It's a bit difficult to explain in words, but obvious when you open the flap. Front pocket - Inside the flap is a 9" x 2" strip of loop velcro that mates with a corresponding strip of hook sewn to the front of the bag. This keeps the flap temporarily secured if the 2" buckle is not closed. There's a pocket on the front of the bag that measures 10" x 8". It's accessed via a single zipper at the top. The pocket has two expansion pleats which contribute greatly to its usefulness. It's the perfect size for smallish items. Hidden magazine pocket - Right behind the front pocket is the hidden magazine pocket. This opens on both ends with vertically-placed zippers. It's fully lined with loop velcro and comes with a stiffened magazine panel with three elastic loops which can hold pistol magazines, flashlights etc. The elastic webbing is sewn flat to the panel and is a bit tight. The magazine panel is then positioned inside the pocket so that the magazines are accessible from the support hand side. The pocket can be accessed with the main flap closed. While the compartment can be used to store a compact handgun in, access isn't as fast as the Quick-draw compartment. Any other velcro-backed accessory can be used inside the compartment. Main compartment - The main compartment is practically organized, with bright orange fabric lining the back panel so items are easier to identify. There is a 5" x 5.5" zippered mesh pocket in the center of the back panel, which also forms a slot pocket. A key lanyard is sewn above it. Two pen slot pockets are next to it, then one larger slot pocket for a flashlight. At the ends of the back panel are two 2" elastic loops on each side. I've llustrated them with the pistol magazines in the photo below. At the ends/sides of the bag are loose slot pockets that will hold a small water bottle or two 30-round M4 magazines each. Inside the front panel are two 6.5" x 7" slot pockets with velcro closures; suited for flat items. I've shown them with a 30-round magazine each in them. Laptop compartment - Behind the back panel is a felt-lined, 13" x 11" laptop compartment. It's accessed via a single zipper on top, and is easily missed if someone doesn't notice the zipper pull there. The DKX IIIA armour plate also fits in the laptop compartment, which provides a bit of padding; making it more comfortable against the body. One thing I noticed was that when loaded up, the bag obviously expands, and the corner of the flap opposite the 2" buckle tends to stick out (see far right photo below). I'd like to see a 1" buckle and strap added in this location to secure it. The extra second it takes to unclick is worth the added security for the contents to me. Notes and Observations - The Slingshot is designed as an armoured concealed carry bag. Armoured bags are nothing new; it's as simple as inserting a ballistic panel or plate into a compartment. Stick a soft panel into a briefcase and it'll protect you to a certain extent. The main issue with just putting an insert into a bag is that it's not necessarily positioned where you want it. An armoured briefcase requires you to hold it in front of you with both hands, meaning that you can only go on the defensive, not the offensive. An armoured backpack shields your back, but is slow and bulky to remove and wear on the front of your body. Messenger bags usually sit too low on the back or side. A sling bag like the Slingshot enables the user to wear it on the back then rotate it around to the front, with the armour insert positioned more effectively in front of the torso than most other bag configurations. Whether a handgun should always be carried on your person instead of in a bag is up to the individual to decide. The Slingshot is meant for the situation where a holster isn't available or carry on your person may not be possible. When worn normally over the shoulder, the Slingshot naturally feels similar to other sling bags I've encountered. It's pretty stable with the shoulder strap cinched up, and even more so with the 1" stabilizing strap utilized. The strap should be snug but not super tight, if the intention is to bring the Slingshot around to the front at a moment's notice. To bring it around, the stabiliizing strap is disengaged and the support hand reaches behind and grabs the single 2"-wide buckle at the bottom corner, which serves as a tactile reference point and handle. The strong hand grabs hold of the red fabric 'handle' while the support hand then locates and pulls down on the braided cord pull. A swift, firm tug starts to unzip the flap and it's pulled completely open to expose the handgun. The strong hand then draws the handgun. The flap can be left hanging, or tucked back under the red handle. I timed myself a few times with a stopwatch and averaged about 3-4 seconds from wearing the Slingshot on the back to bringing the pistol up on target. I think 3 seconds is a reasonable expectation with practice. It's important not to pull outwards on the 2" buckle when rotating the Slingshot to the front, as it can loosen. Just grab it and guide the bag around to the front. One thing I noticed was that when I grabbed the red handle with the strong hand, and pulled the cord in the opposite direction with the support hand, the split metal ring sometimes caught the tip or nail of one of the strong hand fingers that were wrapping under the red handle during the opening of the flap. The pull cord requires a good, quick tug to start the zippers opening, and a firm grip on the handle, so quick a bit of force can be exerted when performing a draw in a hurry. Even if the metal ring doesn't catch a finger tip, it still has to squeeze its way between the fingers. I addressed the issue by replacing the metal split ring with 550 cord. When I brought this up to Pantac, I was told that they recommend holding onto the 2" buckle instead, when opening the Quick-draw compartment. This worked better, and is the way I open it now. Something else I noticed was that the taller suppressor sights on my G17 with RMR and light snagged on the elastic pistol holster when extracting the pistol, since the slide extended beyond the elastic and the addition of the light pushed the slide up towards the edge of the elastic. This didn't happen with regular sights though nor any other full size handgun so I think that it's isolated to taller-than-normal sights plus a light. There are a couple of things that I'd change; one of them is to get rid of the red fabric on the opening/handle of the Quick-draw compartment. Another is to make the Quick-draw zipper pull black, instead of red/black. The combination of handle and red/black large zipper pull just tips off the presence of a compartment more than I'd like; especially one that I'd not want anyone's attention drawn to, and especially when it's behind me. The red handle also provides an aiming point on my chest when the Slingshot is swung round to the front; another thing I'd rather avoid giving an opponent. I'd prefer the Quick-draw compartment handle to be exactly the same fabric as the rest of the bag and the oversized zipper pull made entirely out of black cord, while the rest of the compartments have red cord pulls to draw attention away. I actually think the Kryptek Typhoon pattern fits in just fine with the rest of the bags in a public place. There are so many colours and patterns nowadays that the Kryptek Typhoon doesn't really scream 'tactical' to me - it looks like the bag had a fight with a paint can or climbing chalk on it. It's a subtle pattern, and effective enough to help break up the compartments and features of the bag; to make it more indistinct, which is what I'd expect from it. I don't think that going to just plain black fabric would make it stand out less a whole lot more. All this being said, I used it both as an airline carry-on bag and as a daily use bag, and found its size and pocket layout very practical and easy to use. The overall design attests to the amount of thought that went into the design, but I think that it can benefit from some minor refinements (that some, not all, might agree with me on). As an armoured conceal carry bag, it should do the job quite well without any changes.
|
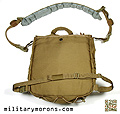
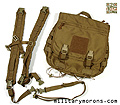
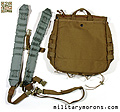
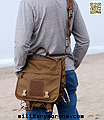
| 2/28/16 - The Baker Street Bag from EMDOM USA is a modern interpretation of the US 1936 Musette bag. It can be worn as a backpack or over-the-shoulder sling bag. The Baker Street bag features internal organization that makes it suitable for a variety of purposes. Background - The Baker Street Bag concept was suggested to EMDOM by one of their friends; Frank R. Its name is a tribute to the fictional detective, Sherlock Holmes, whose London address was 221B Baker Street. Overall description - The EMDOM/MM Charge Satchel is a small, structured shoulder bag with internal dimensions 14" x 8.5" x 3.5". External dimensions are 15" x 9" x 4". It has one main compartment that is lined with loop velcro for use with the included dividers for organization, or any velcro-compatible accessories. The back panel is stiffened with HDPE to provide structure, and the front panel, bottom and sides are lightly padded with closed cell foam. There are two zippered pockets on the front, with pleats that allow them to expand. The Charge Satchel comes with the same shoulder strap that's on the EMDOM/MM TNT bag; it's fully adjustable and removable. There's a low profile webbing carry handle on top. The Charge Satchel is made of 1000D Cordura nylon and is offered in Urban (Black and SDU grey), BFE (Coyote brown), Khaki and Crye MultiCam. Baker Street Bag specs (detailed descriptions are below):
|
|
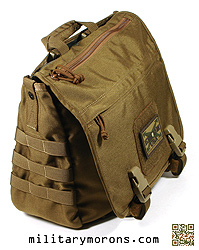
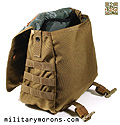
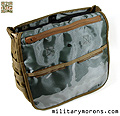
Exterior features - The Baker Street Bag has a main cover flap secured by two ITW side-release buckles. It has a single web carry handle, which is wrapped in cordura and lightly padded for comfort. It has a wedge-shaped, tapered side profile, starting out at 3" deep at the top and widening to 6" at the bottom. Three rows and three columns of PALS webbing adorn the side panels, providing a platform for molle-compatible pouches. Elastic shock cord lacing on the bottom allows the bottom of the bag to be cinched up for a flatter profile, or for carrying a rolled-up jacket. The cover flap has a clear plastic document pocket/window on the inside that is 12" wide and 5.5" tall. It's closed by two strips of velcro. The outside of the cover flap has the two surface-mounted female side-release buckles, and a 4" x 4" loop velcro field for patches. The cover flap also has a zippered pocket (details below). The cover flap straps sewn to the bottom of the bag are extra long and adjustable. They feature velcro wraps to roll up and secure the loose ends. External pockets/compartments - The rear document compartment measures 12" tall x 11" wide. It's lined on the inside with loop velcro for velcro-compatible accessories. I'm not sure that both sides need to be lined, but it does give the user a choice. The compartment has a single snap button closer at the top, and a 550 cord hang loop for hydration bladders. There are also two velcro loops on either side of the snap, which stow the two male side-release buckles. These buckles are the top attach points of the backpack straps. The front cover flap has a zippered pocket on its front. The pocket has a main compartment 8" deep x 11" wide which is secured with a central snap. Two D-ring attachment points are located at the top of the compartment for dummy cording items or hanging keys from. I'd have preferred one D-ring and one lanyard with snap hook instead for keys. The divider has two smaller pockets 6" deep x 5.5" wide. The left side pocket has two rows of 1" elastic sewn into four loops on its front, for retaining pens, flashlights, etc. Lastly, the bag has a dual zipper opening on the top which allows access to the main compartment of the bag without opening the top flap. Interior features - Inside the main bag compartment is a divider. The divider has a double layer and has two storage pockets for water bottles or radios. They're both 12" deep and 5" wide. I've shown them below with a 30-round M4 magazine in each. Two velcro tabs on the side allow the divider to be adjusted so that it's closer or farther from the back of the bag. The back of the bag itself is fully lined with loop velcro. Note that the divider is not sewn to the bottom of the bag, and small items can 'migrate' between the front and rear compartments. It's best used for larger/taller items. To better illustrate the inside of the main compartment, I turned the bag inside out for some of the photos below. At the front (inside) of the bag is an organization panel, with a snap-secured 11" wide x 7" deep pocket behind it. The panel is made up of two layers of fabric, which is divided down the middle into two compartments, 5.5" wide and 7" deep. The front of the panel has two slot pockets (5" and 2.5" deep respectively) and two rows of elastic loops. Shoulder bag and Backpack Configurations - The Baker Street Bag can be configured as a single-strap shoulder bag or a small back pack. It comes with two padded shoulder straps, with sewn-in female side release buckles at each end. Each shoulder strap also has an adjuster, which attaches to one end. A removable sternum strap and waist strap are also included. To configure the Baker Street Bag as a single strap shoulder bag, only one padded shoulder strap is used, along with an adjuster on both ends. The adjusters attach to side buckles that are stowed inside the sides of the bag. When not in use, they fold over and are secured by a snap inside the main compartment. a D-ring is also provided as a dummy cord attach point. There are two male buckles at the bottom corners of the bag that store inside their own compartment. The adjustable waist strap connects there. I found that configured that way, the waist strap was way too low. Even if I were taller with a long torso, the top of the bag would almost be right up under my armpit for the waist strap to be positioned around my waist. It'd be too high to access the contents easily. I solved that issue by using the ITW Nexus GTSR Split Bar 1" Latch (part number 810-1072) on the top row of side PALS webbing. I found that using the slotted male buckles on the top row of PALS webbing worked much better for me; and positioned the waist strap correctly. To turn it into a small backpack, the padded shoulder straps are assembled as shown below. I think that the padding is a bit of an overkill for the amount of weight that will be carried in the bag, and that lower profile straps like EMDOM's suspenders or like that on the Charge Satchel above would be sufficiently comfortable. The main issue with short backpacks is that the straps just end up under the arms, and they're just not as comfortable as a taller pack where the straps connect to the pack lower down. While the backpack mode might work well for a certain occasions, I suspect that most people will end up using the Baker Street as a shoulder bag, as it's quite stable, and the contents are much more accessible. Notes and Observations - I got the Baker Street Bag just before Christmas in 2015; right before I went on a trip to the east coast. I used it as my carry-on shoulder bag on the flight, and also around town. I traveled with my 8-year old son, so the Baker was filled with water, snacks, ipad, camera and a host of other things you bring on trips to entertain a kid with. It's actually quite spacious; and holds a lot of stuff. I used it primarily as a single strap shoulder bag. I tried the backpack configuration and wasn't as fond of it because every time I wanted to retrieve something, I had to take it off, so it was just a matter of convenience. Note that it'll tend to sit lower on the back, as it's such a short bag and just rotates around the shoulders. It's pretty comfortable despite the straps being so high under the armpits. Worn as a shoulder bag, with the opening slightly above waist level, the contents are relatively easy to access by lifting up the cover flap. Since the opening of the bag is drawn tight when hanging from the shoulder straps, larger objects are not as easy to retrieve or insert unless the bag is sitting on something and the tension is taken off the opening, or you use both hands. While the top zipper opening allows access without having to unbuckle the cover flap, the opening is smaller and slightly more restrictive. I think I used it maybe a quarter of the time; choosing instead to unbuckle the cover flap and lift it up. As I mentioned above, the waist strap attach points (which are the same as the lower backpack strap points) were just too low for me. As you can see in the photos below, the waist strap would be below my butt based on how I wear the bag. I didn't find it necessary to use the waist strap under regular everyday use, but I still carry it in the bag just in case. The internal organization is great for a bag this size; I fully appreciate having different compartments in which to organize the contents in. The light silvery grey material used for the internal pocket construction and lining helped me find things more easily than a darker interior. The main compartment interior divider is meant for large items like a magazine or compact laptop. Since the divider isn't fixed to the bottom of the bag, smaller items at the bottom will just migrate back and forth. Like all EMDOM products, quality and construction are very good and the Baker Street is a nice alternative to the larger messenger style bags. It bridges the gap between the Charge Satchel and the TNT Bag. |
TO VIEW FULL SIZE IMAGES: USERNAME and PASSWORD are both "mm"
ATTENTION! PLEASE DO NOT LINK DIRECTLY TO MY IMAGES
-
IT RESULTS IN MY BANDWIDTH ALLOCATIONS BEING EXCEEDED,
AND MY PAGES GO DOWN. THANKS!
/ . PLEASE
OBSERVE AND RESPECT OUR COPYRIGHT! . /
©opyright by MilitaryMorons.com. All Rights Reserved. Reproduction, Duplication,
Distribution Strictly Prohibited.
Unless mentioned otherwise, content and images are the
property of militarymorons.com and are not in the public domain.
They are not to be used without
permission. Please Contact
me for permission to use any images or content herein.
